Using Mitel Assistant
- This section describes how to place a call using Mitel Assistant if MiCollab is set as the default calling app of your device. You can use the same steps to place a call if the default calling app of your device is any supported Mitel calling apps.
- If the default calling app of your device is Mitel One Web, you must configure certain settings in your device’s OS and the browser to be able to cross-launch Mitel One Web and place the call. For more information, see the Pre-requisites section in Click to Dial Using Mitel One Web Application.
After you add the Mitel Assistant app to the Microsoft Teams application, you can place a call to a contact during a chat conversation, by searching the directory, using the dial pad, or by using the Speed Dials menu.
-
Mitel Assistant add-on
-
Search
-
Call History
-
Speed Dial
-
Phone number link in a contact card in MS Teams
-
Call or video icons in MS Teams contact card.
-
Call or video icons in chat area.
Place a Call during a Chat
During a chat conversation, do the following to place a call to the contact with whom you are chatting:
- Click the Mitel Assistant icon by doing either of the following:
- If the Mitel Assistant app is added to your chat window
Click the
 icon at the bottom of the chat window.
- Click sign, you can see Mitel Assistant.

- If the Mitel Assistant app is added to your chat window
- From the dialog box that opens, click Call. A window opens displaying the name, default number and avatar of the contact.
- Click the
 icon to dial the default number.
 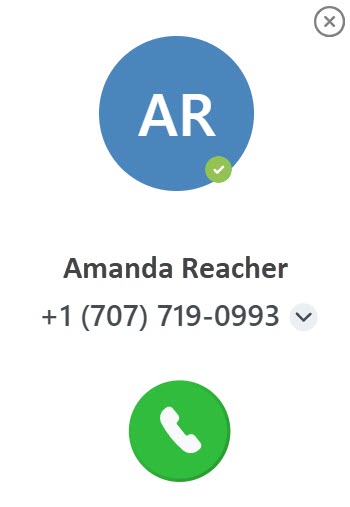 Note:
Note:- If there is more than one telephone number for a contact, click the
 icon beside the default number, select the number you want to dial from the drop-down menu, and click the icon to dial that number.
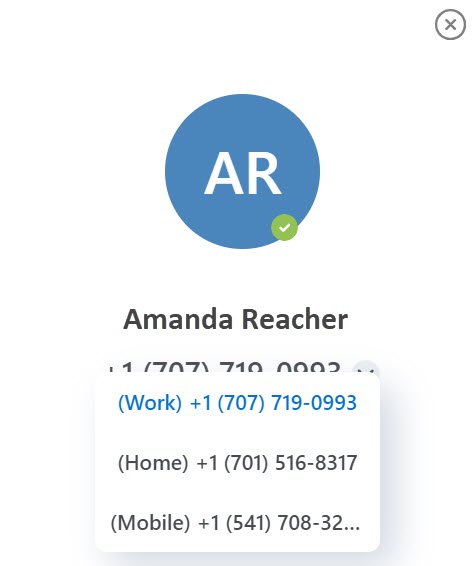
-
The telephone numbers of a contact displayed in the Mitel Assistant directory are synchronized from the Office phone, Home phone, and Mobile phone fields in the Azure Active Directory. These are fixed field mappings and cannot be changed.
- Mitel Assistant application cannot search for local contacts if they are not stored in the cloud.
- If there is more than one telephone number for a contact, click the
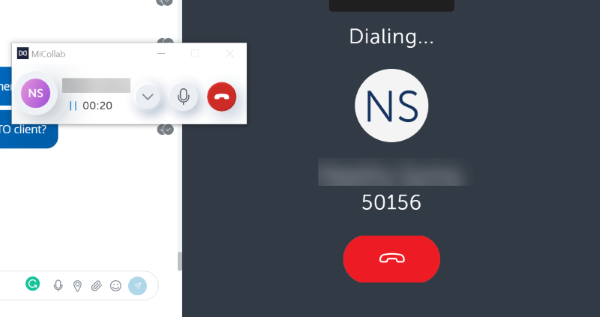
- This will cross-launch the MiCollab application and the call will be placed. An in-call window is displayed with the caller's name, telephone number, and picture (if available).
Place a Call using Search
-
Select Mitel Assistant from the left navigation pane of your Microsoft Teams application. The Call page opens.
-
Type the name of the contact in the Search field. The Search field displays a list of contacts whose names match the letters that you type.
-
Click the name to select that contact. A window opens displaying the name, default number, and avatar of the contact. Click the
icon to dial the default number of the contact.
Note:-
If there is more than one telephone number for a contact, click the
icon to beside the default number. Select the number you want to dial from the drop-down menu, and click the icon to dial that number. -
The telephone numbers of a contact displayed in the Mitel Assistant directory are synchronized from the Office phone, Home phone, and Mobile phone fields in the Azure Active Directory. These are fixed field mappings and cannot be changed.
-
-
This will cross-launch the MiCollab application and the call will be placed. An in-call window is displayed with the caller's name, telephone number, and picture (if available).
Place a Call using Speed Dial
You can add and manage up to 20 contacts in your Microsoft Teams and Outlook directory as speed dials in Mitel Assistant so that you can call your most common contacts quickly. When logged in to your CloudLink account, you can add and manage up to 100 contacts as speed dials.
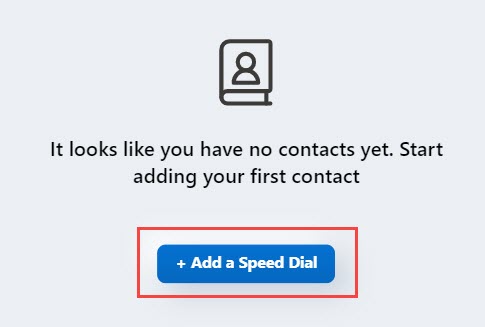
To add a contact as a speed dial:
- Click Add a Speed Dial. The Add Contact screen opens.
- In the Search field, type the name of the contact. The Search field displays a list of contacts whose names match the letters that you type. Hover over the name of the contact you want to add, and click ADD to add the contact as a speed dial. Clicking Cancel cancels the operation.
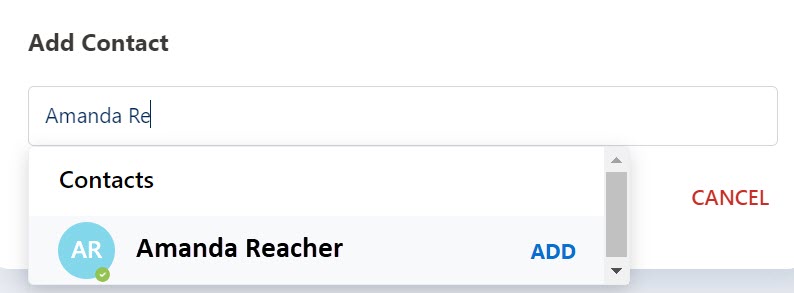
Note:Only contacts with one or more Home, Business or Mobile number fields filled, can be added as Speed Dial's. Contacts without a valid number will display as NOT AVAILABLE.
To place a call using speed dial:
- Click the
 icon associated with the contact from the Speed Dials menu to dial the primary telephone number for this contact.
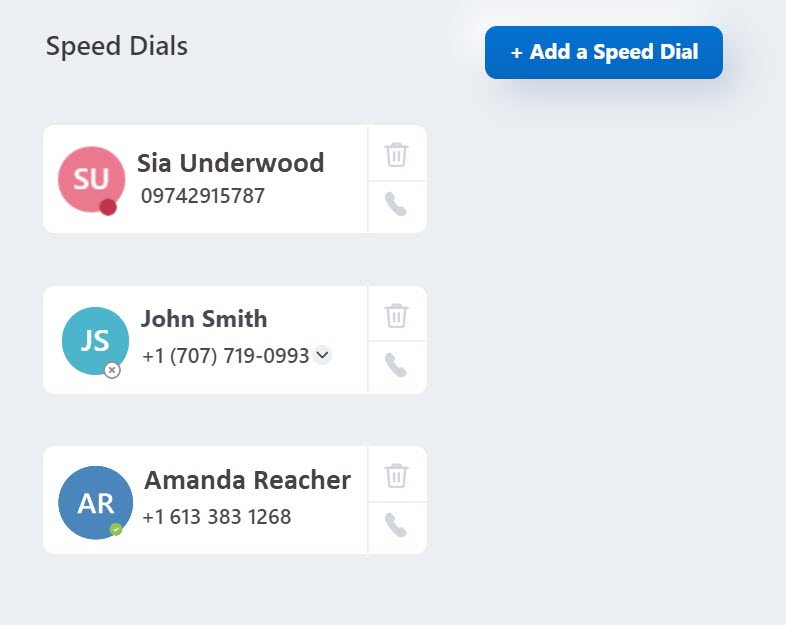
- This will cross-launch the MiCollab application and the call will be placed. An in-call window is displayed with the caller's name, telephone number, and picture (if available).
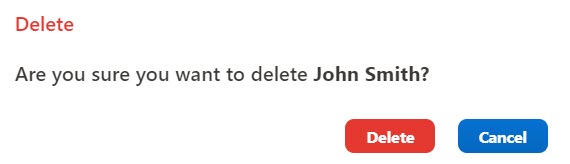
To delete a speed dial:
- Click the
 icon associated with the speed dial you want to delete.
 - In the confirmation panel that opens, click Delete to confirm deletion. Clicking Cancel cancels the operation.
Call History
As a Mitel Assistant user, you can view your Mitel phone call history from the Mitel Assistant application after you log in to your CloudLink account.
If you have not logged in to your CloudLink account, a message as shown below is displayed:
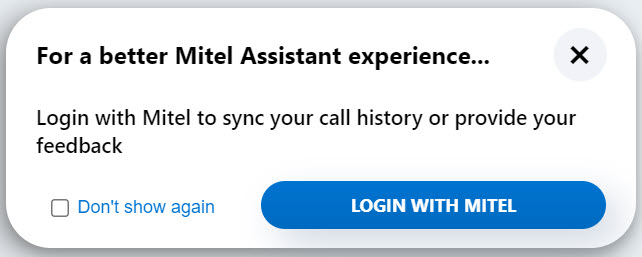
- Click LOGIN WITH MITEL, or click the
 icon and then click Sign in.
 - Enter your login credentials in the Sign into Mitel pop up that opens and click Next.
You are successfully logged in to your CloudLink account and the Call History tab is displayed.
Note: Mitel recommends that you enable Azure AD SSO and Azure AD sync for your accounts. Enabling Azure AD SSO is recommended so that users can use the same login credentials that they are using in MS Teams. Enabling Azure AD sync is recommended for the alignment of user names between Mitel Assistant and MS Teams.
- On the Call History panel of the Call screen, click the All tab.
The All tab is displayed with a list of all call logs. Outgoing calls are distinguished by the
 icon, and the incoming calls are distinguished by the
  icon. Missed calls are distinguished by the
  icon.
icon. - Click the Missed tab to view only the missed call logs.When you hover over a call log entry, the following options are displayed:Note: When you use Mitel Assistant from the MS Teams mobile application, you will see the following options when you tap a call log entry.
- Delete
 - To delete the call log entry
 - Call
 - To call back the chosen contactNote: With MiVoice Business, MiCollab version 9.7 is required for placing calls from the Call History tab.
 - Favorites
 - To add the contact to the favorites list.
- Delete
- Click the Voicemail tab to view all voicemails you received. Click Call voicemail to listen to the voicemails. Note:
- The Voicemail feature is available only if your organization has a MiVoice Office 400 PBX or MiVoice Business PBX deployment.
- The application does not display the number of unread voicemails a user receives. Every time a user receives a voicemail, it displays a red indicator on the
 (Voicemail) tab.
 - On the MiVoice Business PBX, the Mitel Assistant supports only configured voicemail. The CloudLink Gateway selects the voicemail Pilot HG with the lowest number. If there are multiple voicemail systems, ensure that the voicemail Pilot HG with the lowest number is used with the Mitel Assistant.
- The CloudLink Gateway must synchronize with the MiVoice Business where the voicemail resides, it will import the first (lowest numbered) Hunt Group with the type Voicemail.
-
Click the icon, and do either of the following:
- Click Issues and Feedback to raise an issue or provide feedback.
- Click Log out to log out from your CloudLink account.