Map Active Directory Fields for Bulk Import
A Service Provider can now merge an LDIF file into the Management Portal Bulk Import workflow. Active Directory Association uses existing fields in Active Directory (AD) and allows you to re-use them to map to specific fields in the Management Portal Bulk Import or add custom fields into an AD schema.
See also Active Directory Mapping Examples.
Considerations
Keep these points in mind:
Active Directory (AD) is accessible only when a Service Provider performs Log in as Customer.
AD imports only LDIF files created from AD.
Administrators can upload and work with only one LDIF file at a time.
Administrators must know and understand the attributes in an LDIF file in order to perform the mappings.
Associate AD with the Management Portal Bulk Import
Step 1: Log in to access Active Directory Association.
Step 2: Upload the LDIF files (.ldif extension).
Step 3: Map the fields.
Step 4: Assign bundles to users.
Step 5: Download the Bulk Import Spreadsheet.
Step 6: Import the changes back into the portal.
Step 1 Log in to access Active Directory Association:
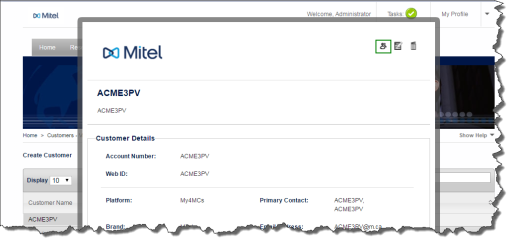
From the Service Provider Portal, select Customers > View Customers.
Select the customer and then click the Login as customer administrator icon.
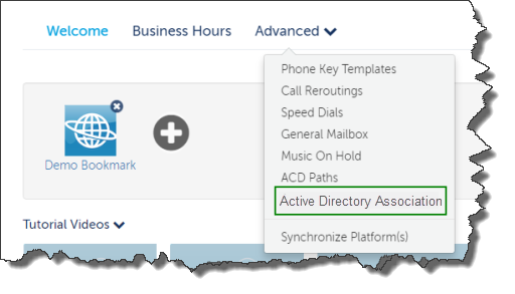
From the Customer Administrator Portal, select Advanced > Active Directory Association.
Step 2 Upload the LDIF files:
After you select Active Directory Association, you are taken to the Active Directory Association page.
Click Add New. The New Active Directory Association upload dialog box appears.
Click the folder icon to upload the .ldif file. After you select the file, it appears in the dialog box.
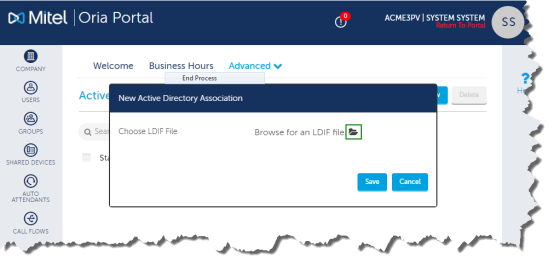
Click Save.
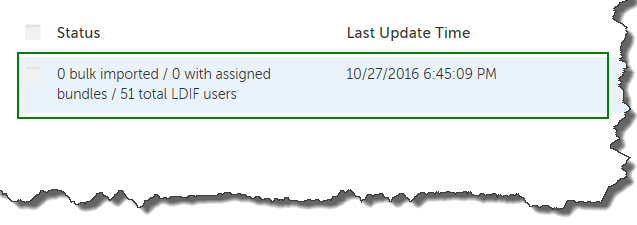
The uploaded file displays the following information:
The number of users that have been bulk imported into Management Portal.
The number of users that have bundles assigned to them.
The total number of users in the .ldif file.
Select and click the file to open it. If you want to delete the uploaded file, select the file and click Delete.
Step 3 Map the fields:
Take the following information into consideration before performing the field mappings between Management Portal and AD. To map the Management Portal field names (see below) between AD to Management Portal, the same value must reside on Management Portal. The more fields you can map the less work is needed in the Bulk Import Spreadsheet.
Management Portal Field Names
|
Site |
Dialing Privileges |
DID |
Prime Phone CPN |
|
Prime Phone Key Template |
Prime Phone Device Type |
Prime Phone Emergency Location |
Second Phone Emergency Location |
|
Third Phone Emergency Location |
Fourth Phone Emergency Location |
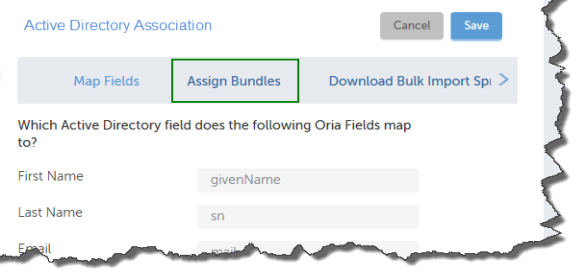
After you open the LDIF file, you can perform the mappings.
Some default mappings are filled in for you. You can edit these mappings.
Enter the Active Directory attributes into the empty fields on the right. The attributes you enter in the fields map to the corresponding Management Portal attribute on the left.
After all the fields are mapped, click Save. All mappings are saved so that you can return to the .ldif file later if needed. Management Portal will take you to the main page in AD. To continue working on the mapping, click the imported LDIF file again.
Step 4 Assign bundles to users:
After you’ve completed mapping the fields, assign bundles to users.
In the Map Field form, click the Assign Bundles tab. The Assign Bundles form displays a Search feature and lists all the users in the LDIF file.
To perform a search do the following:
Enter the Active Directory attribute in the Field Name box. Wild cards are not accepted.
In Field Value, enter the criterion to search on. You must enter the values correctly or your search results could be different than what you expect. Wildcards are not accepted.
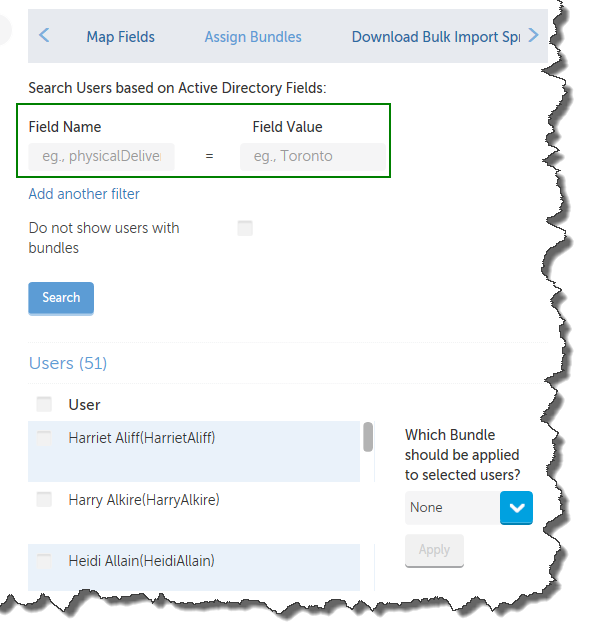
Click Search. The user list is updated to matching the search criterion.
To add several search criteria, click Add another filter.
To remove values to search on, click the Garbage Can icon next to Field Value and then click Search again. This will update your user list.
After you have the list of users, assign a bundle as follows:
Select the users on the list to assign a bundle to. From the drop-down list of bundles, select a bundle. The icon (shown below) beside the user name indicates that the user has already been imported into Management Portal.
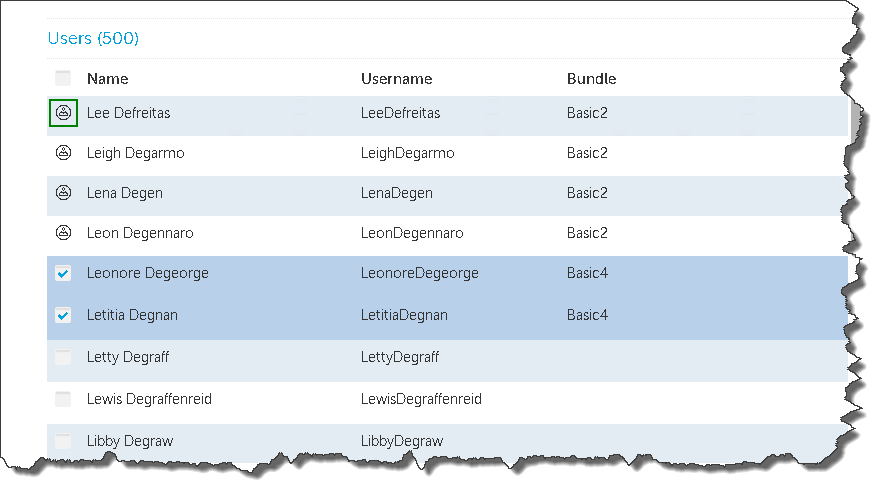
Click Apply. The bundle name appears in the bundle column.
If you want to search for more users to apply a bundle to, but you don’t want already assigned users to appear in the list, select Do not show users with bundles and click Search. This step removes all users from the list that both meet your search criteria and have a bundle already assigned to them.
To remove a bundle from a user, select the user and from the bundle drop-down list, select None. This will remove the bundle from the user.
After you have assigned bundles to the list of users, click Save to save your work and return to the Active Directory page, or continue to work on bundle assignment.
Step 5 Download the Bulk Import Spreadsheet:
Click Download Bulk Import Spreadsheet to download a bulk import Excel spreadsheet.
To change any of the bundle assignments, click Map Fields or Assign Bundles and make the changes.
Step 6 Import the Spreadsheet back into the portal:
After you complete the Bulk Import spreadsheet, return to Service Provider Portal and perform a Bulk Import. See Bulk Import Users for details.