Deploy MiVoice MX-ONE OVA
To deploy MiVoice MX-ONE OVA, do the following:
- Create the number of Service Node / Media Server standalone Virtual Machines required based on size of the current MX-ONE system.
- Consider consolidation of server/Media Gateways to reduce server footprint. The below figure shows the built of new system.Note:
A PC is required to connect to the systems that are having access to both Production and Migration network.
Figure 1. Virtualized Environment After Deploy of New System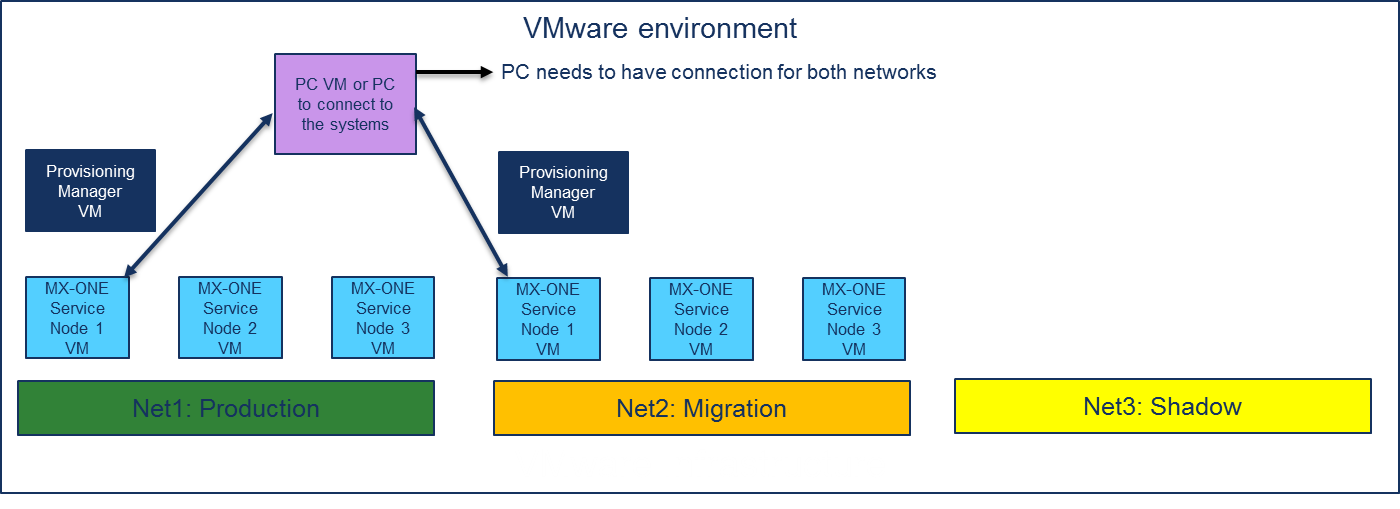
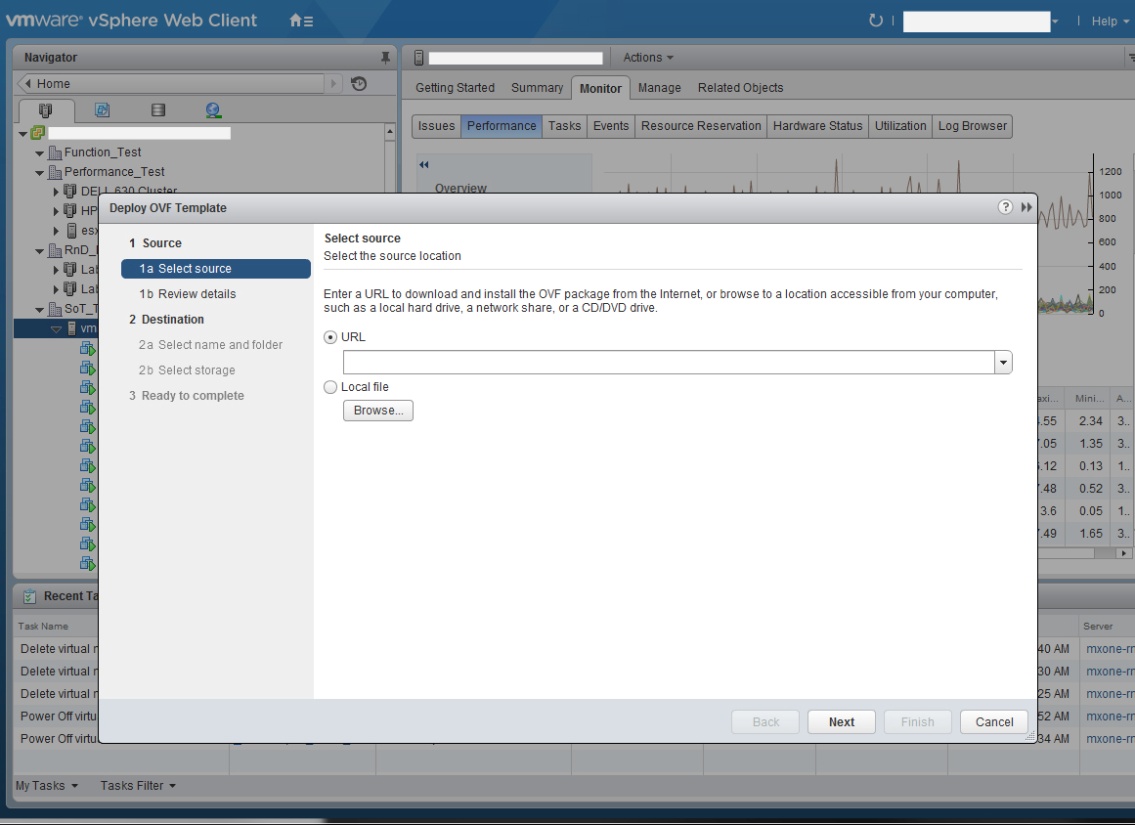
- Install the new MX-ONE system. The Service Node is installed in the Migration network.Figure 2. Deploying a New MX-ONE OVA
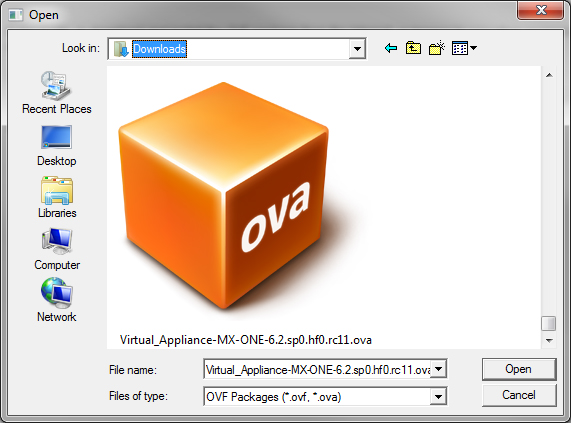
- Select the OVA file.Figure 3. Selecting the OVA
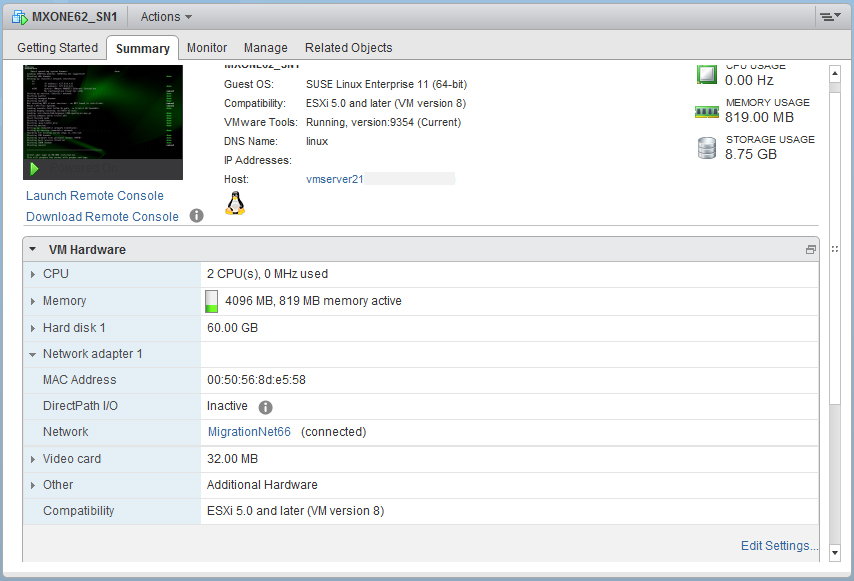
- Check if the Service Node is in the Migration network as soon the deployment is done. In the example, the MigrationNet66 is used.Figure 4. Verification of the MX-ONE VM setup
- Deploy the OVA for the number of Service Nodes required.
- Adjust the VMs resources (vCPU, memory, disk, and so on) according to the MX-ONE virtualization guidelines. As an example, in this document the process is done 4 times, 3 for Service Nodes and 1 for Provisioning Manager standalone.Note:
MX-ONE requires access to Default Gateway during the installation process.
If the MX-ONE system network consists of only one subnet, a VM PC (it might be the same PC used to setup the system) can be used to simulate the Default Gateway. So, it can be placed in the Migration network with the IP address of the default gateway (DG).
Otherwise, the VMware Administrator needs to setup a valid Default Gateway in the Migration network.
Service Node setup gets fail if it cannot reach the DG by these two ways, because when setup the Service Node network, it tries to PING the default gateway. If the PC is set with the DG IP address, or the network answer, Service Node receives an answer that the operation is succeeded.
For example, default Gateway is 192.168.66.1, the VM PC is configured with this IP.
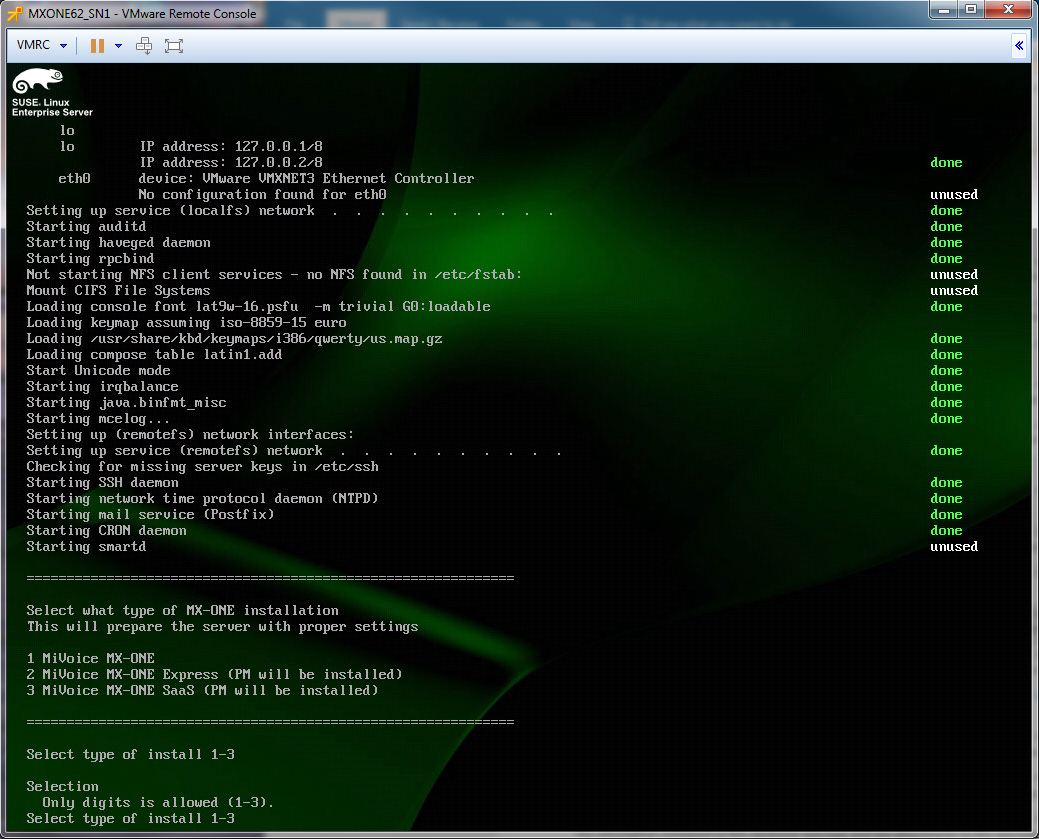
- Access the Service Nodes and setup them according to the documentation.Figure 5. MX-ONE Service Node Installation Screen
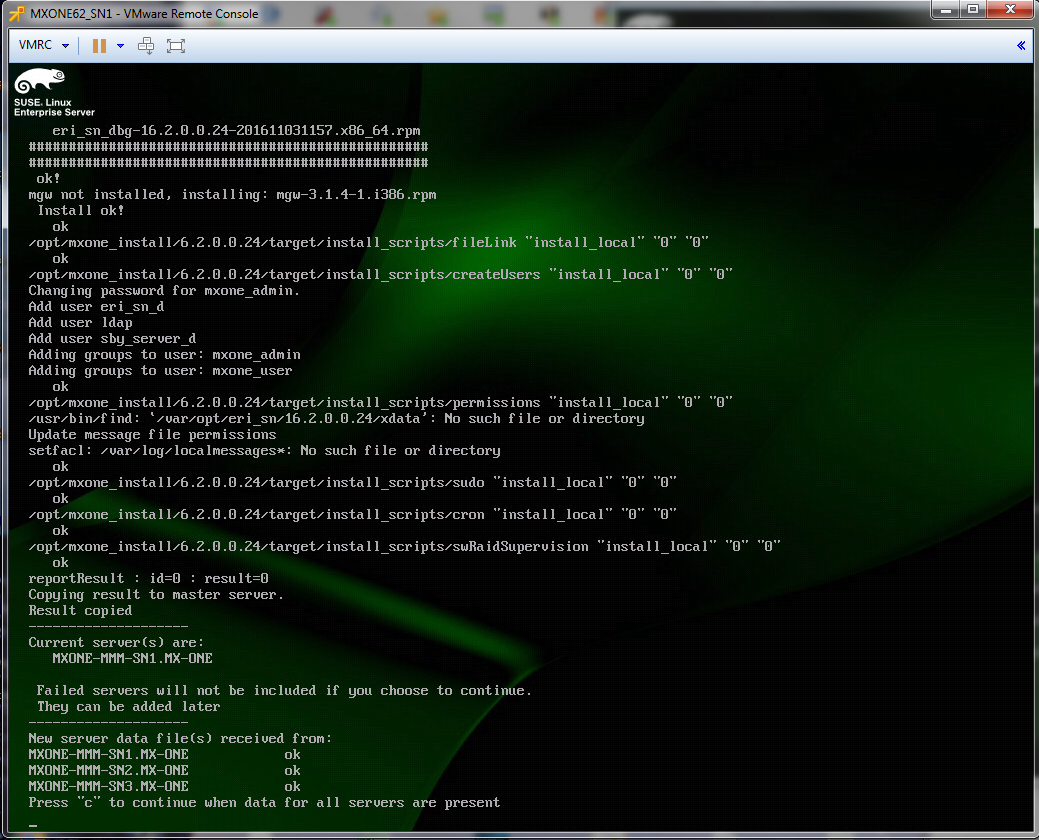
- When all the Service Nodes are setup, the following screen is displayed.Figure 6. MX-ONE Service Node installation screen (3 Service Nodes)
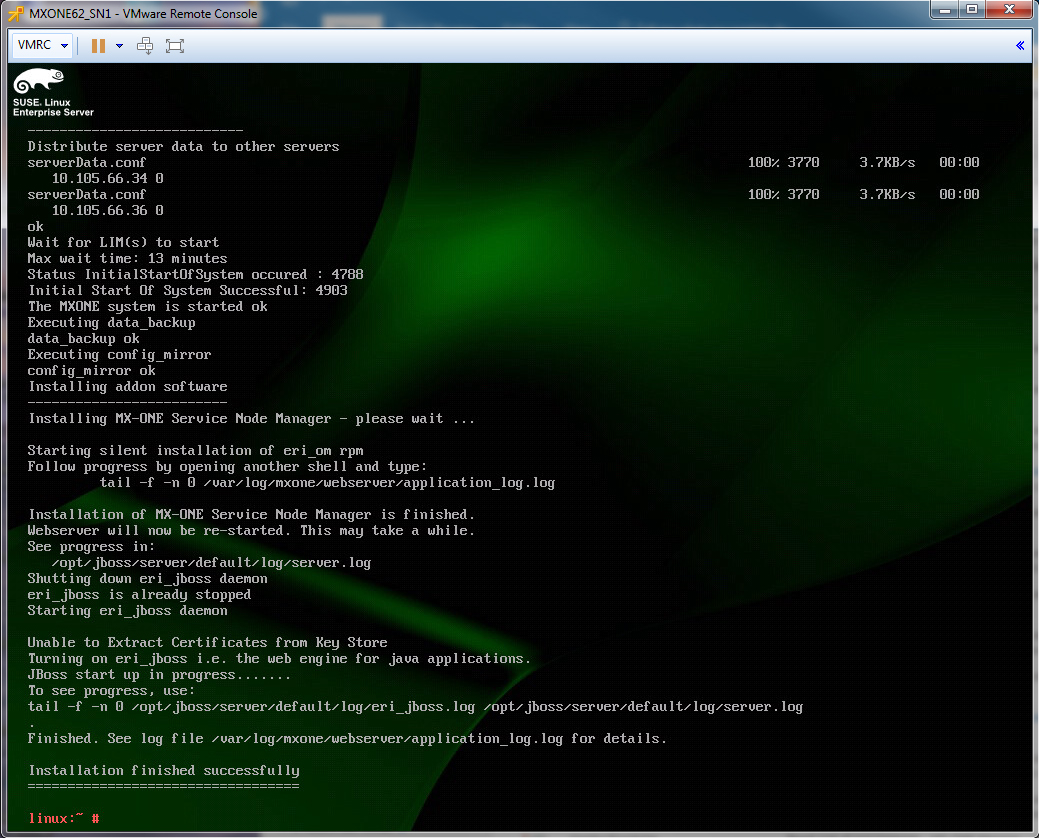
- Press C to continue the installation. When the installation is finished, the following screen is displayed.Figure 7. MX-ONE Service Node Finish Setup (3 Service Nodes)
- Execute basic tests in the Service Nodes without placing the configuration. You can do this during office hours without system down time.
- Create a VMware snapshot for the new system, if desired. It might be useful in some cases.