Verify Provisioning Manager and Service Node Manager setup
After restoring the database, both software needs get verified to execute the sanity check.
Provisioning Manager Details
To view Provision Manager:
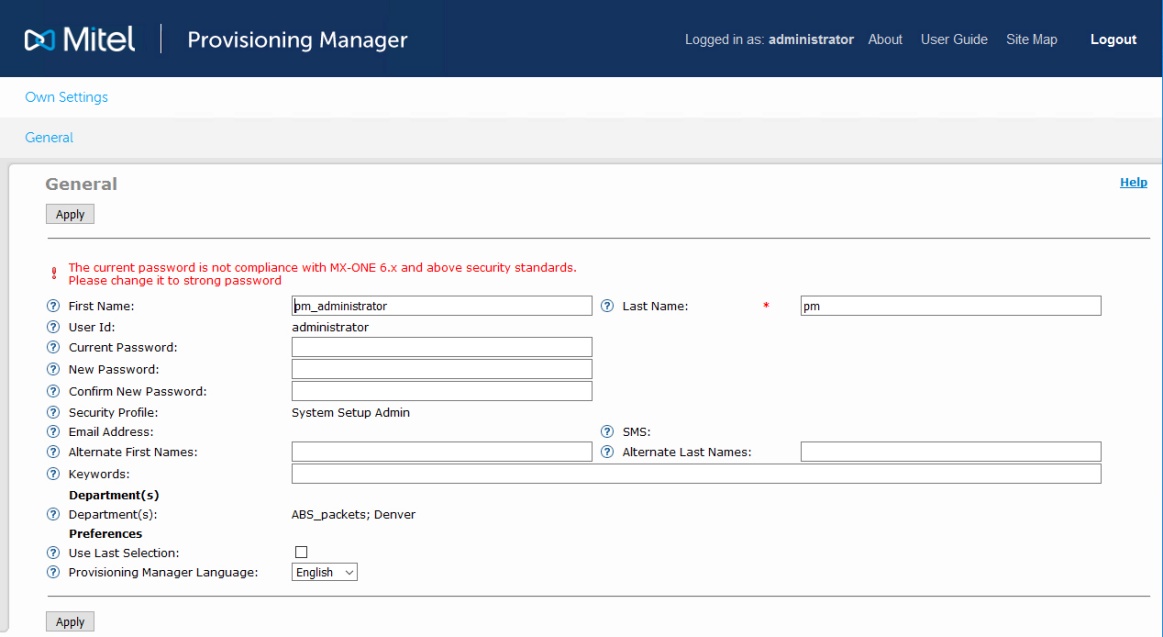
- Login in to the Provisioning Manager and change the administrator password if it is not in compliance with MX-ONE 6.X requirements.Figure 1. Provisioning Manager Page (after restore)
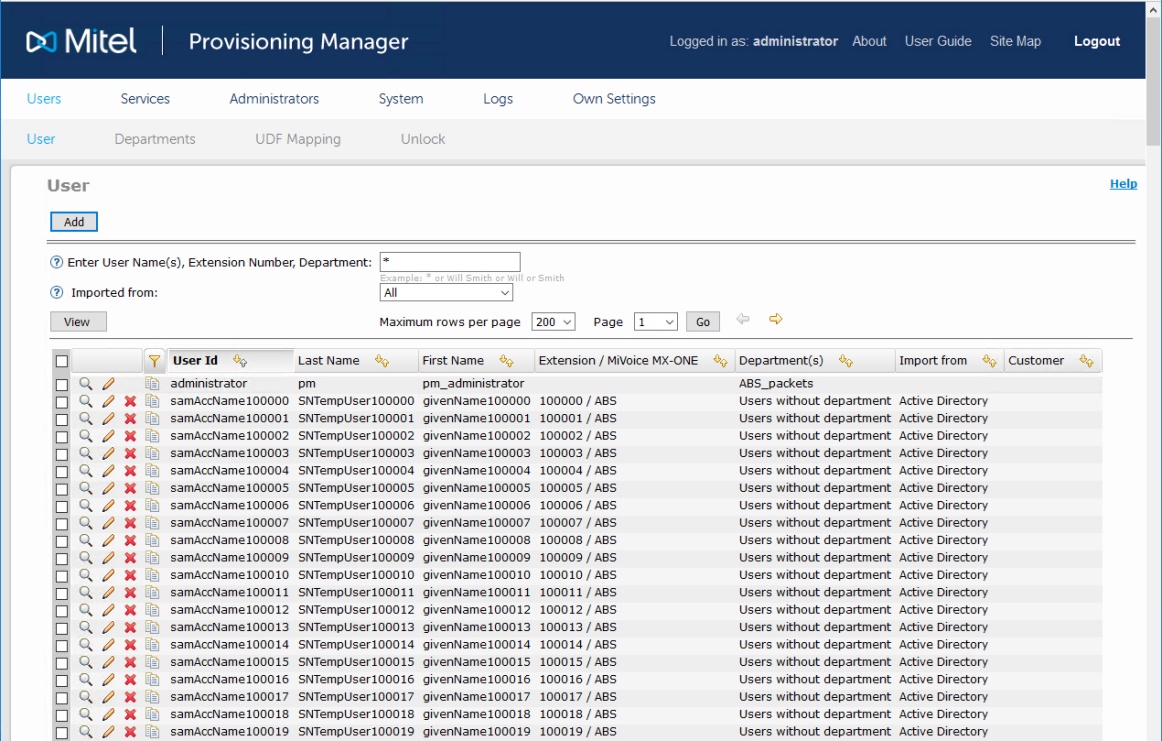
- Go to user task and check if users are present in the Manager Provisioning 5.0 in the new system. In the Provisioning Manager User task, the first page is presented below showing the first 200 users.Figure 2. User Task (all users page 1)
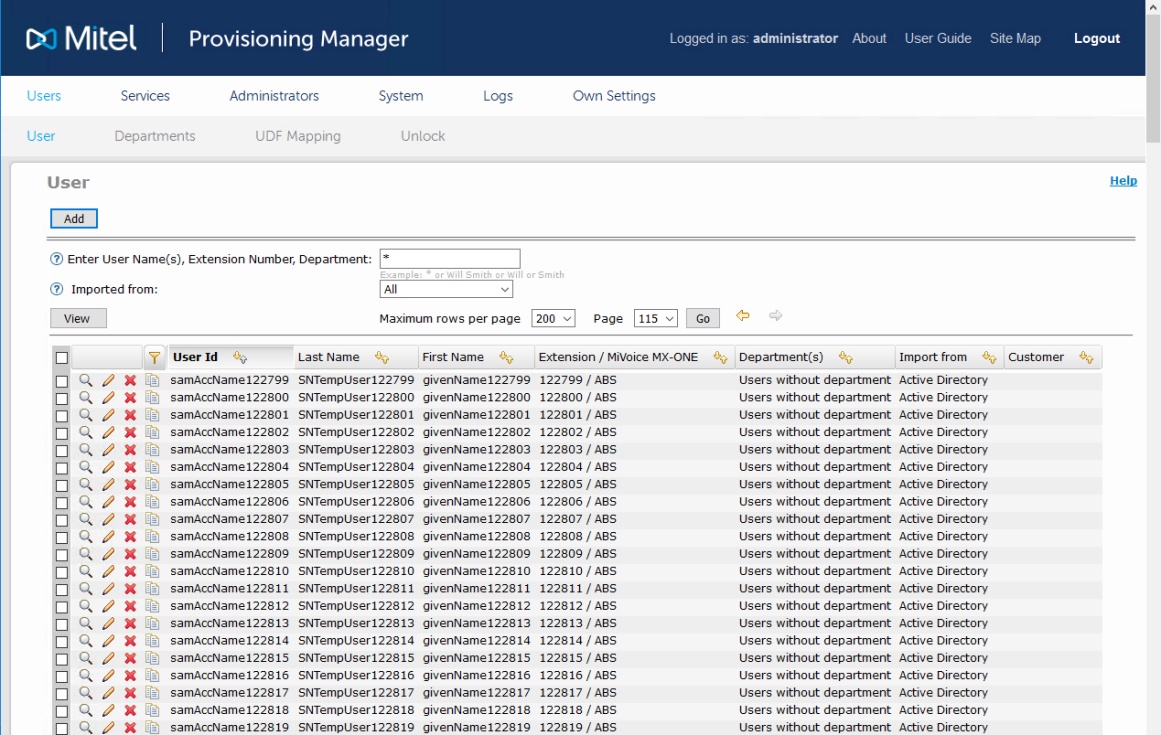
- In the Provisioning Manager User task, below is the last page is presented showing the remaining 200 users. In this system 200 users per page, 115 pages, resulting in 23000 users.Figure 3. User Task (all users page 1)
- Go to user task and add a new administrator user to manager the system (AlaCarte Service Provider).Figure 4. User Task All Users (Page 115)
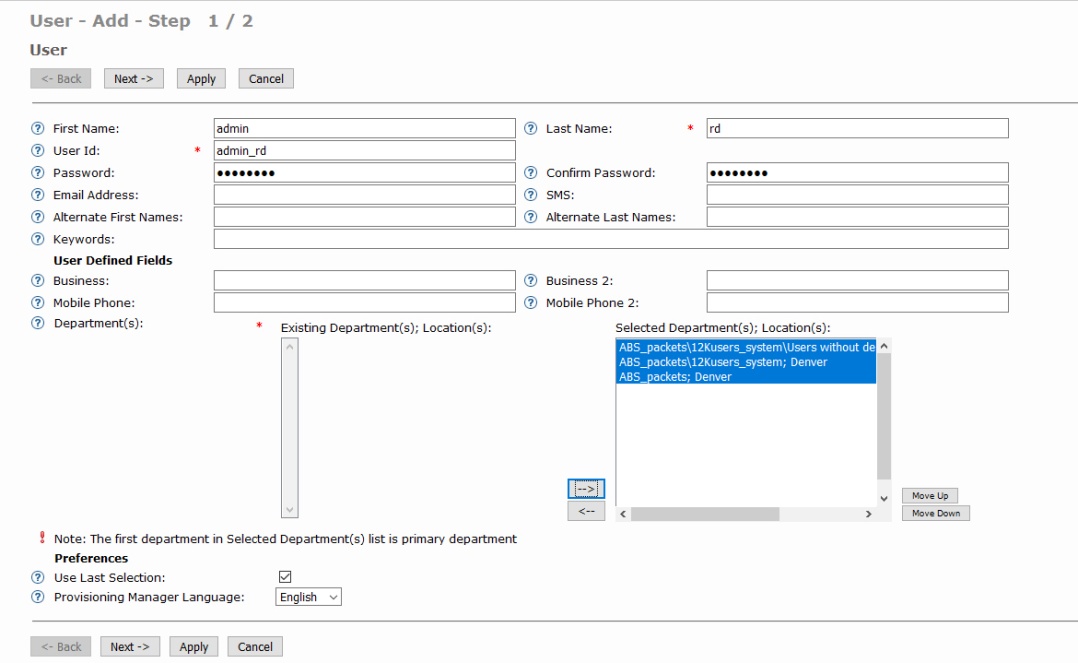
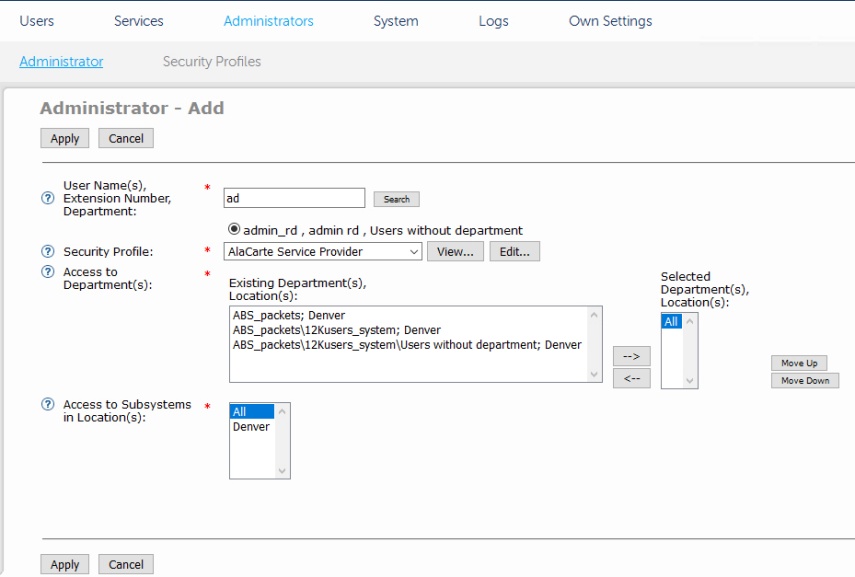
- Go to Administrator task and select Administrator and click Add.
- Select the new administrator user and the Security Profile AlaCarte Service Provider, make the other setup and click Apply.Figure 5. Add Administrator Page
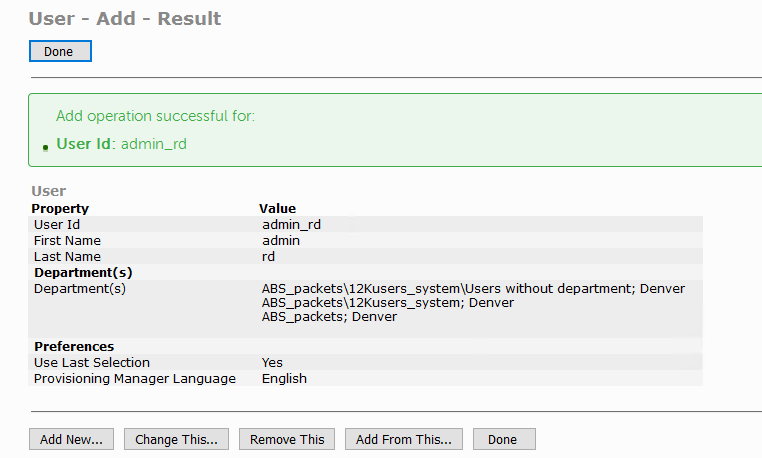
- If the new administrator user is successfully created, the following screen is presented.Figure 6. Add New User Result
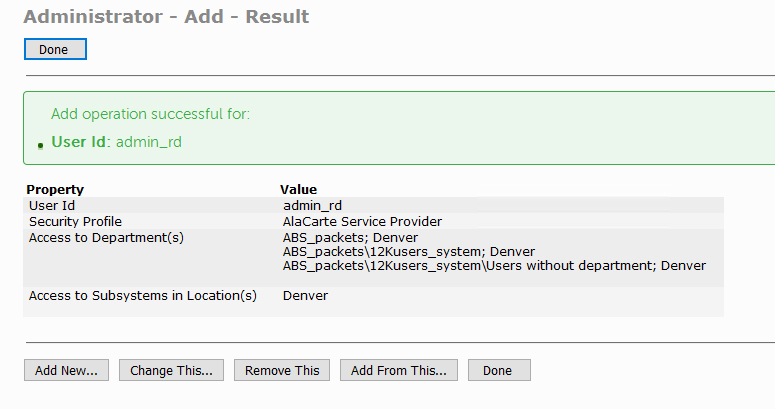
- If the security profile for new administrator user is successfully assigned, the following screen is presented.Figure 7. Add Administrator Result
- Login with the new administrator user, in the example admin_rd.
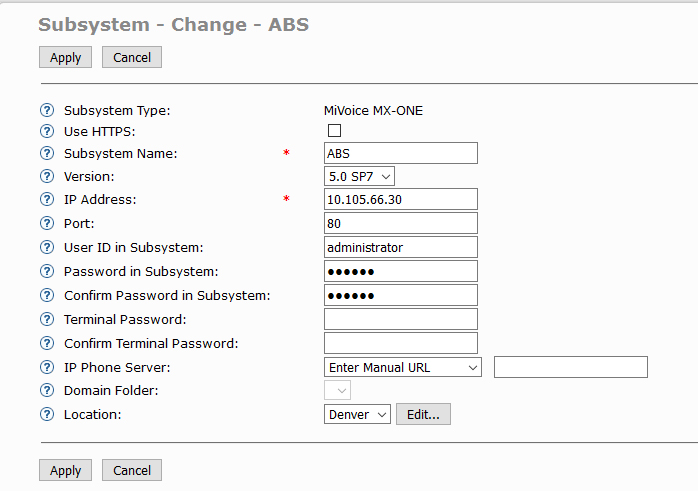
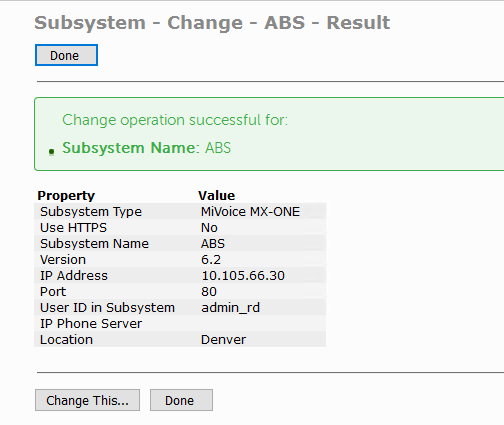
- Go to System menu> Subsystem, change the Subsystem information, Version and User ID in Subsystem.Figure 8. Subsystem View Page
- Subsystem change result is presented below.Figure 9. Subsystem Change Result
 Note:
Note:In this example Provisioning Manager is used for the Service Node Manager authentication
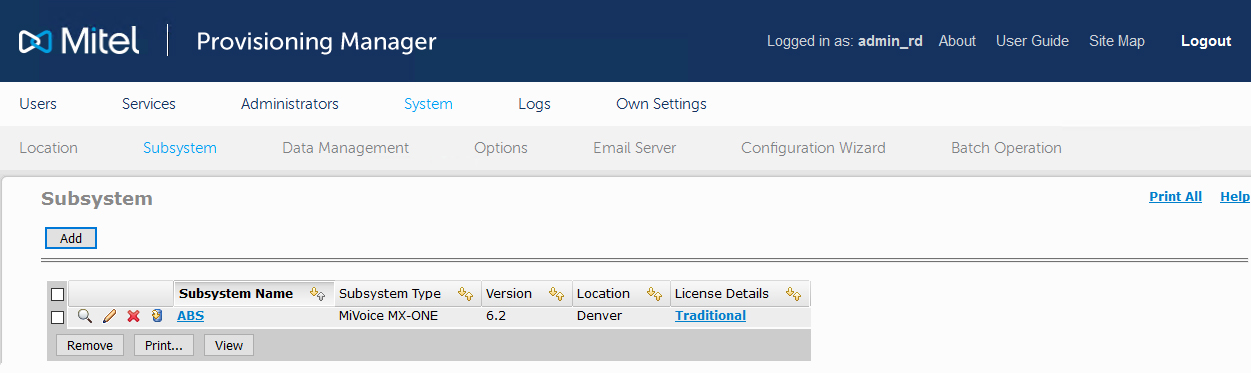
- If the setup is correct, the license information is shown as below.Figure 10. Subsystem Page
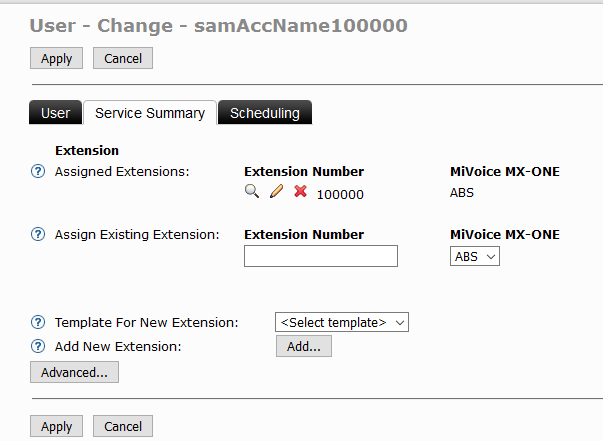
- Go to User task and select for example first and the last user and check if the extension information is correct.
- Click in the pencil icon to change or magnifier to view the extension configuration.Figure 11. User Change Service Summary
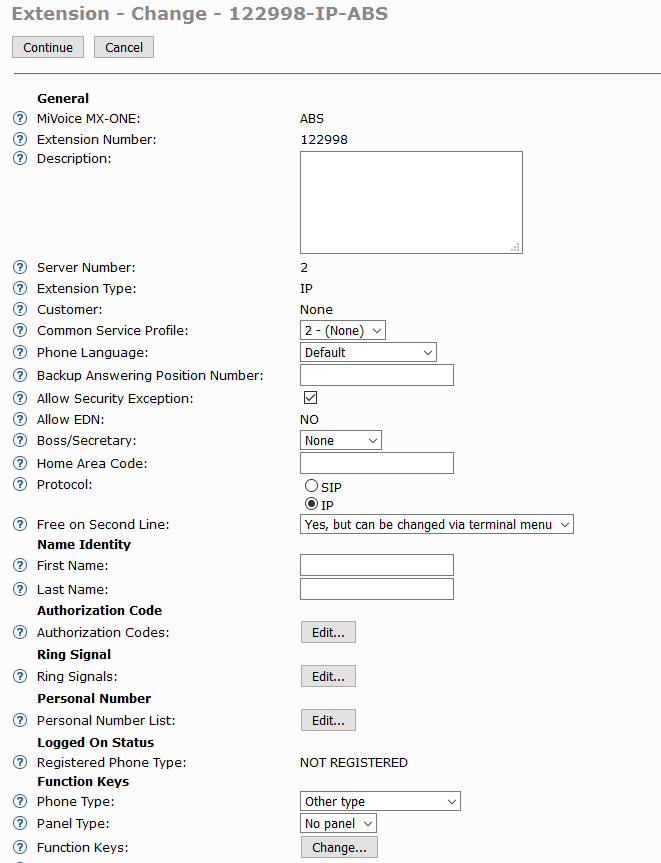
Below the change page is shown for the extension 100000.
Figure 12. User change extension page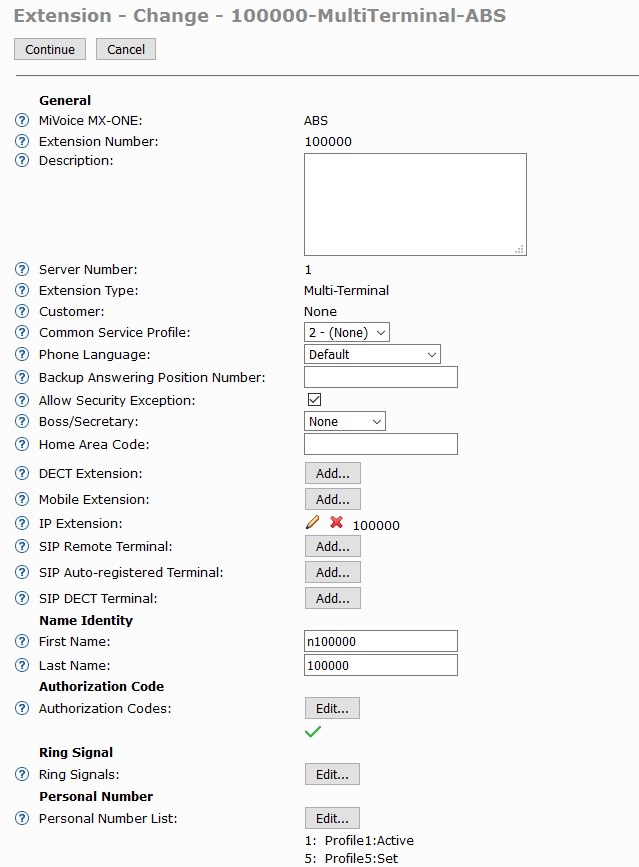
- Click in the pencil to change or magnifier to view the extension configuration.Figure 13. User Change Service Summary
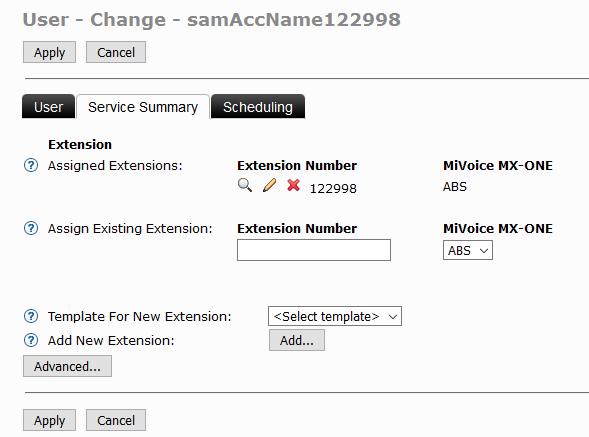
- Below the change page is shown for the extension 122998.Figure 14. User Change Extension Page
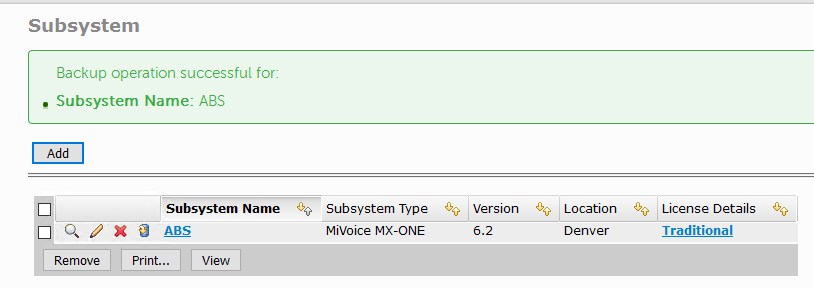
- Go to Subsystem and perform a Service Node backup if it is required.Figure 15. Service Node Backup Result
- Click in the Subsystem Name link to open Service Node Manager.
Service Node Manager
- Verify the Service Node Manager functionality.Figure 16. Service Node Manager Main Page
- Navigate in the tool and check if the configuration is correct.
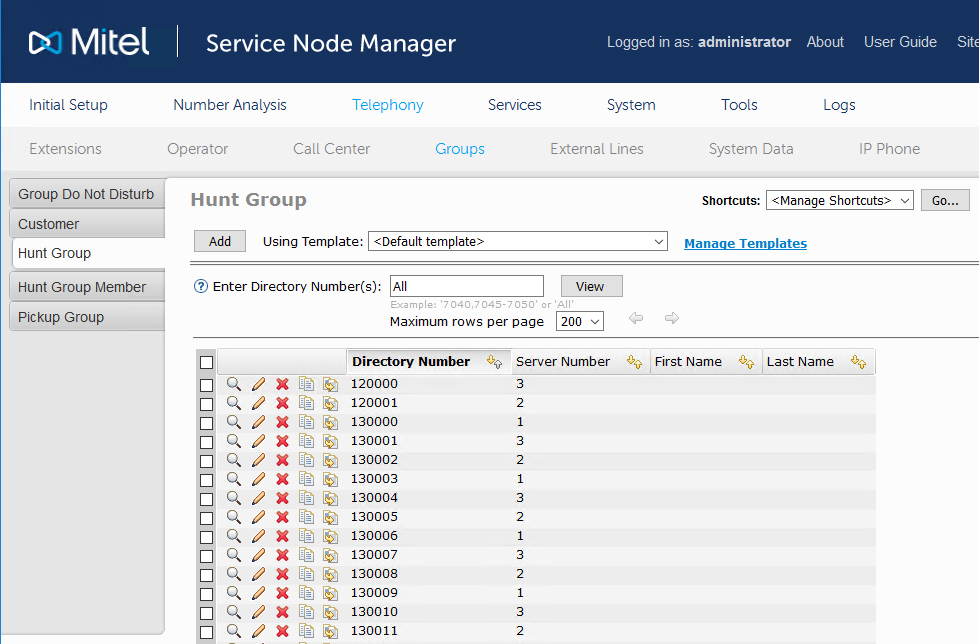
- In Telephony menu, click Groups and then Hunt GroupFigure 17. Service Node Manager Hunt Group Page
If everything is correct, then start the migration.
↑