Initial Install of System
-
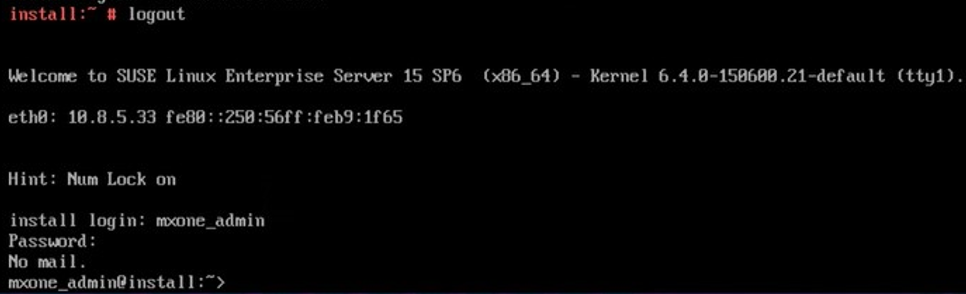
Log off from the system as a root user (if root is used) and then login as mxone_admin user.
-
Copy the template file from mxone_admin home directory /local/home/mxone_admin/mxoneInstallData-template.txt to create /local/home/mxone_admin/mxoneInstallData.txt.Note: The template file is used as a sample configuration file for configuring all servers in the system.
-
Update the mxoneInstallData.txt file with your system information.

-
Copy the MX-ONE SW package (for example, MX-ONE_x.x.spx.hfx.rcx.bin) to the master server (LIM 1) using network transfer or from USB stick to /local/home/mxone_admin/install_sw/.
-
Optional Step: Copy the MX-ONE OS patch package to /local/home/mxone_admin/install_sw/. to have SLES on all servers patched when install is ready.Note: You can also add patches manually after installation by using the mxone_maintenance tool.
-
As a mxone_admin user, verify the mxoneInstallData.txt file by entering the following command.
runTkInstall <path>/<MX-package file> --verifyTxtNote:If any errors are found, correct them by updating the mxoneInstallData.txt file, and then repeat this step.
-
Start installation using following command: runTkInstall ./install_sw/MX-ONE_<your version>.bin
-
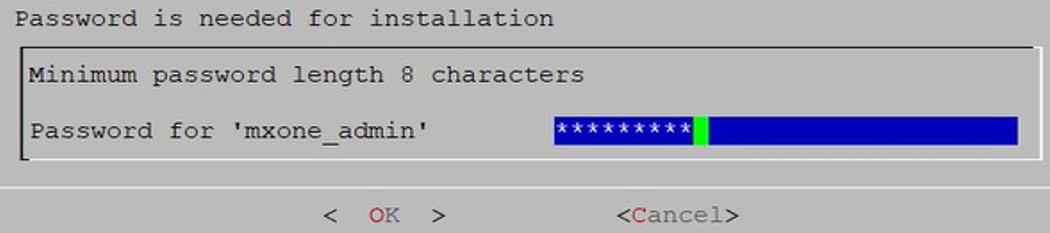
Enter password for mxone_admin to start the installation.
-
Follow on screen printouts of installation progress. For a more detailed view, follow the installation for a server with command tail -F /var/log/messages
When system installation is ready Installation finished successfully is printed on screen.

Verification After Installation
Login to the MX-ONE system as an mxone_admin user.
Enter the following command.
install_data_syntax_check --verify <file>
In this command, the <file> indicates the mxoneAddServerData.txt or mxoneInstallData.txt.