Enabling LDAPS (SSL) for AD LDS in Window Server
- Create a separate directory in the user location in the system.
- Create a file adlds_request.inf (file name can be anything with .inf extension).
- Copy the below highlighted
content in that file and change the required value in pink color.Note:
Remember that “;” is a comment in this file.
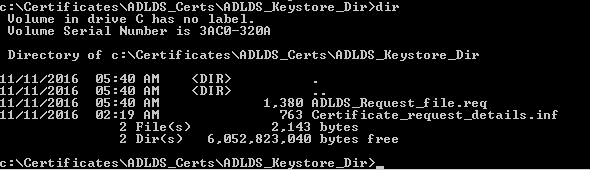
- Execute the below command
in directory to create a certificate request.certreq -new
<.inf file name> <certificate request file name>
An example of the command is mentioned below.

- A new file is created
in the same directory.
- Share the file with Certificate Authority to provide the signed certificate.
- Copy the file in the
same directory (with preferred extension of .cer / .crt).
For example, the sample AD LDS Server Signed Certificate (in this pmsnmdomain.com is root certificate), which is certificate of Issuer who has issued certificate to AD LDS Instance. Adldsserver.pmsnmdomain.com – is the Signed Certificate of AD LDS Instance.

- Once you receive the
signed certificate from Certificate Authority. Type the below mentioned
command.certreq -accept <received signed certificate file
name>
An example of the command is mentioned below.

- Open Command Prompt and Run as Administrator.
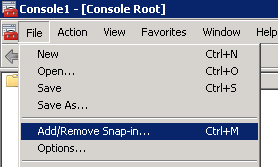
- In the command prompt, execute mmc command that opens a new mmc window.
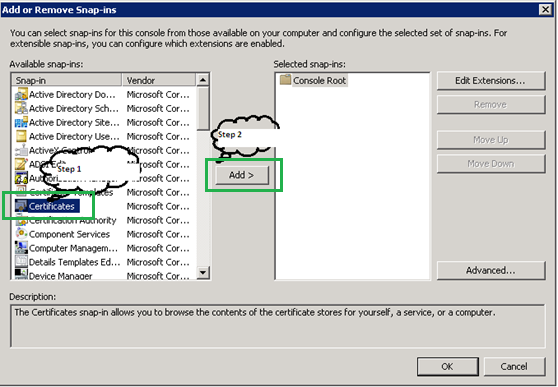
- In the mmc window,
go to File and select Add/Remove Snap-in option.
- In the Add or Remove Snap Ins window, select Certificates from the left side pane and click on Add button.
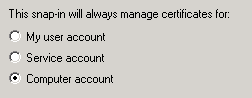
- Select Computer Account and
click Next. Select Local Computer. Click Finish and
then click OK.
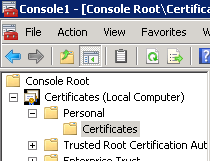
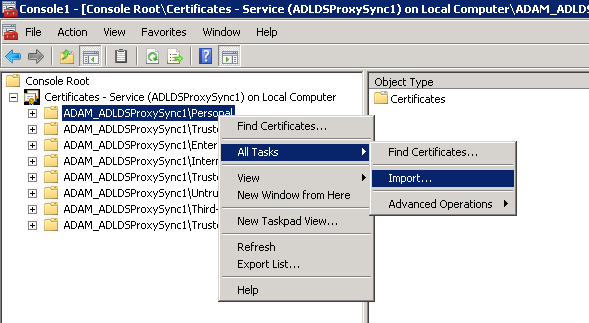
- Extract Certificates > Personal > Certificates from
the left side pane. All the certificates get listed in the right
side pane.
- Open the Signed certificate which you have received from Certificate Authority.
- Once the certificate is opened, go to Details tab and click on Copy to File button.
- Click Next and
select Yes, export the private key option.

- Click Next.

- Enter your password (double time) to assign to the Keystore and click Next.
- Save the .pfx file in the system in the same location where certificate request is created for easy identification.
- Click Next and click Finish.
- In the same mmc window, open File menu and select Add/Remove Snap-In option
- Select Certificates and
click Add.
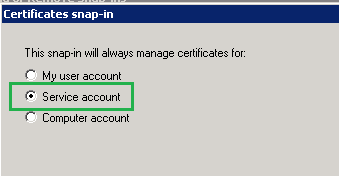
- Select Service Account.
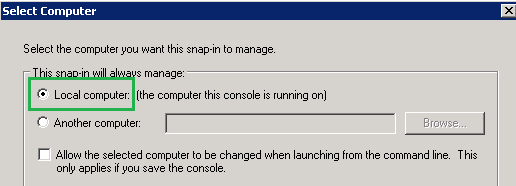
- Select Local Computer,
click Next.
- Select the Service Name
/ AD LDS Instance Name.
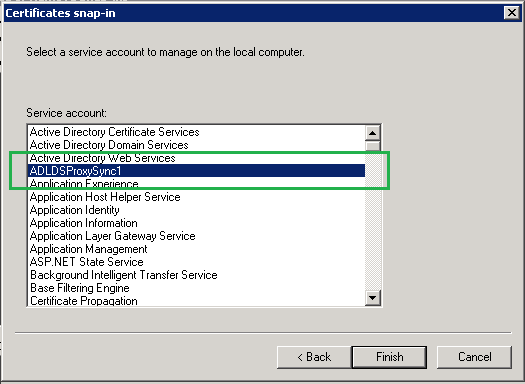
- Click Finish and
then click OK. The following Add or Remove Snap-ins window
appears.

- In mmc Certificates window, expand Certificates – Service (AD LDS Instance Name) on Local Computer. Add the AD LDS Signed Certificate in AD LDS Instance Name/Personal section.
- Click Next > Browse. Select the key store that you have created in previous step (file extension is .pfx) in File browser.
- Click Next. Enter the password of key store (entered while creating .pfx file).
- Click Next > Next > Finish.
Once it is added, certificate is available as shown below.

- In the same way, add the AD LDS certificate’s Root certificate (for example, pmsnmdomain.com) in AD LDS Instance Name/Trusted Root Certificate Authorities.
- Add the AD LDS certificate’s Root certificate in AD LDS Instance Name/Trusted Publishers.
- Add the other end certificate
(for example, Provisioning Manager application certificate) in AD
LDS Instance Name/Trusted People. An example is shown below.

- Add the ownership to the added certificates to Network Service.
- Go to C:\ProgramData\Microsoft\Crypto\RSA\MachineKeys.
- Right click on each
certificate where Lock like icon appears on the files.

- Open Properties and
go to Security tab. Click Edit and then click Add.
Enter Network Service.
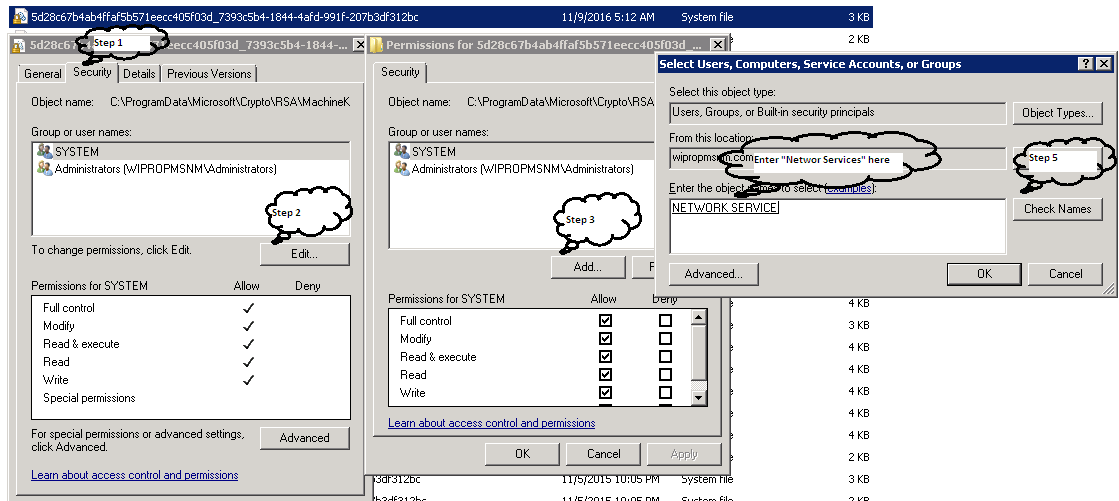
- Enter the Network Service and select Users, Computer, and Service Accounts or Groups window.
- Give Read, Read &
Execute permission > click OK > OK.
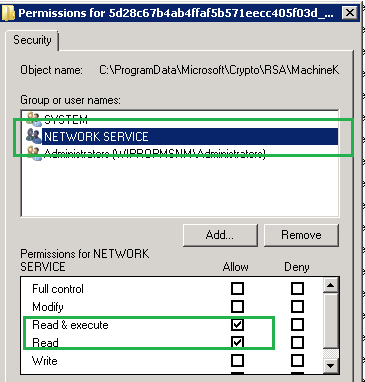
- In the same way, provide
permissions to all certificates for Network Service user. When
you give the permissions, all the Lock icons get disappeared.

- Restart AD LDS Instance.
Test LDAPS for AD LDS by using the below command from PM installed server.
openssl s_client -connect IPAddress of AD LDS:LDAPS port
For example:
openssl s_client -connect 192.168.26.129:53994
↑