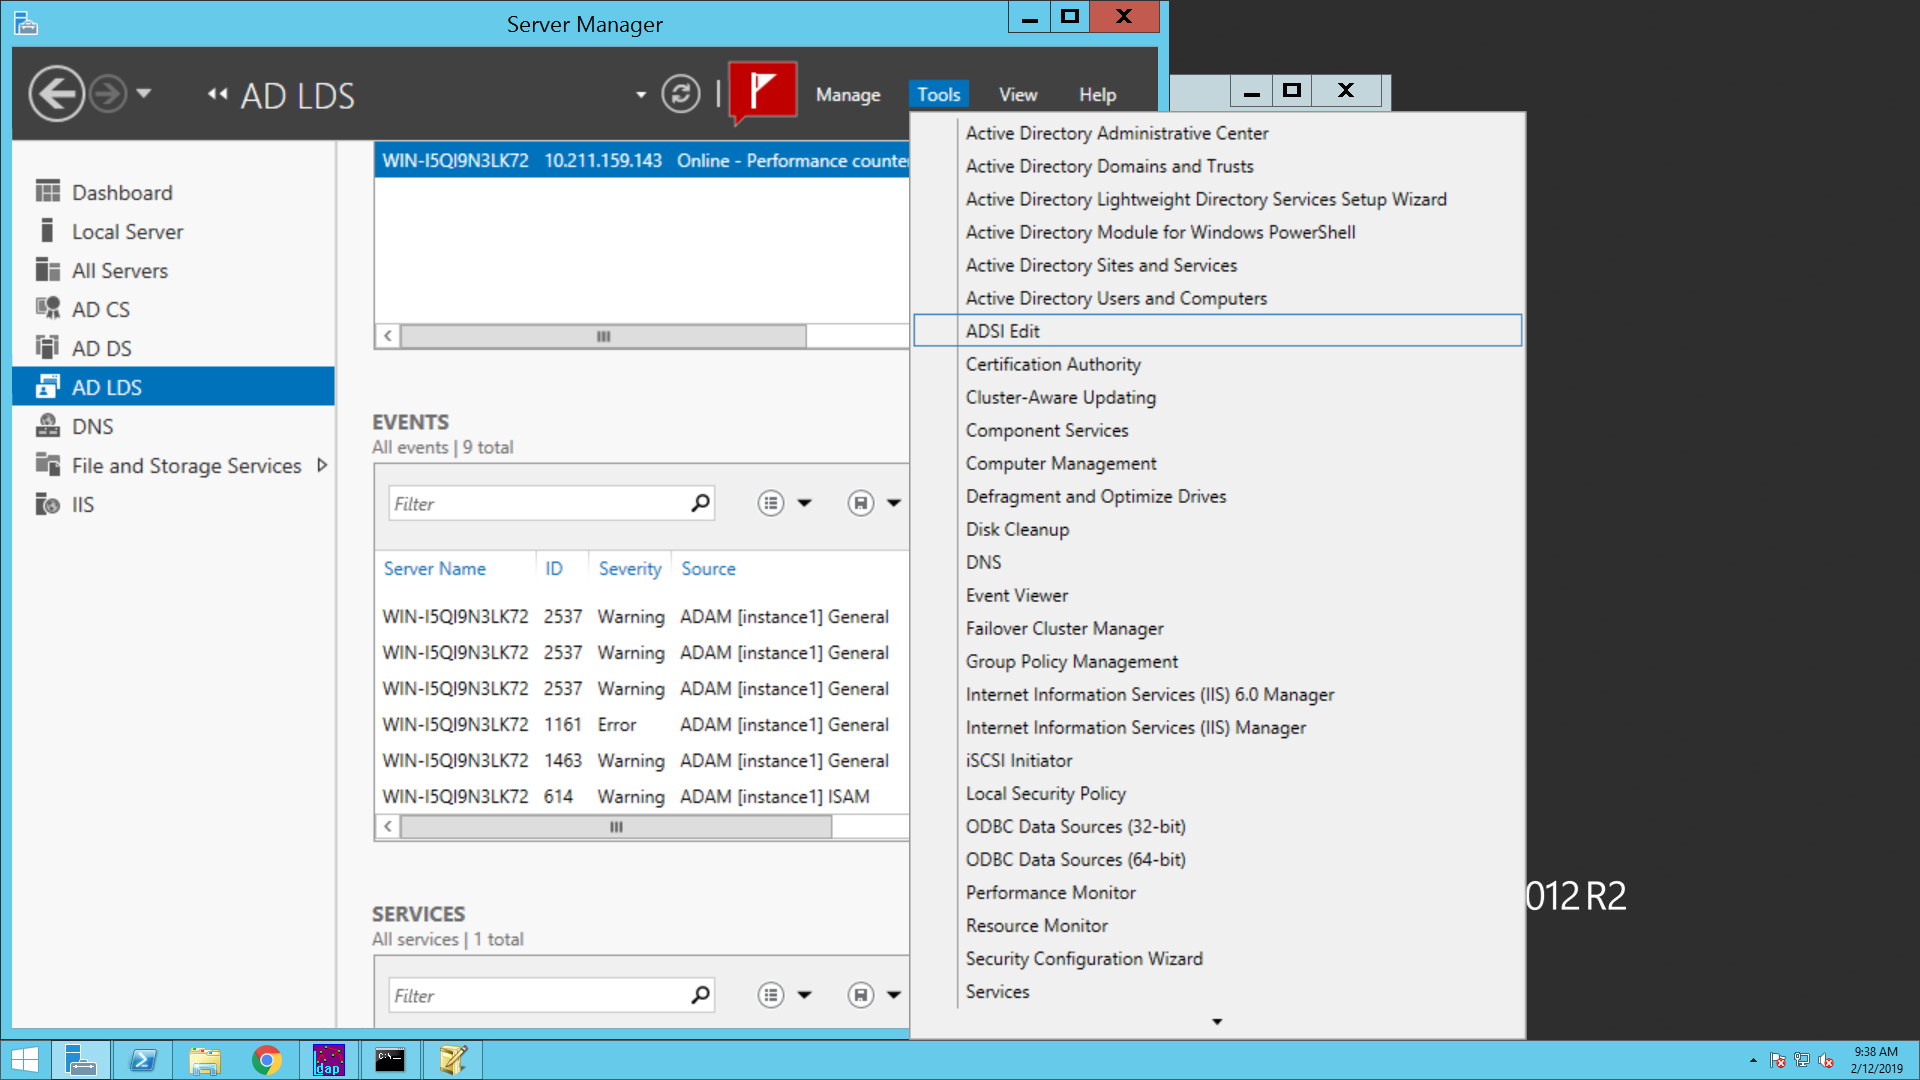
Creating an Admin User in AD LDS
- Select Server Manager > Roles > Active Directory Lightweight Directory Services.
- Select ADSI Edit shown
in the right side pane, under the Advance Tools section.
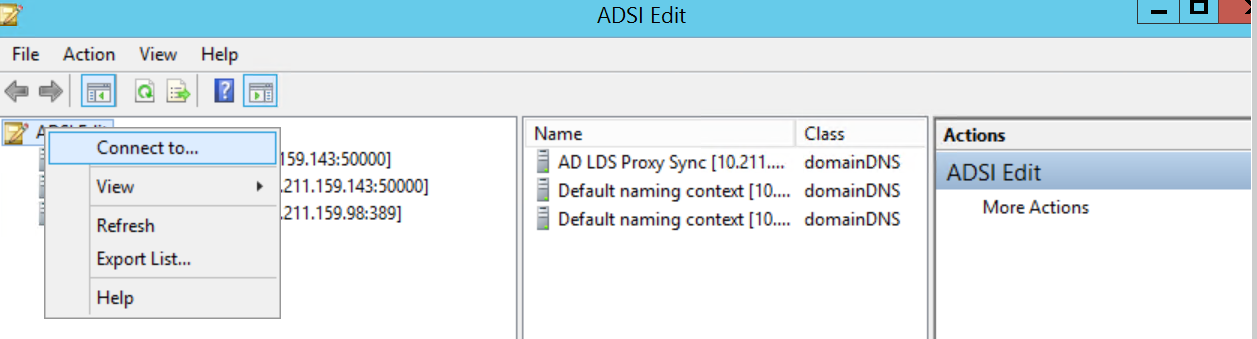
- In ADSI Edit window,
go to Action Menu, select Connect to… option, or right click on
ADSI Edit in the left side pane.
- The Connection Settings
window appears to fill the below details.
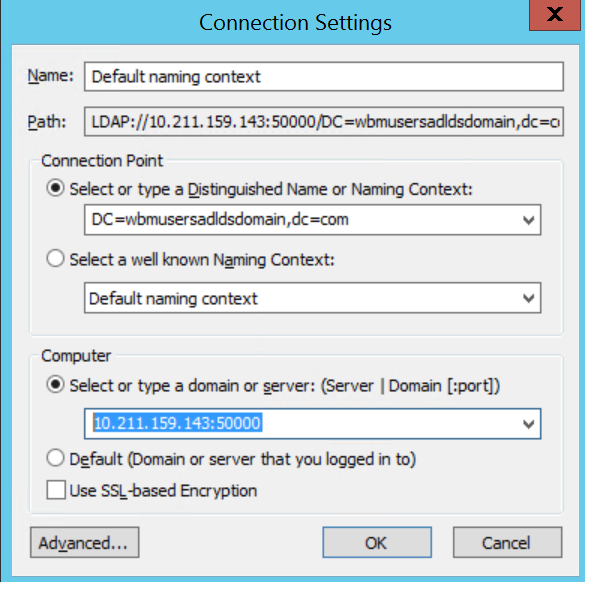
- Enter Name to identify this AD LDS Instance.
- In the Connection Point section, Select or type Distinguished Name or Naming Context and enter the Partition Name in AD LDS instance.
- In the Computer section, select or type a domain or server: (Server | Domain[:Port]) and enter the server IP of AD LDS and port details.
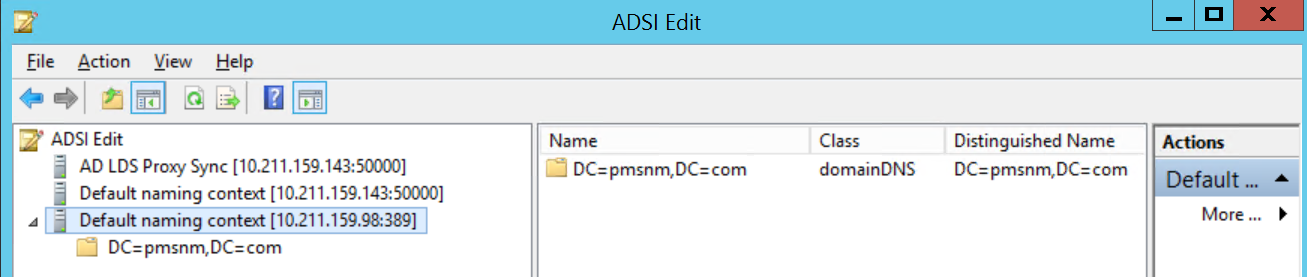
- Click OK. The following
ADSI Edit window appears.
- Right click on Partition/ Distinguished Name > select New > Object.
- In ADSI Edit window, you can expand the right side pane to check Name and Distinguished Name.
- In Create Object window,
select container from the class list provided below.
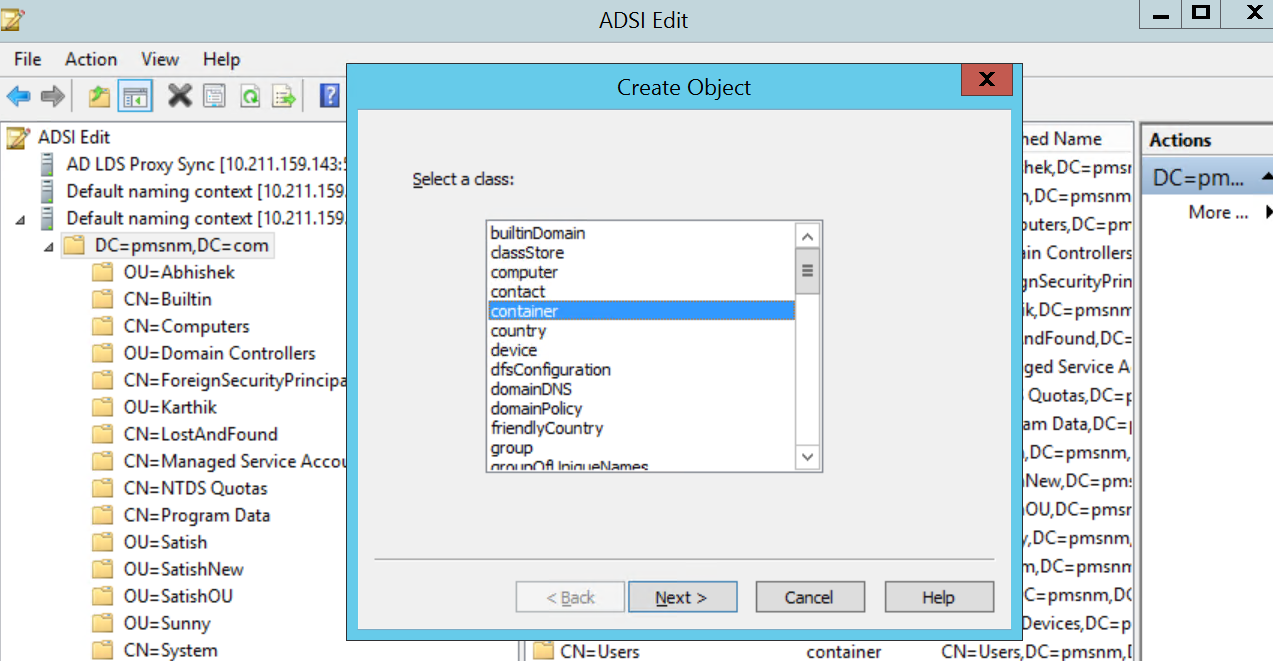
- Click Next. The Create Object window appears to add value.
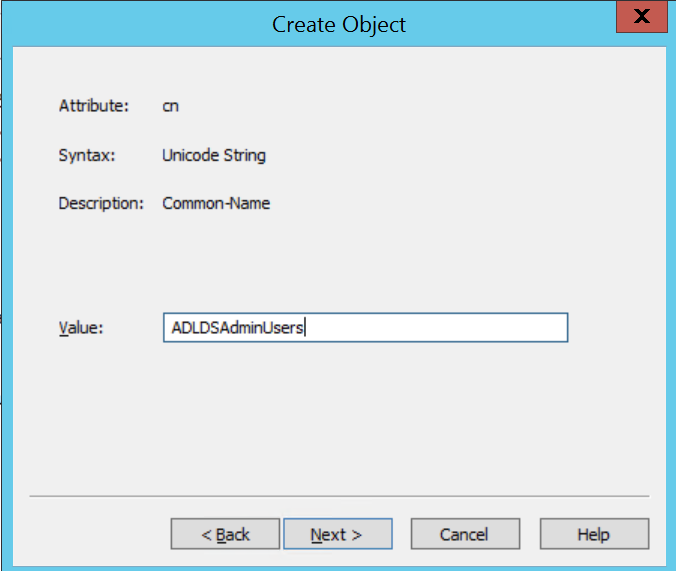
- Enter name of the container
(for example, ADLDSAdminUsers) in the Value box and click Next.
- Click Finish.
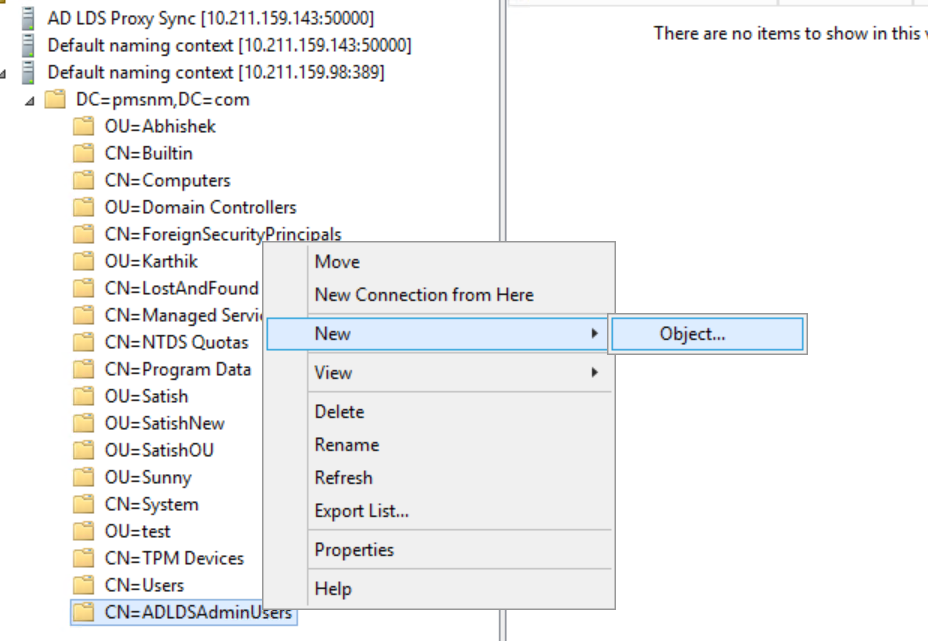
- Right-click on the newly
created container which is added under the Partition Name and select
New > Object.
- In the Create Object
window, select user from the list of Class items displayed. Click
Next.

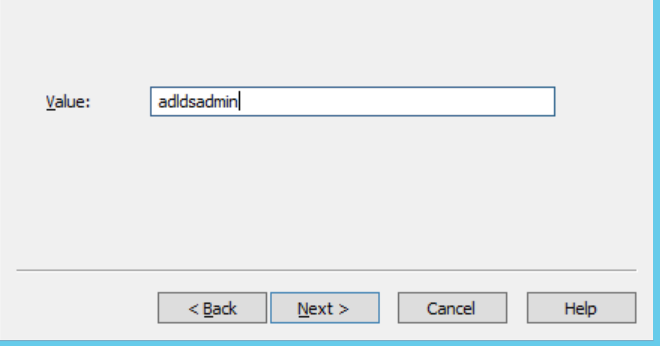
- Enter a username (for
example, adldsadmin) in the Value box.
- Click Next and click Finish.
- Expand newly created
container and right click on the newly created user. The following
window appears to Reset Password.
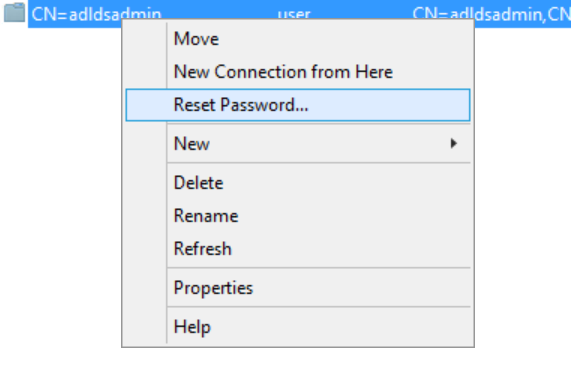
- Select Reset Password.
The following window appears to assign a new password for user.
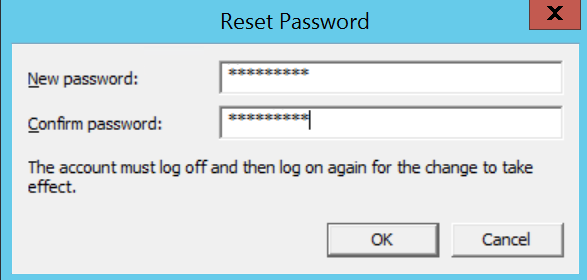
- Enter the New password and Confirm password. Click OK.
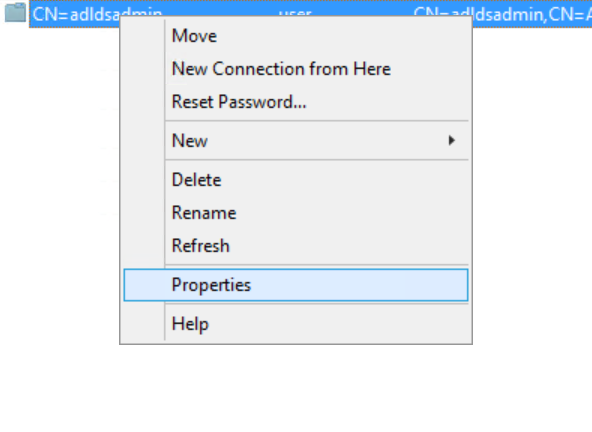
- Right click on the newly
created user and select Properties.
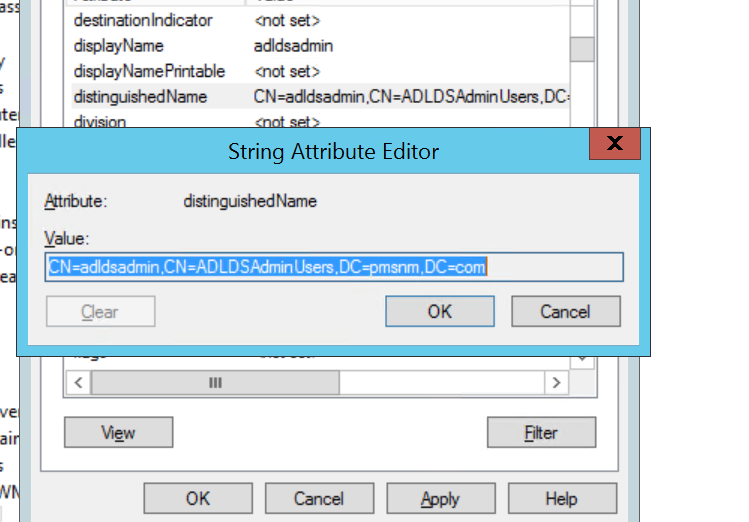
- Right click on the newly
created user properties dialog, select displayName and double click
on it. The following String Attribute Editor appears.
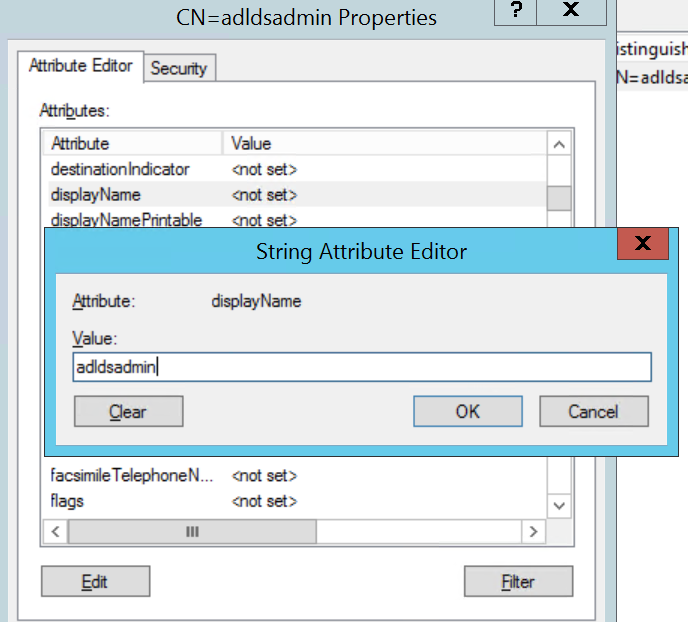
- Enter the same username while resetting the password.
- Select distinguishedName double click on it to copy the distinguishedName value.
- Click OK.
- In the same attribute
editor Select msDS-UserAccountDisabled and double click on it. The
following Boolean Attribute Editor window appears.
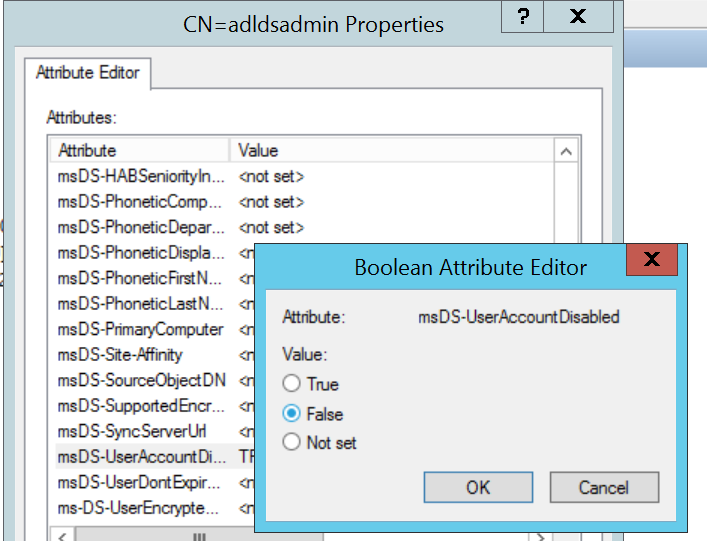
- Select False and click OK.
- Click Apply and OK.
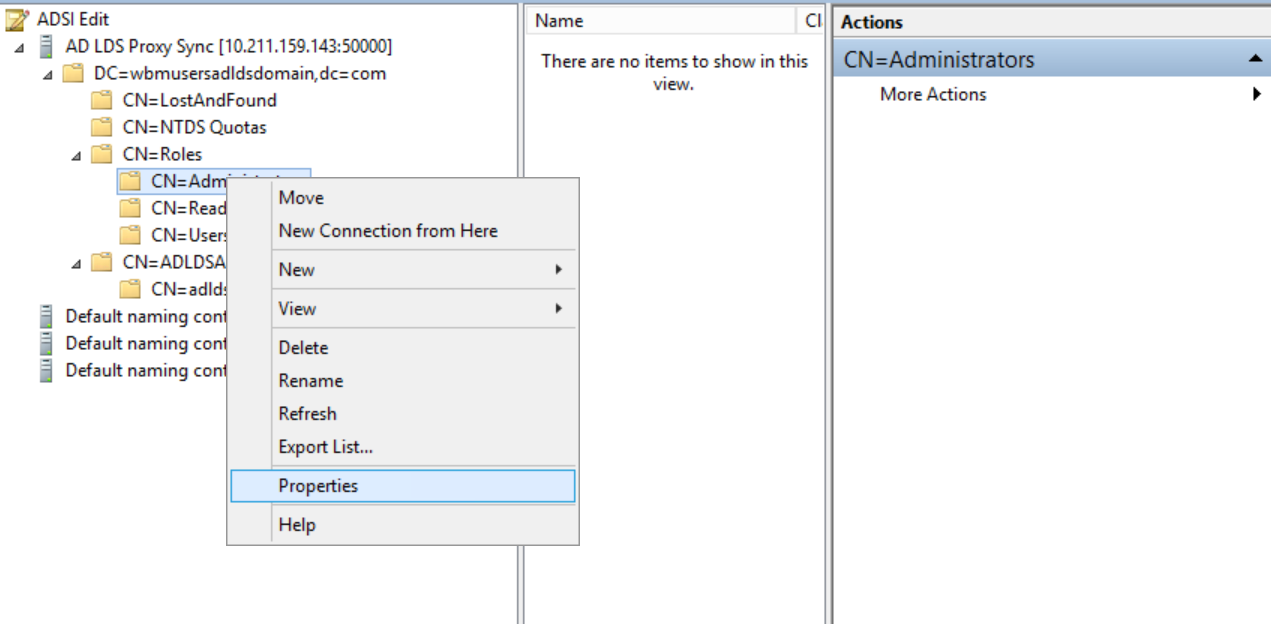
- Expand the newly created
partition name and CN=Roles. Right click on CN=Administrators > Properties to view the Attribute
Editor.
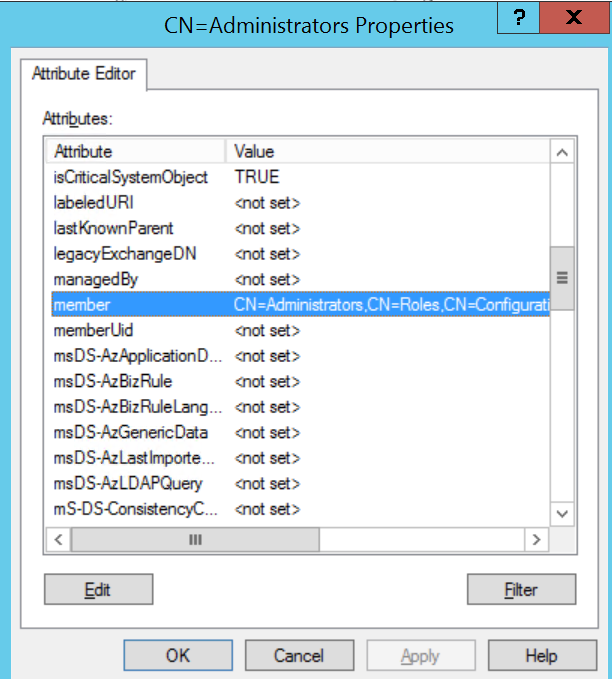
- In the Attribute Editor,
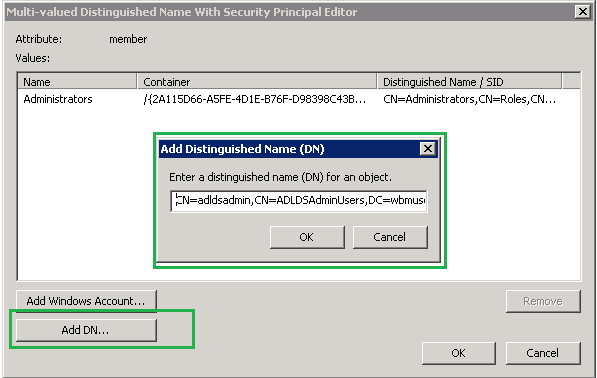
select member and click Edit.
- Click Add DN button and Enter DN of user created above
(for example, CN=adldsadmin,CN=ADLDSAdminUsers,DC=wbmusersadldsdomain,DC=com) ? click OK.
- Click OK and click Apply.
- Click OK.
↑