Streams
A Stream is a collaboration space designed to enable collaboration between teams, projects, and topics. In a Stream, you can add several members, message to those members, and share images among them. You can add new members to an existing Stream and these members can view the previous conversation history inside the Stream.
Create Stream
To create a Stream:
- Click the Messages icon (
 ) in the navigation menu of the application. The Messages screen opens.
 - Do either of the following:
- Click the
 icon, and then click Stream.
 - Click the
 icon in the Streams section, and then click Create Stream.
The Start a Stream panel opens.
- Click the
- You can create a public or a private Stream.
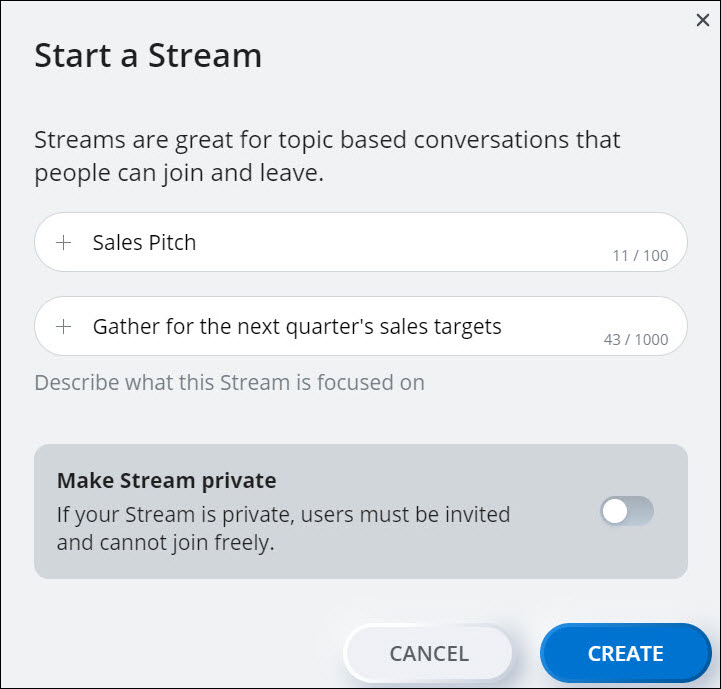
- Public Stream
A public Stream is a collaboration space in which any Mitel One user can join any Stream that is displayed in the Streams search results list. To create a public Stream, do the following:
- In the Stream name field, enter a name for the stream. If a Stream with the name you entered already exists, an error message A stream with this name already exists is displayed.
- Choose a different name and provide a description about what the Stream is about in the Description field. Click CREATE. A messaging window opens displaying the Stream name. The Stream will be displayed in your Streams list.
- Private Stream
A private Stream is a collaboration space, to join which, users must be invited. To create a private Stream, do the following:
Note: A private Stream is displayed in the Streams search results list of only those users who have joined that Stream.- In the Start name field, enter a name for the Stream. If a Stream with the name you entered already exists, an error message A stream with this name already exists is displayed.
- Choose a different name, and describe what the Stream is about in the Description field. To set the Stream as private, slide the Make Stream private toggle button to the right.
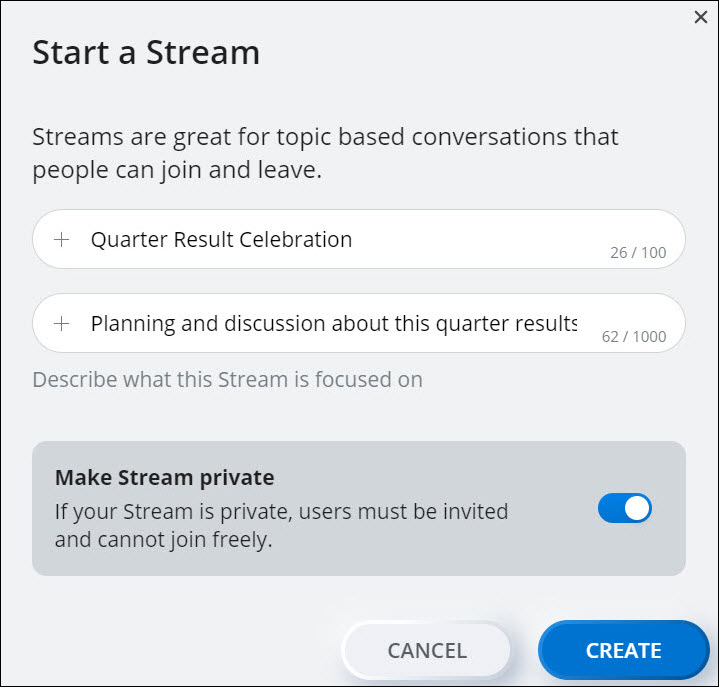
- Click CREATE. A messaging window opens displaying the Stream name. The Stream will be displayed in your Streams list.
- Public Stream
Browse Streams
To browse and join a public Stream, do the following:
- Click the Messages icon () in the navigation menu of the application. The Messages screen opens.
- Click the icon in the Streams section, and from the panel that opens, click Browse Streams. A panel opens displaying a list of public Streams.
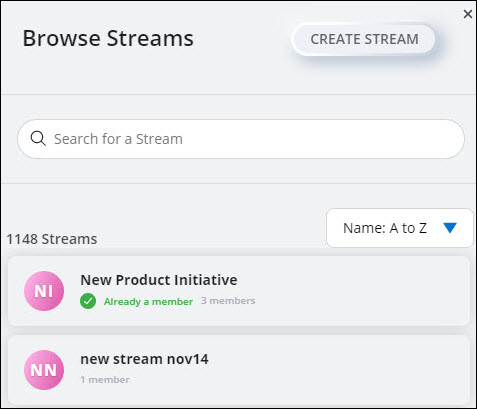
- Hover the Stream you want to join and click
 . Alternately, click the Stream you want to join and click the Join option.
You can also search for the Stream you want to join by typing the name of that Stream in the Search for a Stream field. The search field displays a list of Streams that match the letters you type. Click the Stream you want to join and click the Join option. To create a new Stream, click Create Stream.
Manage Streams
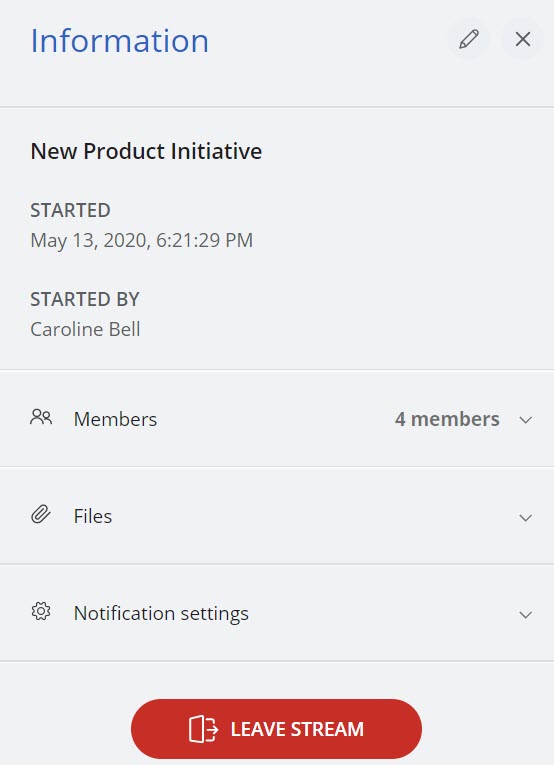
You can edit the name and description of a Stream; invite members to a Stream; view the existing members, and files in a Stream; view and manage the notification settings of a Stream; or leave a Stream by performing the following steps.
- Click the Messages icon () in the navigation menu of the application. The Messages screen opens.
- From the Streams section click the Stream you want to manage.
- Click the
 icon at the top-right corner. The Information panel opens.
-
- To edit the name and description of a Stream:
- Click the
 icon. The Edit Stream Details panel opens.
 - Edit the name and description of the Stream, and slide the Make Stream private toggle button to the right to make the Stream private.
- Click SAVE to save the changes.
- Click the
- To view the members in a Stream, click Members. All members currently in the Stream are displayed in a drop-down list.
- To invite members to a Stream:
- Click Members, and then click ADD PEOPLE. The Invite members to the Stream panel opens.
- In the Search to add users field, type the name of all the contacts you want included in the conversation. The search field displays a list of contacts whose names and email addresses match the letters that you type. Click the name to add that contact.
- Click ADD. The selected contacts are added as members to the Stream.
- To view and download the files shared in a Stream:
- Click Files. The drop-down displays all the files currently shared in the Stream.
- Click the
 icon associated with a file to download that file.
- To view the notification settings for a Stream:
- Click Notification settings . The panel displays the option to enable or disable the notifications for the Stream.
- Click OPT-IN to enable the notification and OPT-OUT to disable the notification.
- To leave a Stream:
- Click Leave Stream.
The Stream will be automatically removed from the Streams list until the participant is re-invited.
- Click Leave Stream.
- To edit the name and description of a Stream:
Start a meeting in a Stream
You can start a meeting with all your contacts in the Stream by clicking the meeting icon (![]() ) at the top-right corner of the messaging window. The meeting pop-up window opens, and a new meeting session is created with the contacts in the Stream. AJoin now action card is displayed in the Stream for the contacts to join the meeting.
) at the top-right corner of the messaging window. The meeting pop-up window opens, and a new meeting session is created with the contacts in the Stream. AJoin now action card is displayed in the Stream for the contacts to join the meeting.