Setting Up Postgres 14 Database
The Call History Postgres Database stores all the Call History records for MiVoice Business Console operators.
Prerequisites
A Windows PC that meets the basic Postgres Server requirements. For more information, refer to MiVoice Business Console Installation and Configuration Guide.
The server PC's port 5432 must be available to the network and all other MiVoice Business Consoles.
The Postgres server can be installed on one of the MiVoice Business Consoles if required.
- It is recommended to keep the Server PC on at all times to facilitate the proper functioning of Call History and Transfer Assistant features of all MiVoice Business Consoles.
To set up the Call History Postgres Database
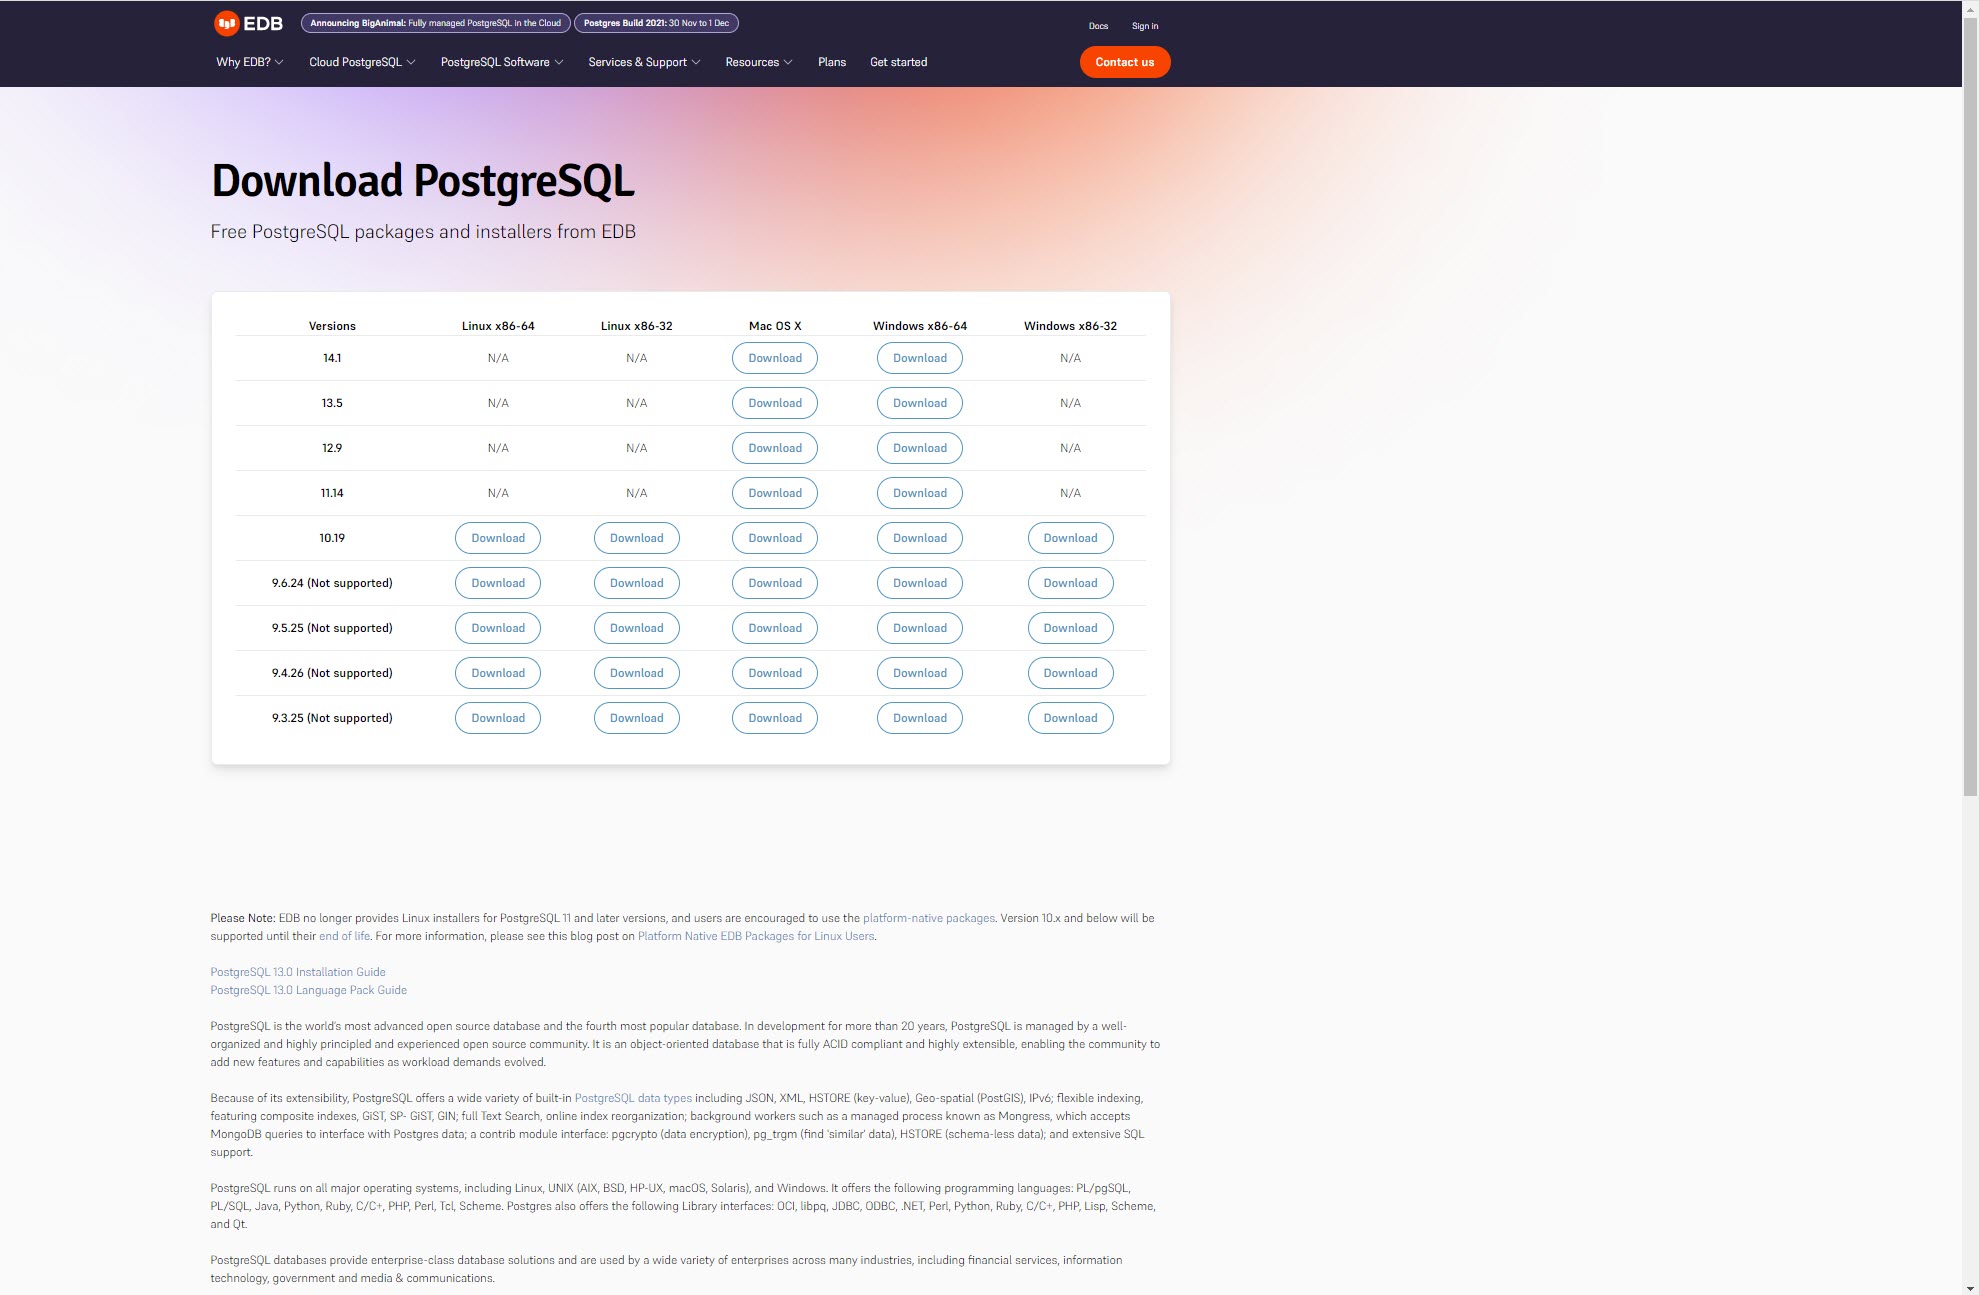
Download the Postgres Server Installation package from the website:
https://www.postgresql.org/download/windows/

Execute the downloaded installation package.
The Setup wizard appears.
In Setup wizard, under Select Components, clear the Stack Builder check box, and click Next.
Note: By default, all the check boxes are selected.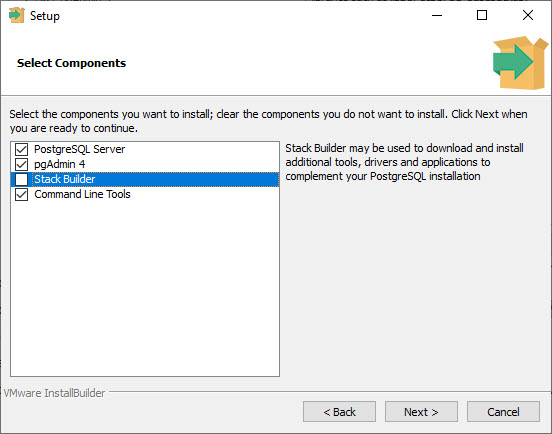
Specify the database location and click Next.
Note: It is recommended to create a sub-folder 14 to differentiate between future Postgres Server versions.Enter a password for the Postgres user and click Next.
Note: This password is used by Postgres SQL server database administrator when migrating to a newer version of Postgres.Do not modify the default Port number (5432) and click Next.
Do not modify the default Locale ([Default locale]) and click Next.
The Summary window is displayed.
Click Next.
The Ready to Install window is displayed.
Click Next.
After the installation is complete, click Finish.
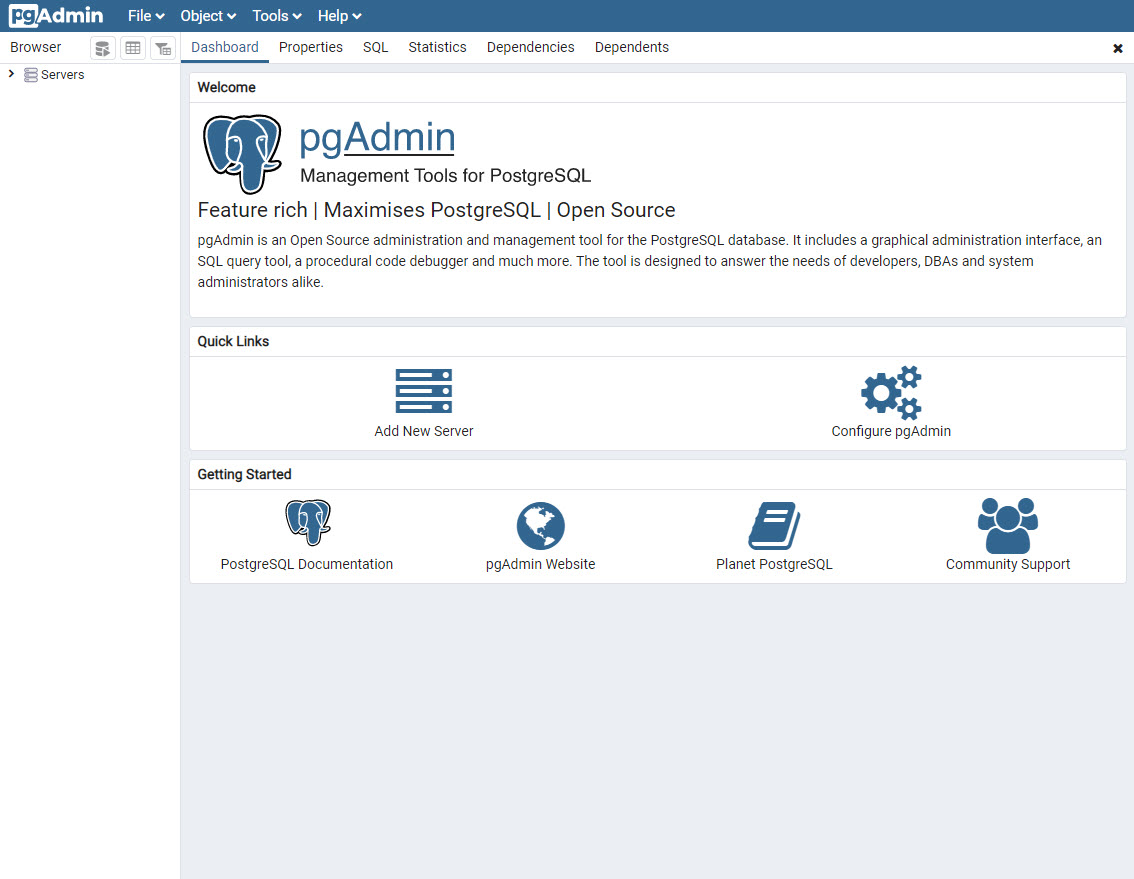
Open the pgAdmin 4 application to connect to the database server.
Go to C:\Program Files\PostgreSQL\14\pgAdmin 4\bin to launch pgadmin4.exe
The application displays the current server.
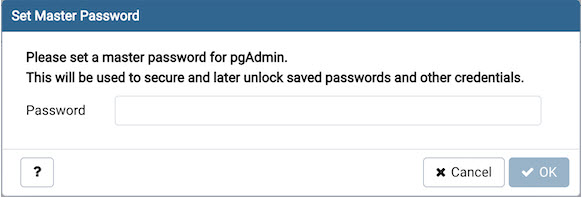
Enter a master password and click OK.
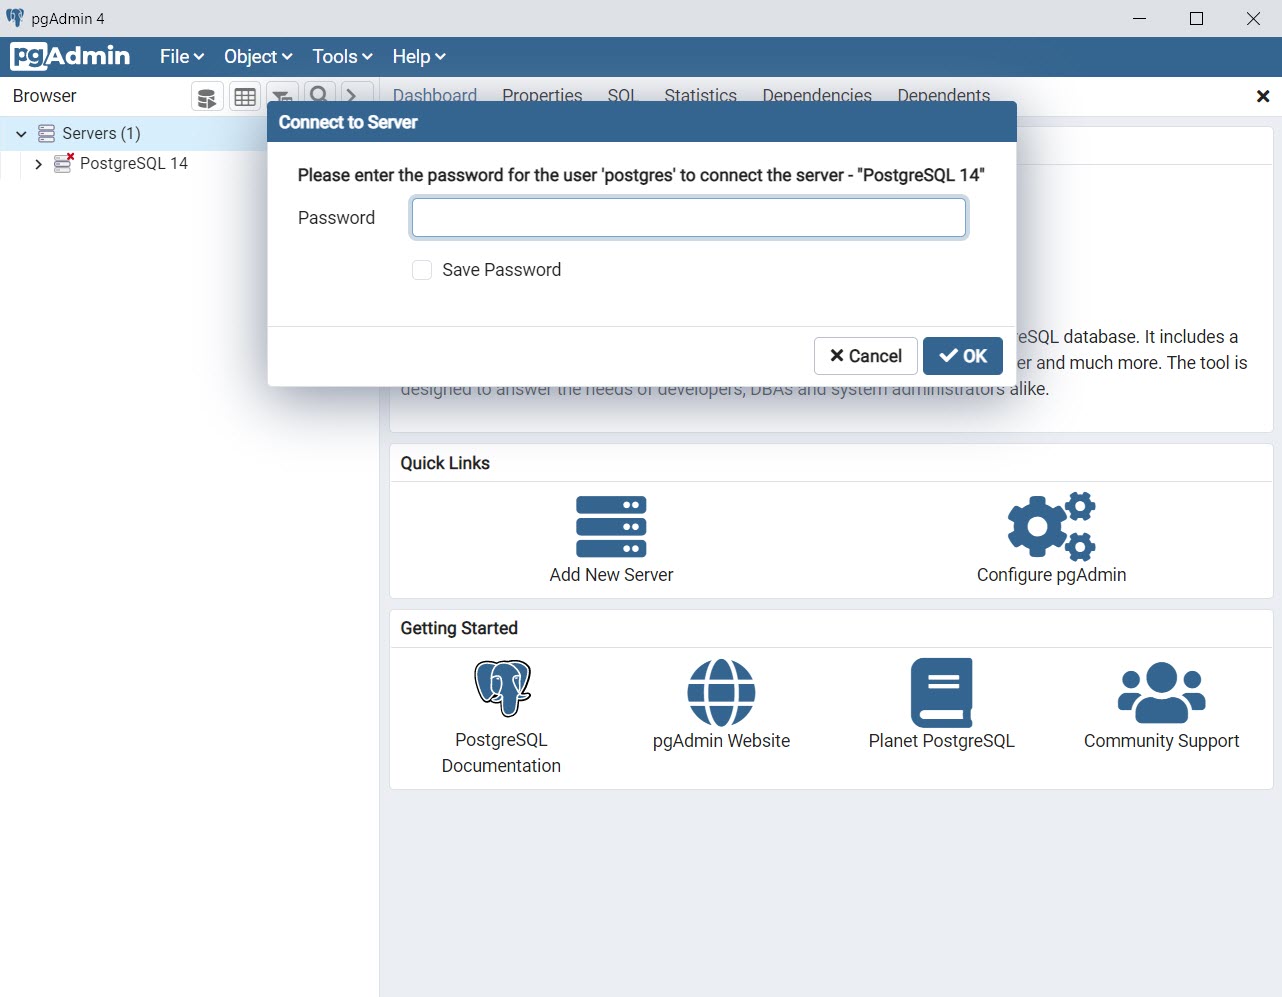
Expand Servers to view currently installed Postgres 14 server.
Enter a password and click OK.
If new server does not appear, right-click Servers, point to Create, and click Server.
The Create -Server dialog is displayed.
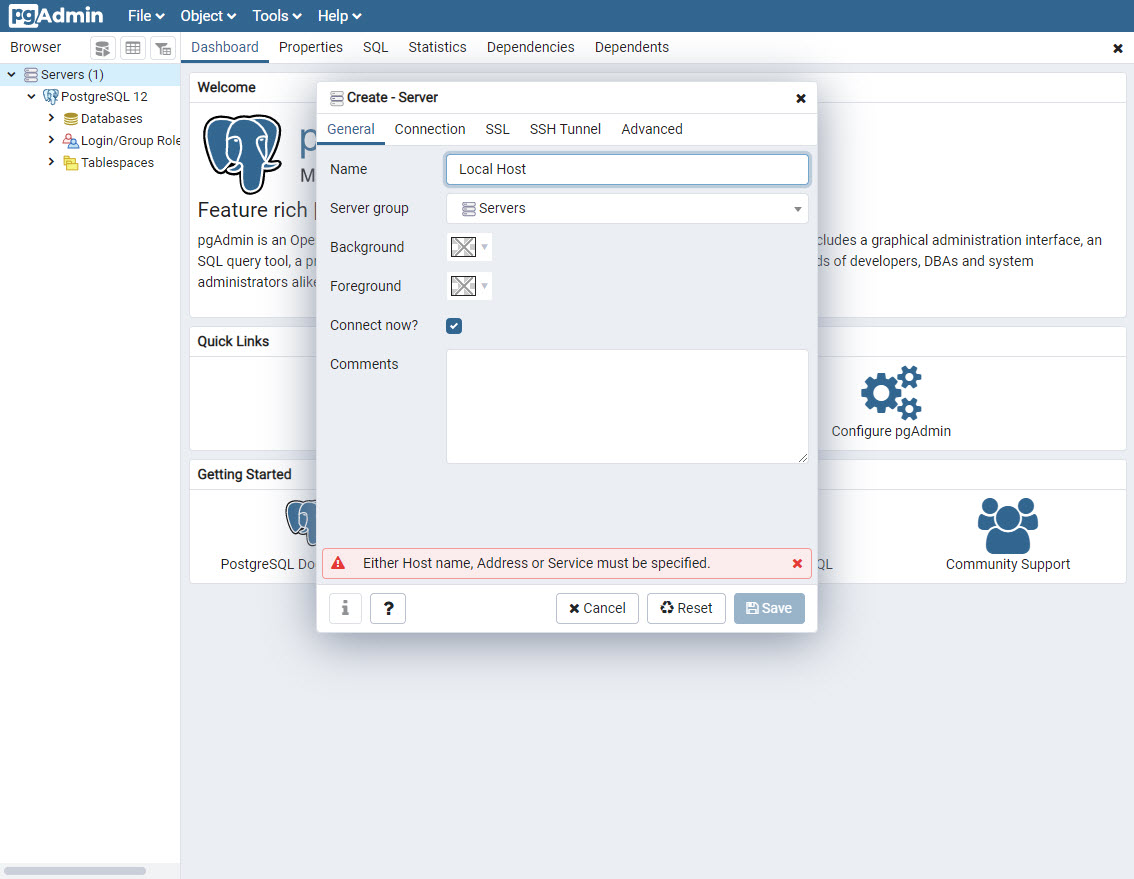
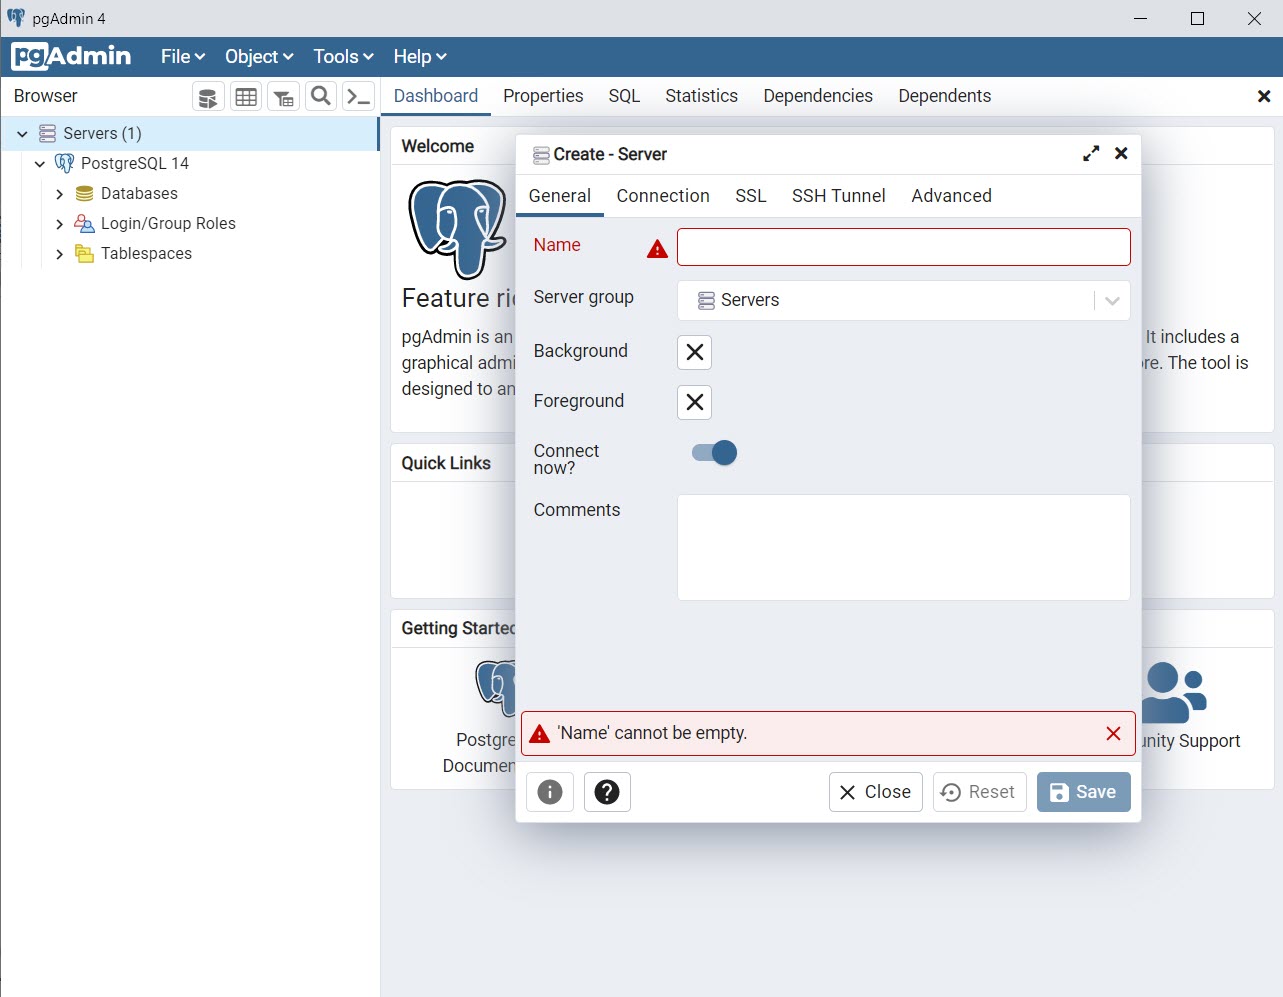
In the Name field, enter the name of the server. For example, Local Host.
Click the Connections tab, and enter the following details:
Host name/address- enter localhost or the DNS name of your remote computer.
Port- enter 5432 as the port number.
Maintenance database- enter a name for the maintenance database.
Username- enter a user name for the server.
Password- enter a password for the Postgres user.
Click Save.
Create a role with the name:
Expand Local Host, right-click Login/Group Roles, point to Create, and click Login/Group Role.
The Create - Login/Group Role dialog is displayed.
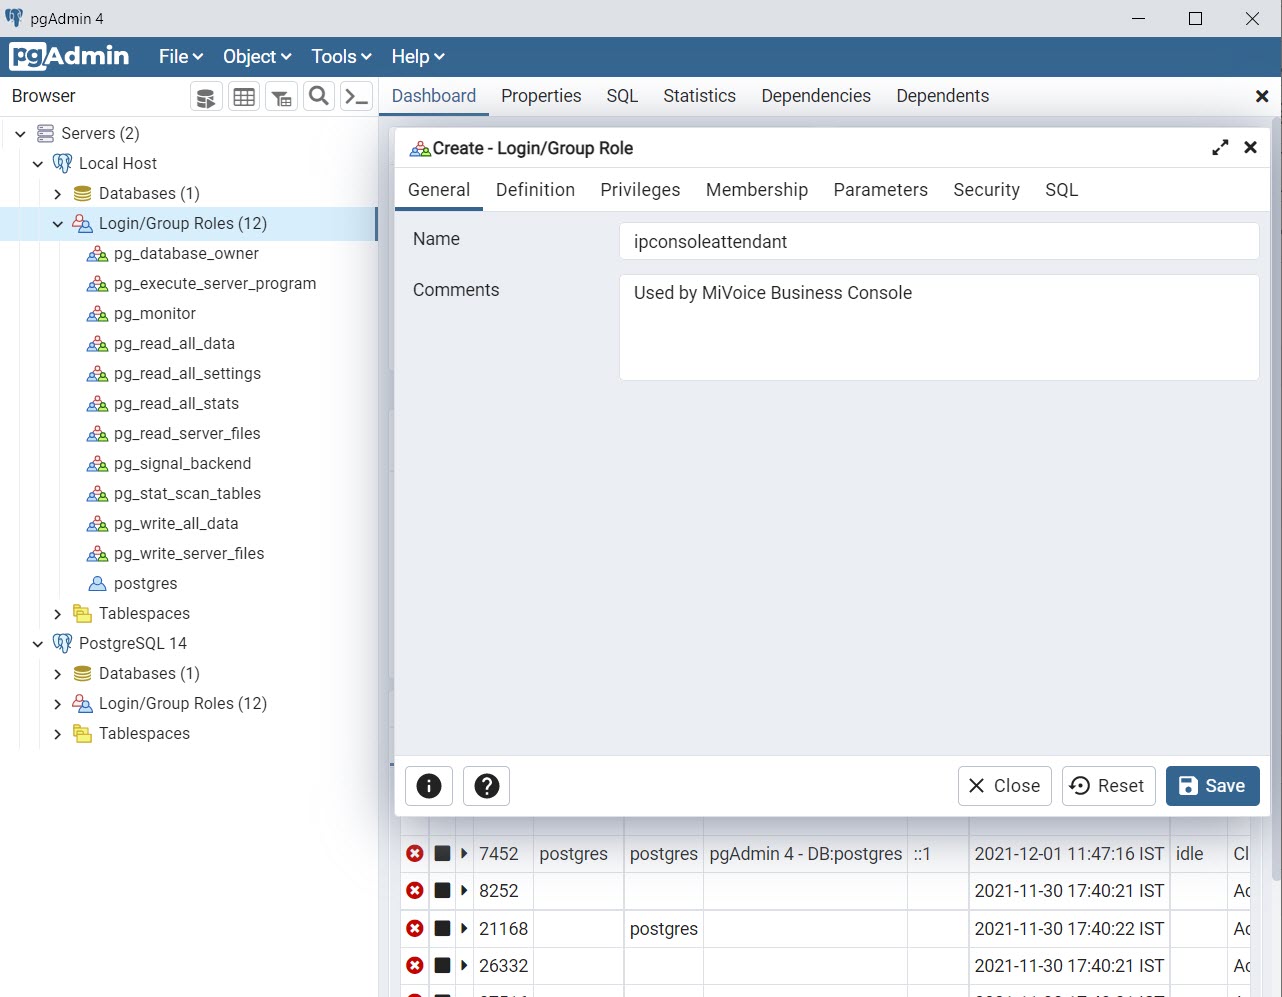
- In the Name field, enter ipconsoleattendant. Note: A new login role must be added before creating the database. The IP console attendant account is used by all consoles for logging in. The same login role can be simultaneously used by all MiVoice Business consoles.
- In the Comments field, enter comments for the role.
Click the Definition tab.
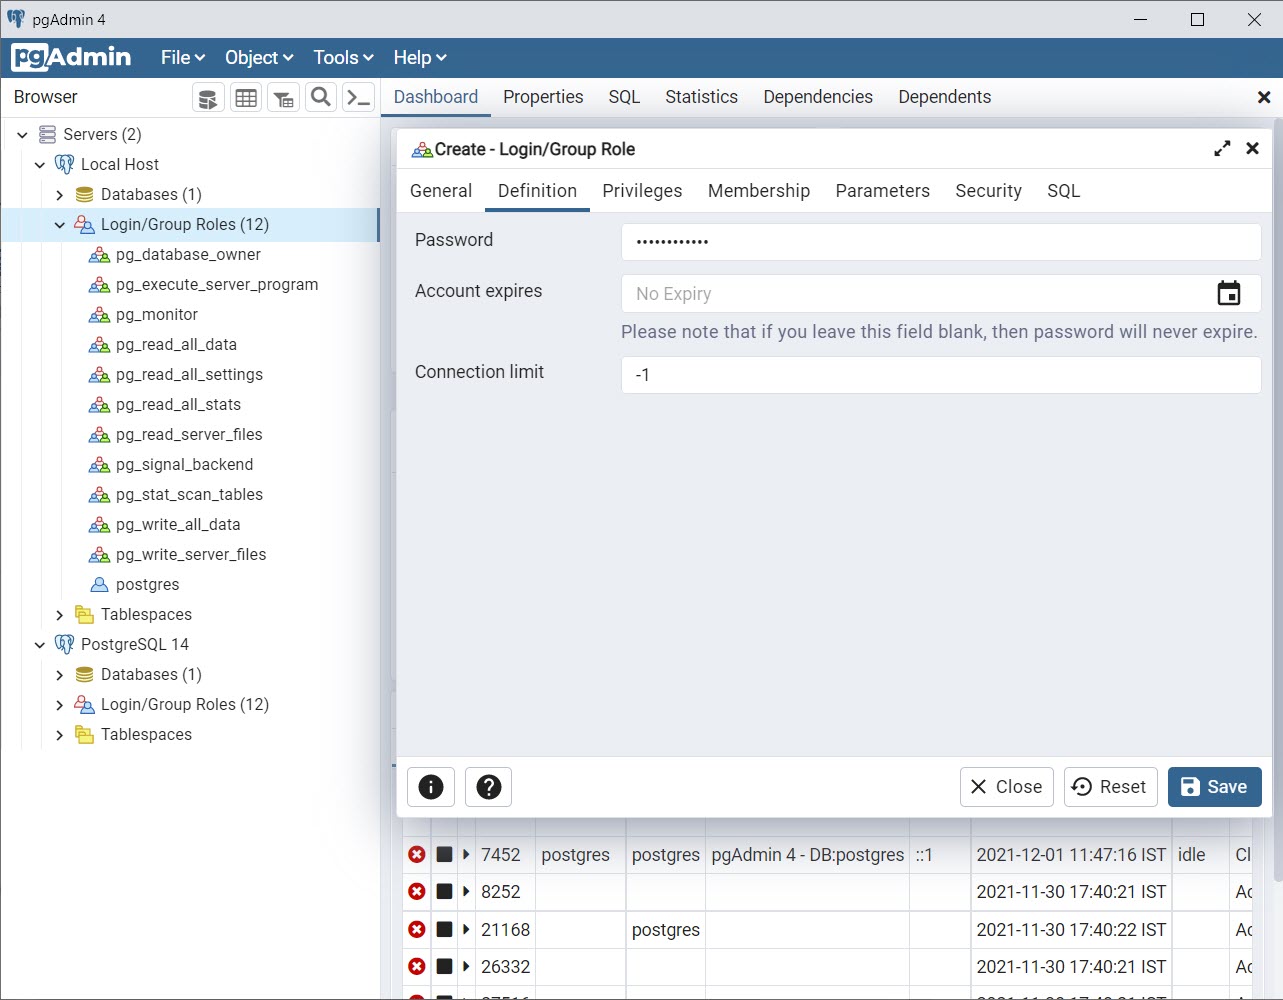
Enter password for the role.
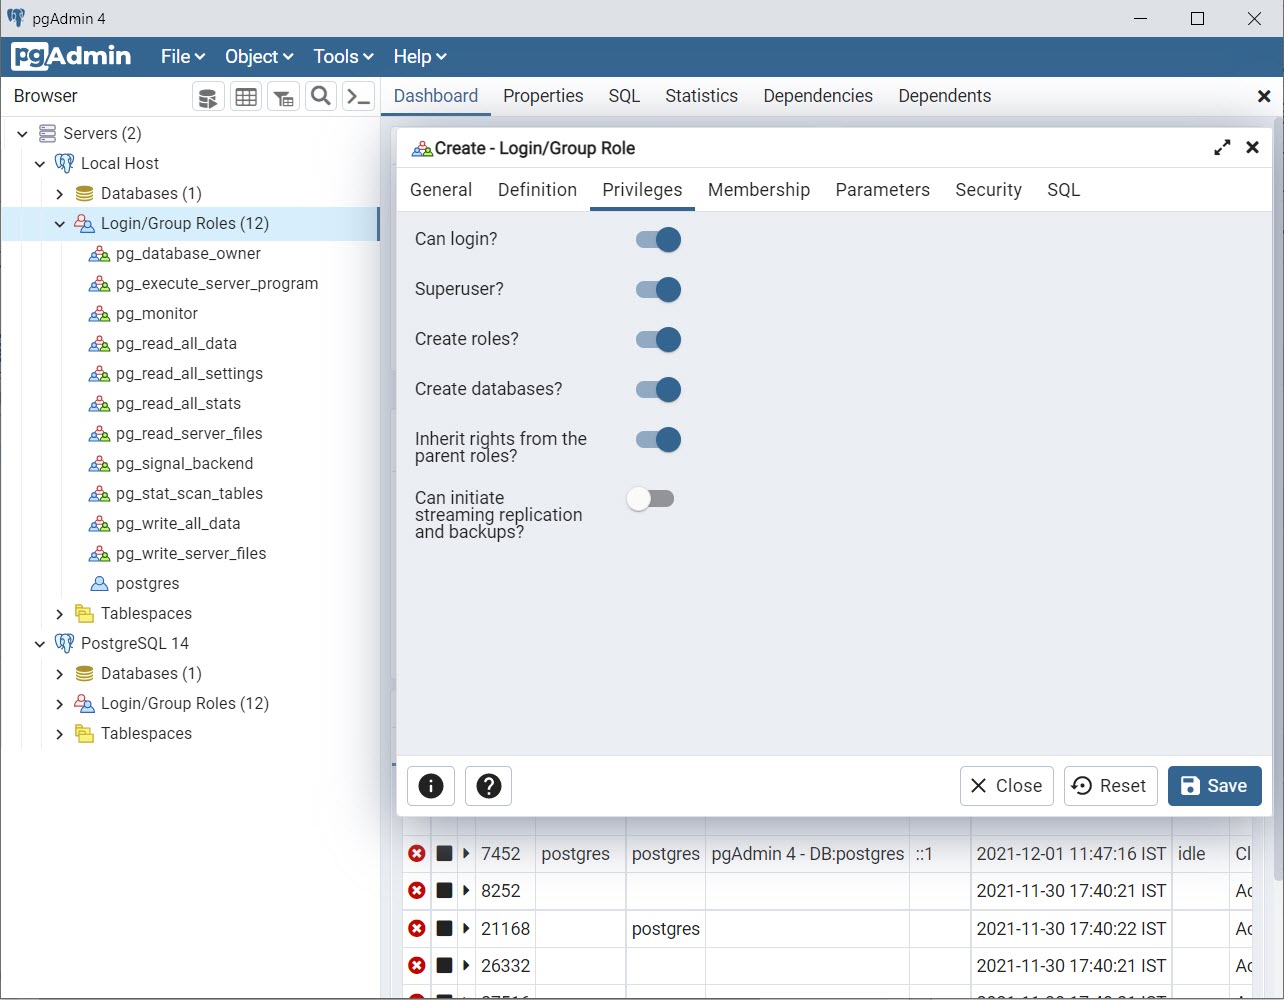
Note: This password is configured on each MiVoice Business Console on Call History option form. If it is an upgrade to a newer Postgres Server, it is recommended to reuse the existing IP console attendant password.Click Privileges tab and set Yes for all the privileges except Can initiate streaming replication and backups?
Click Save.
Create a database with the name IP_CONSOLE_5550:
Expand Local Host, right-click Databases, point to Create, and click Database.
The Create - Database dialog is displayed.
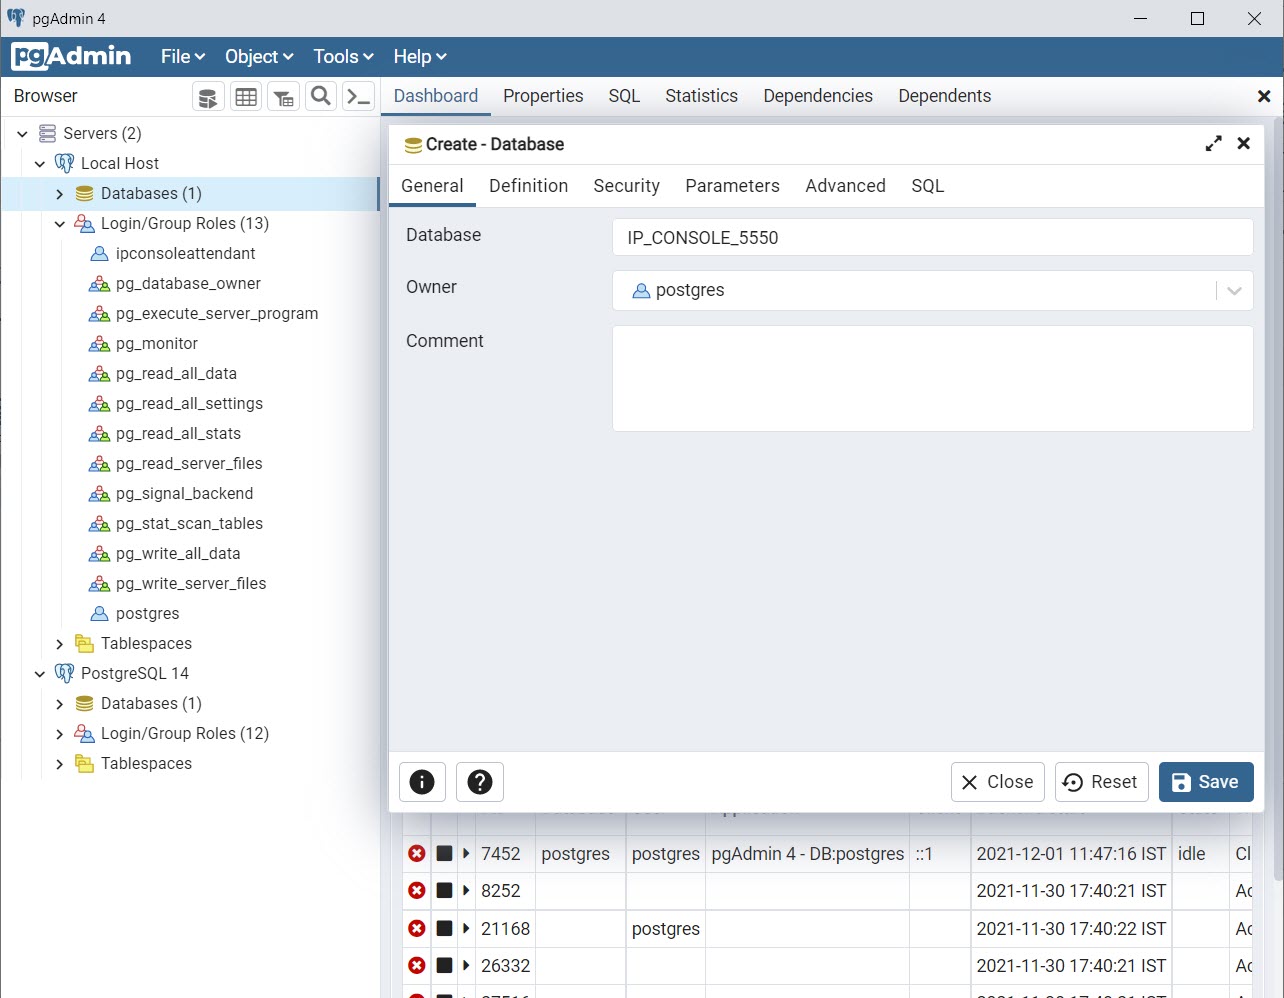
In the Name field, enter IP_CONSOLE_5550.
In the Comments field, enter comments for new database.
Note: Although 5550 IP Consoles are no longer supported, the name IP_CONSOLE_5550 is chosen so that the customers migrating from 5550 IP consoles to MiVoice Business consoles can retain their previous database entries.Click Save.
The database IP_CONSOLE_5550 is created.
Note: The call_history table is created by the first console that connects to the database.
Configure Postgres Network Parameters
The network parameters must be configured on pgAdmin application to provide access for MiVoice Business Consoles on the network.
To set Postgres network parameters:
Open the pg_hba.conf file in the Notepad application.
Note: Typically, the file is located in the C:\Program Files\PostgreSQL\14\data directory.Scroll to the bottom of the file and add the network parameters as shown in the following example.
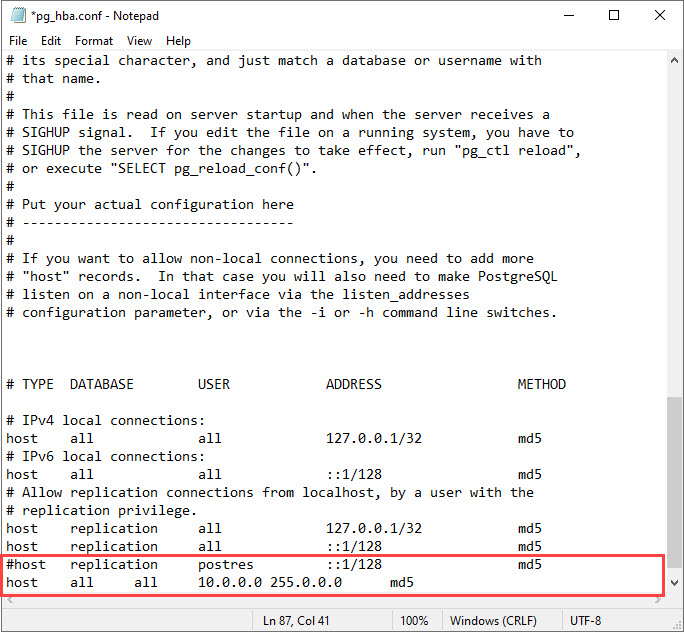
On the File menu, click Save, and close the file.
Configuring MiVoice Business Console
Call History feature must be enabled on MiVoice Business Consoles in the network. For detailed procedure, see Configure Call History.
Backup
To back up the call history database:
Open the pgAdmin 4 application.
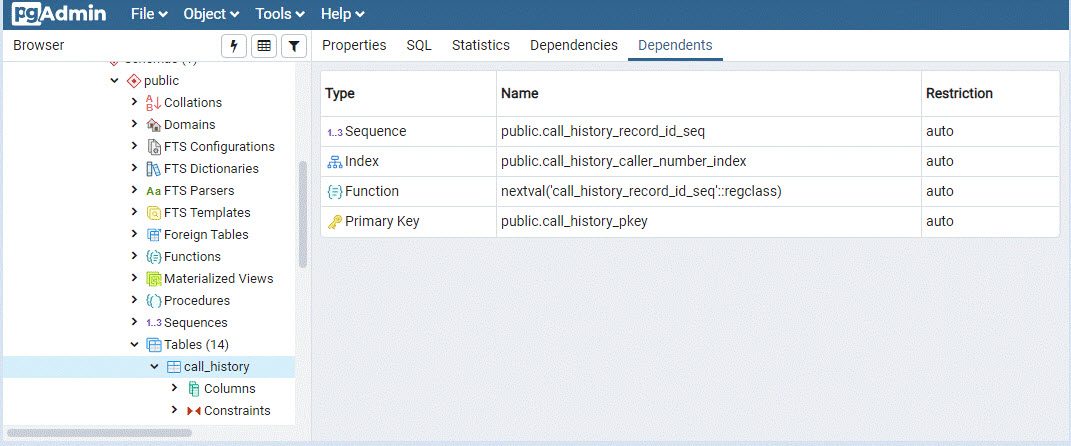
Using the left pane, navigate to Server > <Your Server Name (for example, Local Host) > Databases > IP_CONSOLE_5550 > Schemas > public > Tables > call_history.
On the Tools menu, click Backup.
The Backup dialog is displayed.
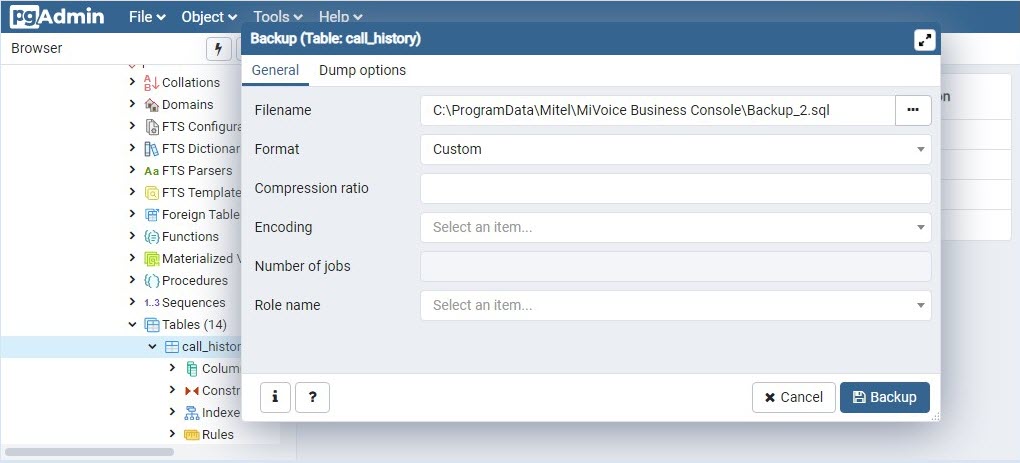
In the Filename field, enter a file name with the directory location where you want to save the backup file.
Click Backup.
Purge
You must periodically purge the Call History database to improve performance.
To purge call history database:
Open the pgAdmin 4 application.
Using the left pane, navigate to Server > <Your Server Name (for example, Local Host) > Databases > IP_CONSOLE_5550 > Schemas > public > Tables > call_history.
On the Tools menu, click Query Tool.
The Query Editor is displayed.
To retain only the last one year data, in the Query Editor, type delete from call_history where call_time < date(now()) – 365 and click
 to purge the call history database.
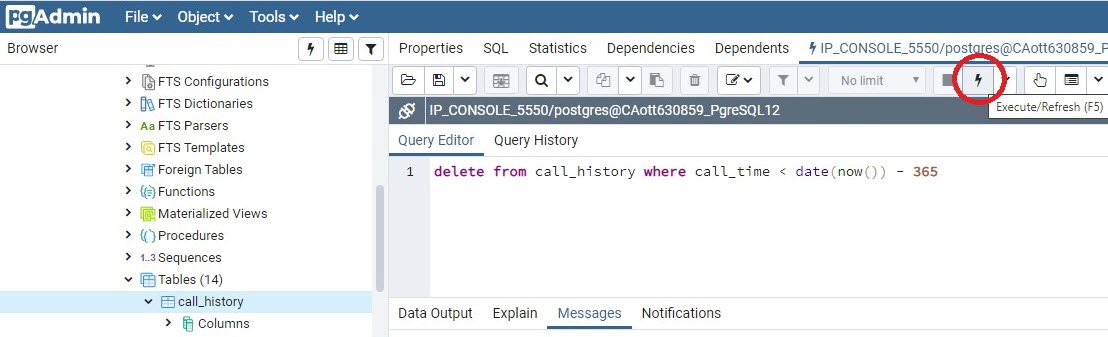
A dialog is displayed with the result.