After enabling the Unify Phone integration, the next step is to configure SIP connectivity. This process establishes a secure communication path between the Unify Phone service and the customer’s PBX system.
Starting the SIP connectivity configuration
-
Access the Integrations panel from the Account Information page or from the Integrations & Apps option.
-
Click the Available features drop-down list under the Unify Phone integration.
-
Click Complete Setup next to SIP Connectivity.
The SIP Connectivity Configuration page opens.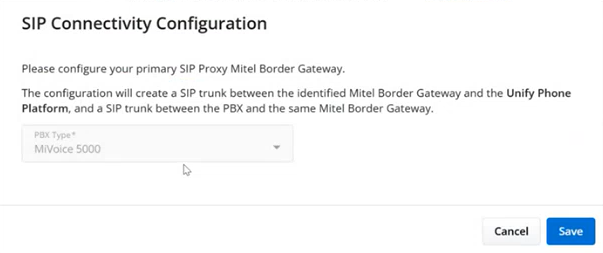
-
Select the appropriate PBX Type from the drop-down list.
If only one PBX type is available, it will be preselected and the field will be disabled.
-
Click Save.
Important: Once saved, the PBX type selection cannot be changed. To modify it, you have to remove the Unify Phone integration, re-add it to the account, and repeat the setup steps.
Adding and managing SIP trunks
After completing the initial SIP connectivity configuration, you can add SIP trunks to establish communication between Unify Phone and the customer’s PBX system. Youc an also edit, delete, sort, and search for trunks as needed.
- To add the first SIP trunk:
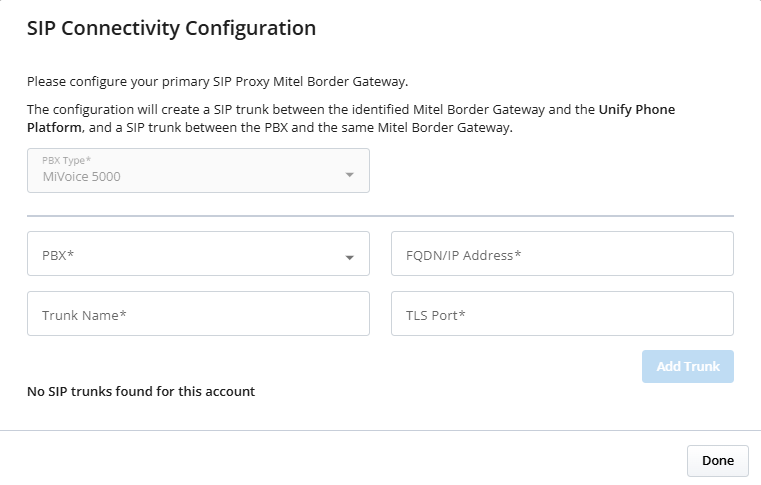
On the SIP Connectivity Configuration page, a form to add SIP trunk appears.
-
Select a PBX from the drop-down list of available PBXs.
-
In the FQDN/IP Address field, enter the Fully Qualified Domain Name (FQDN) or IP address of the selected PBX.Note: This field is auto-populated based on the selected PBX but can be manually overridden if needed.
-
In the Trunk Name field, enter the name of the SIP trunk.
-
In the TLS Port field, enter the port number on which the SIP trunk listens for incoming requests that use the TLS protocol.
-
Click Add Trunk.
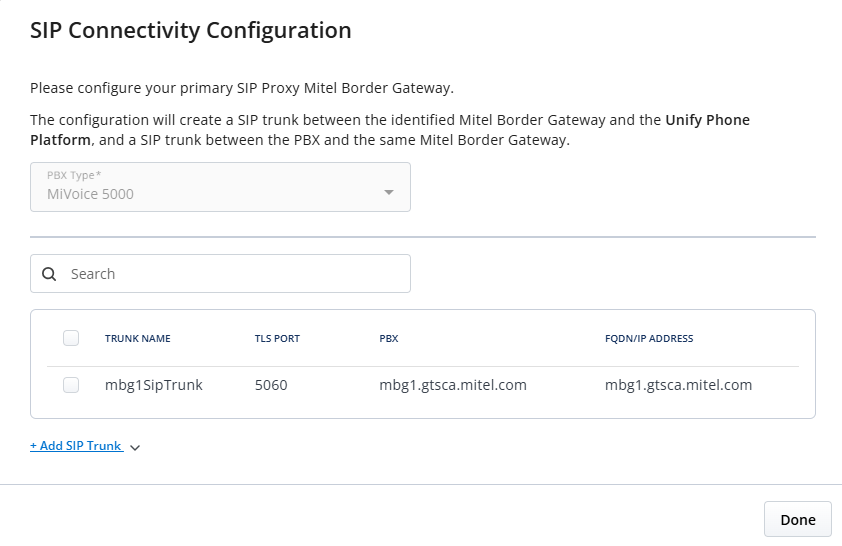
Name Description TRUNK NAME
The name of the SIP trunk
TLS PORT
The port number used for TLS-based incoming SIP requests
PBX
The PBX type followed by its IP address
FQDN/IP ADDRESS
The Fully Qualified Domain Name (FQDN) or IP address of the PBX
-
-
To add another SIP trunk:
-
Click +Add SIP trunk.
The Add SIP Trunk section expands, displaying a blank form. -
Enter the new SIP trunk details as described above.
-
Click Add Trunk.
-
-
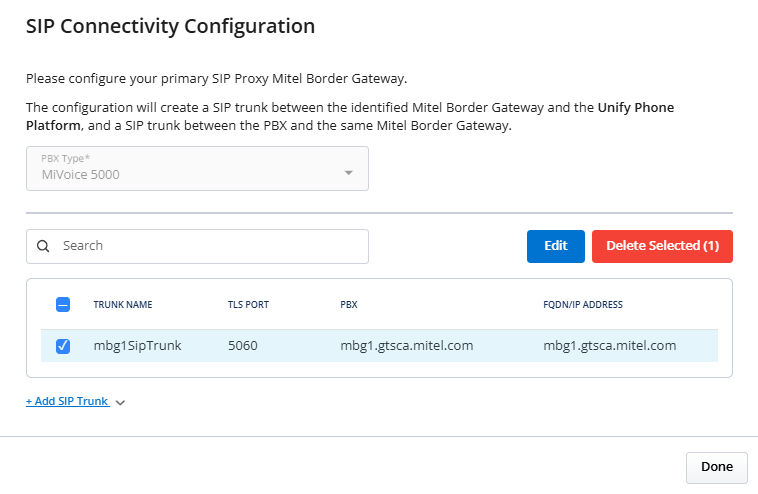
To edit an existing SIP trunk:
-
Select the checkbox associated with the SIP trunk you want to edit.
-
Click the Edit button that appears.The Edit SIP Trunk section appears and expands, displaying the current trunk details pre-filled for editing.
-
Modify the fields as needed.
-
Click Save to apply changes or Cancel to discard them.
-
-
To delete one or more SIP trunks:
-
Select the checkbox(es) next to the SIP trunks(s) you want to delete.
-
Click the Delete Selected button that appears.
-
Confirm the deletion by clicking Delete or cancel the action by clicking Cancel.
-
-
To sort the SIP trunks:
-
Click a column header in the SIP trunks table to sort the entries by that column’s values in ascending order.
-
Click the same header again to toggle the sort to descending order.
An upward-pointing arrow (
 ) next to a column header
indicates ascending order. An downward-pointing arrow (
) next to a column header
indicates ascending order. An downward-pointing arrow ( ) next to a
column header indicates descending order.
) next to a
column header indicates descending order. -
-
To search for a SIP Trunk:
-
In the Search bar, type the TRUNK NAME, TLS PORT, PBX or FQDN/IP ADDRESS of the SIP trunk you are searching for.
The table will display a list of matching trunks as you type.
-
-
To finalize the configuration and close the SIP Connectivity Configuration page, click Done.