Installing Subrack A
Note: Ensure that the front and rear air plates are mounted.
For more information, see Mounting the Front Air Plate in Subrack A and Mounting Rear Air Plate in Subrack A.
Figure 1. Installing Subrack A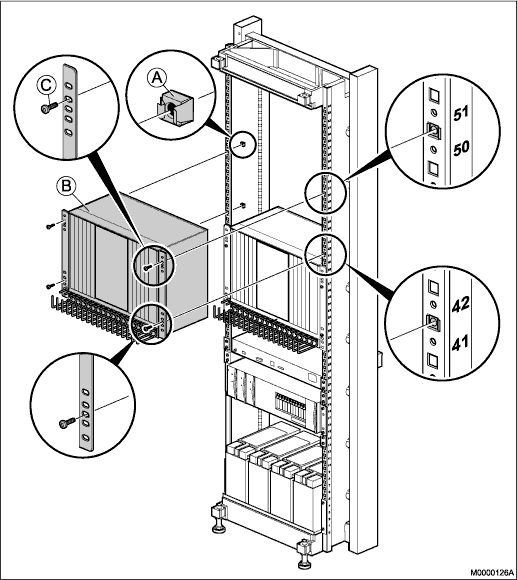
To install subrack A, perform the following steps:
- Mount four captive nuts (A) (see Installing Supporting Captive Nuts) according to the number positions shown.
- Use the screws (C) to fasten the subrack A to the captive nuts in the cabinet.
Ensure that no gap is left between subracks A, and B.
Parts from this mounting set are used at a later installation stage, leave the remaining parts at hand.
↑