Configure MiVoice Office 400 on Virtual Appliance
This topic explains how to configure a MiVoice Office 400 PBX on a Virtual Appliance (VA) (VMware or Hyper-V) (with embedded Gateway) to integrate with CloudLink. For detailed PBX instructions see, MiVoice Office 400 technical documentation.
Use the instructions in the sections below in this specific order to ensure that your MiVoice Office 400 is correctly integrated with CloudLink. Leave all other settings (not specifically mentioned in these sections) set to the default value.
Install CloudLink Gateway Application
Install the CloudLink Gateway application using MSL Server-Manager.
-
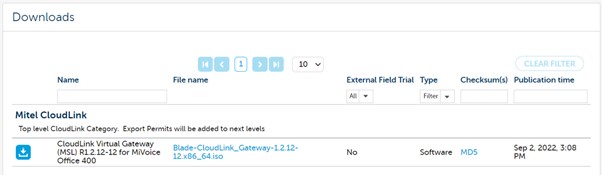
Download the ISO file from MiAccess Portal under Software Download Center option.
-
Copy the ISO file to the storage of your hypervisor (VMware or HyperV).Note: It is recommended that the Connect at power on settings is on. If the Connect at power on is not on, the admin must mount the virtual CD/DVD drive in order to display the ISO file in MSL Server-Manager.
Browse to MSL Server-Manager (https://<IP-Address>:8443).
-
Log in by entering admin as User name and admin-password as password.
The Mitel Standard Linux window is displayed.

-
Navigate to ServiceLink > Blades.
CloudLink Gateway is displayed in the table.
-
Click Install and accept the licence agreement.
-
Remove CD-ROM ISO-image.
-
Click Clear this report.
The CloudLink Gateway downloads the required components from the cloud in the background.
Configure CloudLink Gateway
-
In the MSL Server-Manager, navigate to Applications > CloudLink Gateway.
-
Click CloudLink portal.
You are redirected to the CloudLink portal.
For more information about onboarding customers see, Onboard Customers Using Navigation Bar or a Single Page.