After you create a customer account in the Accounts console, you can begin the deployment of the CloudLink Gateway to associate the Gateway with the customer account, configure and connect a PBX, and to deploy a CloudLink application for all the users.
Onboarding the Gateway
To onboard a gateway, that is, to properly associate a gateway with a new customer account on the CloudLink platform, the Mitel Partner or the Account Admin must access the Mitel Administration for the first time as indicated below:
- For standalone platforms, which have an external gateway, access Mitel Administration:
- by entering the IP address of the gateway appliance in a supported browser.
- by connecting a supported browser to the gateway at http://cloudlink.local/.
Note: mDNS must be supported in your system in order to access the gateway using http://cloudlink.local/. For Windows, this support can be downloaded and installed with Bonjour Print Services.You must do this from a computing device located on the same LAN subnet as the CloudLink Gateway. For more information, see Access the CloudLink Gateway. After successful login, the gateway will redirect you to Mitel Administration.
- For SMBC platforms, which have an embedded gateway, access the Mitel Administration from the SMB Controller Manager. Log into MSL Server on the SMBC. Select Blades > Install > follow the steps. For more information, see Access the CloudLink Gateway. After successful login, the gateway will redirect you to the Mitel Administration.
The gateway (on a standalone platform or SMBC platform) will be properly associated with the customer account when you complete Step 2 in Configuring the CloudLink Gateway.
Accessing the Mitel Administration
After you have associated an account with a gateway, you can access the Mitel Administration to manage customers in the following different ways:
- By connecting to the gateway at http://cloudlink.local/ from a computing device located on the same LAN subnet as the CloudLink Gateway. (for standalone platforms only)
- By entering the IP address of the gateway appliance in a supported browser from a computing device located on the same LAN subnet as the CloudLink Gateway. (for standalone platforms only)
- By accessing the Application configuration link in the SMB Controller Manager (for SMBC platforms only)
- By accessing Mitel MiAccess at https://connect.mitel.com/, and then clicking Mitel Administration from the left navigation panel.
- By accessing the Mitel Administration directly at https://accounts.mitel.io/.
Adding CloudLink Gateway Integration
After logging in to the Mitel Administration, add the CloudLink Gateway integration to a customer account by performing the steps mentioned in Adding an integration to a customer account.
After you have added CloudLink Gateway integration to the customer account, CloudLink Gateway will be listed in the Integrations panel and a status message Configure Gateway will appear indicating that you need to configure the gateway to continue with the integration process.

- the subsequent step that needs to be done to configure the gateway.
- an error message, warning that there is an issue with the gateway.
- an alert message, notifying that there is a software update available.

Status Messages
The following are the common status messages that indicate the next step to be completed for configuring the CloudLink Gateway.
- No gateway detected
- Configure gateway
- Add PBX (for standalone platforms) or Sync PBX (for SMBC platforms)
- Connect the PBX
- Deployment
Onboarding the CloudLink Gateway
After enabling the CloudLink Gateway integration in Mitel Administration, you must add a gateway to the customer account, configure that gateway, and sync a PBX to the account to deploy CloudLink applications to the users in the account. To do this, complete the following steps:
- From the Integrations section of the Account Information page, click Add Gateway.

The Gateway page opens.
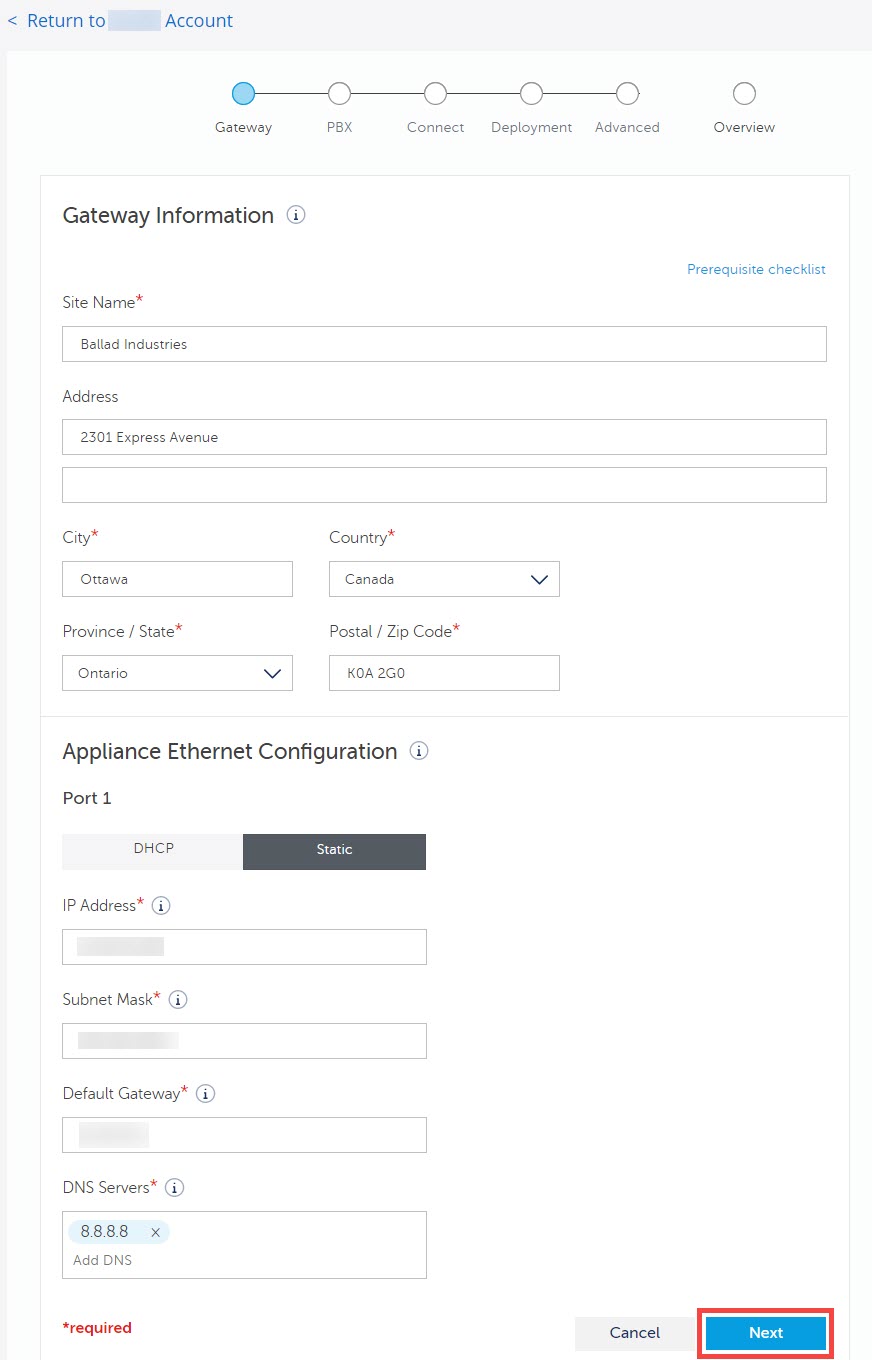
Note: Any time during the configuration process, click the Return to XXXX (Account Name) option to return to the previous page (Integrations & Applications page or Account Information page). - In the Gateway page, within the Gateway Information dialog, enter the site name, the complete address for the physical location of the PBX if it is different from your business address (populated by default), and configure the Ethernet ports on the external Gateway appliance or on the virtual machine. For more information about entering these details, see Configure the Customer Site.
After entering these details, click Next to configure and register the gateway.
The Accounts console tries to establish a connection with the CloudLink Gateway. When a successful connection is established, the CloudLink Gateway is linked to the customer account, a pop-up message Successfully updated site is displayed, and the following page opens depending upon the platform in which you are deploying the gateway.
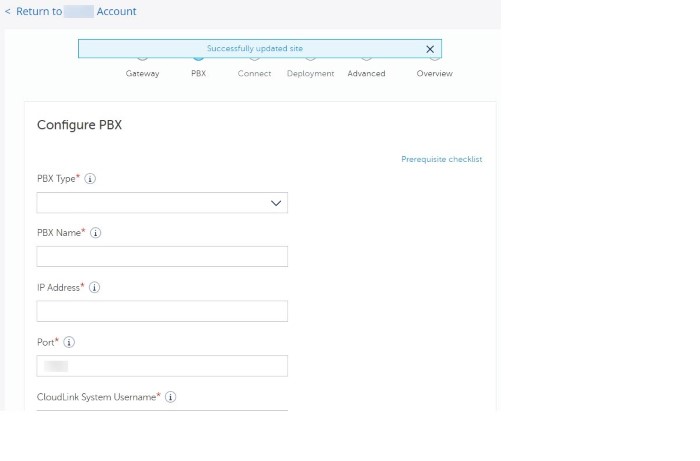
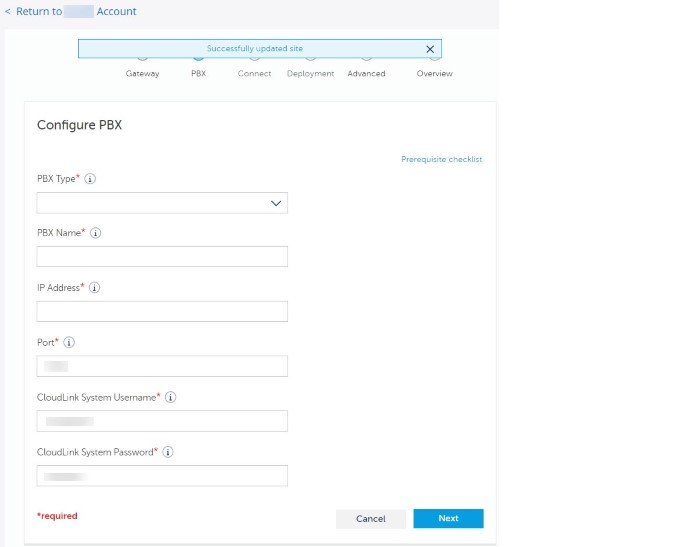
- For standalone platforms, the PBX page opens displaying the Configure PBX dialog. Proceed to Step 3 to provide the PBX details.
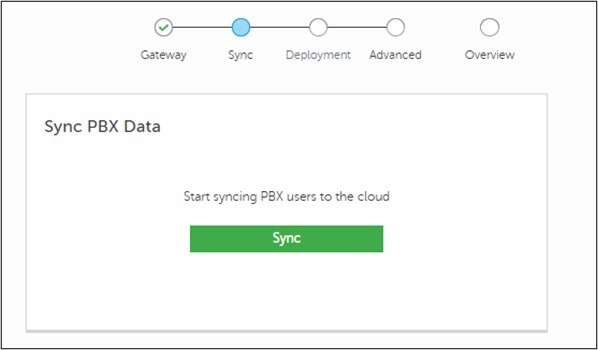
- For SMBC platforms, the Sync page opens displaying the Sync PBX Data dialog. Skip Step 3 and proceed to Step 4 to continue the onboarding process.
- For standalone platforms, the PBX page opens displaying the Configure PBX dialog. Proceed to Step 3 to provide the PBX details.
- To add and configure the PBX for your account, enter the information specific to your PBX in the fields provided. For more information about entering the PBX details, see Enter PBX Information. After entering all the necessary details, click Next.
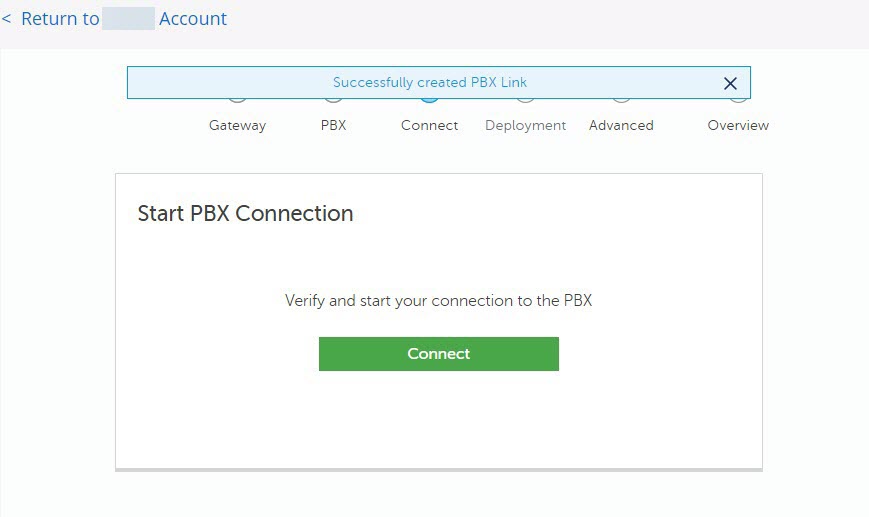
When the configuration is successful, a pop-up message Successfully created PBX Link is displayed, and the Connect page opens displaying the Start PBX Connection dialog.
- To connect or sync the PBX with the customer account, click Connect. The Accounts console tries to establish a connection with the PBX. When a successful connection is established, the PBX Connected dialog is displayed, along with the Connection successful message. For more details, see Connect or Sync the PBX.
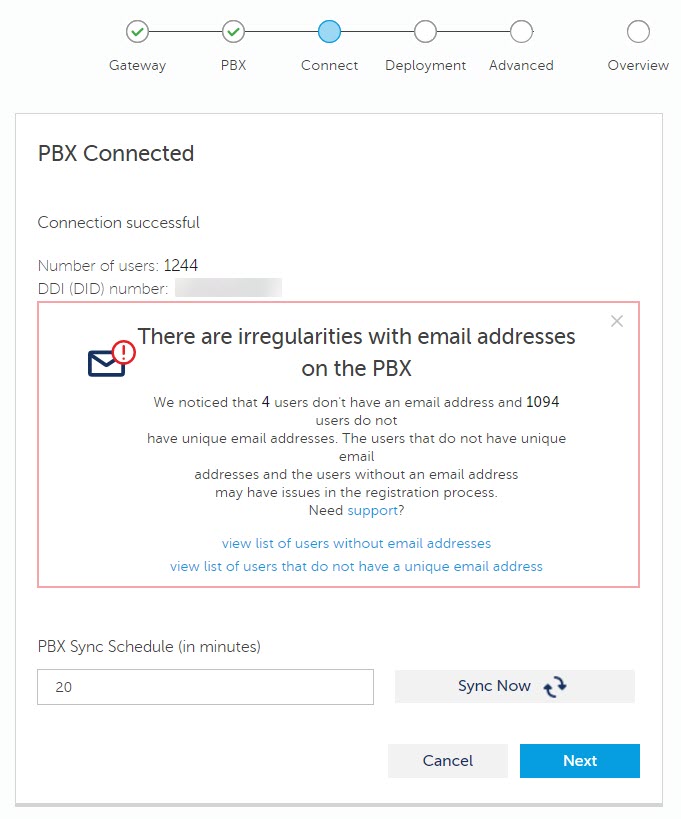 By default, the synchronization occurs every 20 minutes. You can modify the sync interval by entering the number of minutes in the PBX Sync Schedule field.Note:If there is a warning regarding missing email addresses of users, make all the necessary corrections and modifications on the PBX. Then click Sync Now to manually trigger the synchronization without waiting for the next scheduled run. Once the warning messages are resolved, click Next. The Deployment page opens.
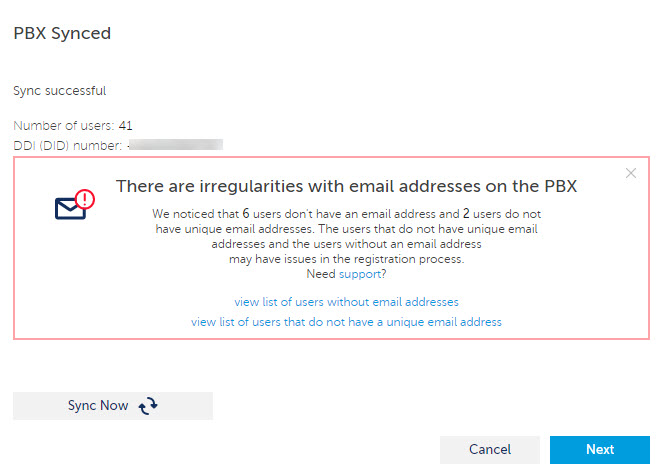
For SMBC platforms, you can not modify the sync interval. Following PBX Synced dialog box is displayed.
Do not click Sync Now immediately after you have connected the PBX. By default, automatic synchronization is initiated.
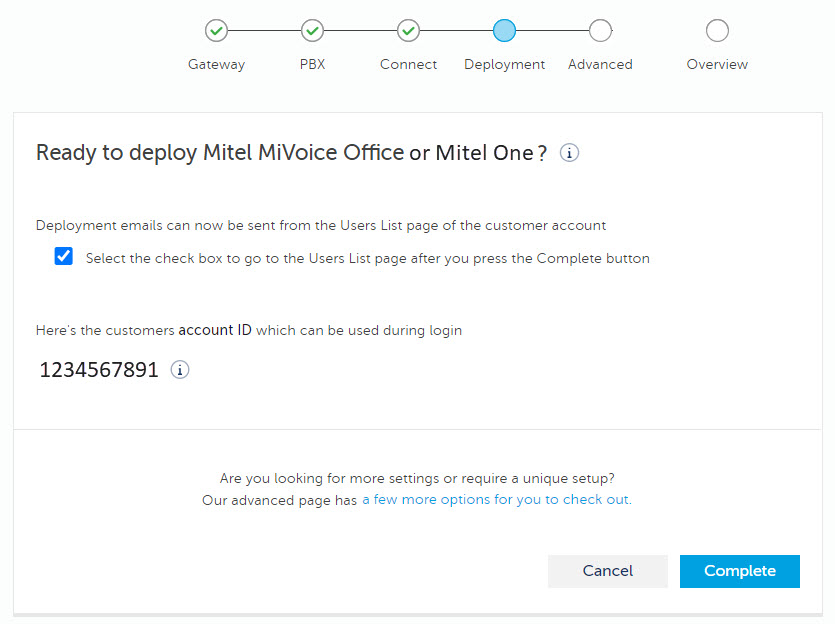
- (Optional ) You can use the Deployment page if you want to deploy the CloudLink application associated with your PBX by sending deployment emails to the imported users so they can register their account and receive introductory information about the application.
Sending deployment emails can be done any time from the Users page in the Mitel Administration. To navigate to the Users page, select the Select the check box to go to the Users List page after you press the Complete button check box and click Complete.
If you click Complete without selecting the check box, you will be taken to the previous page in Mitel Administration. You can then access the Users page by clicking the Users option displayed in the navigation menu in the left side of the Accounts Console.
In the Users page:
- To send deployment email to all the users in the customer account at once, click the Manage option and click Send Mitel Office deployment emails to all (for MiVoice Office 400).
- To send deployment email to selected users, select the users from the Users page, click the Manage option, and click Send Mitel Office deployment emails (for MiVoice Office 400).
- After successful configuration of the gateway, CloudLink Gateway will be listed in the Integrations panel as shown below.

If an error message is displayed, see Troubleshoot Errors for information about resolving errors. Click the
 icon to view or modify the configuration.
Deleting an Existing Integration
Use the following steps to delete the CloudLink Gateway integration for a customer account.
- Depending on the stage of integration do either of the following:
- For incomplete integration click the Delete icon (
 ) associated with CloudLink Gateway from the Integrations section of the Account Information page.
 - For complete integration disable the toggle button associated with CloudLink Gateway from the Integrations section of the Account Information page.
) associated with CloudLink Gateway. A Revert To Factory Default? panel opens.
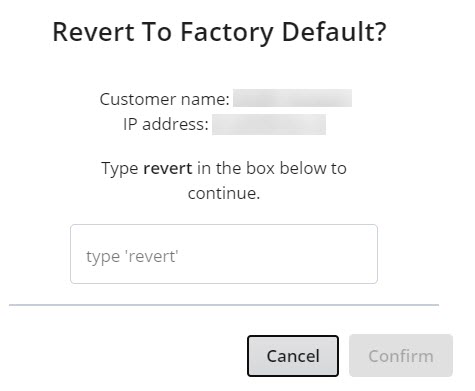 Note: This panel is displayed only if you are deleting the integration in a customer account that has a physical gateway appliance onboarded. This panel will not be displayed if you onboard a virtual gateway appliance.
 - For incomplete integration click the Delete icon (
- Type revert in the field provided and click Confirm. The CloudLink Gateway integration is deleted from the customer account and the gateway will be reset.