Message Features
Individual and Group Messages
The message feature in the Mitel One web application allows you to start and respond to individual and group conversations to communicate with others. After a message is initiated, participants cannot be removed from or added to the conversation. To add others to a conversation, create a new message and add all of the contacts you want to message to. There is no limit to the number of contacts that can be added to a new group message.
Message History
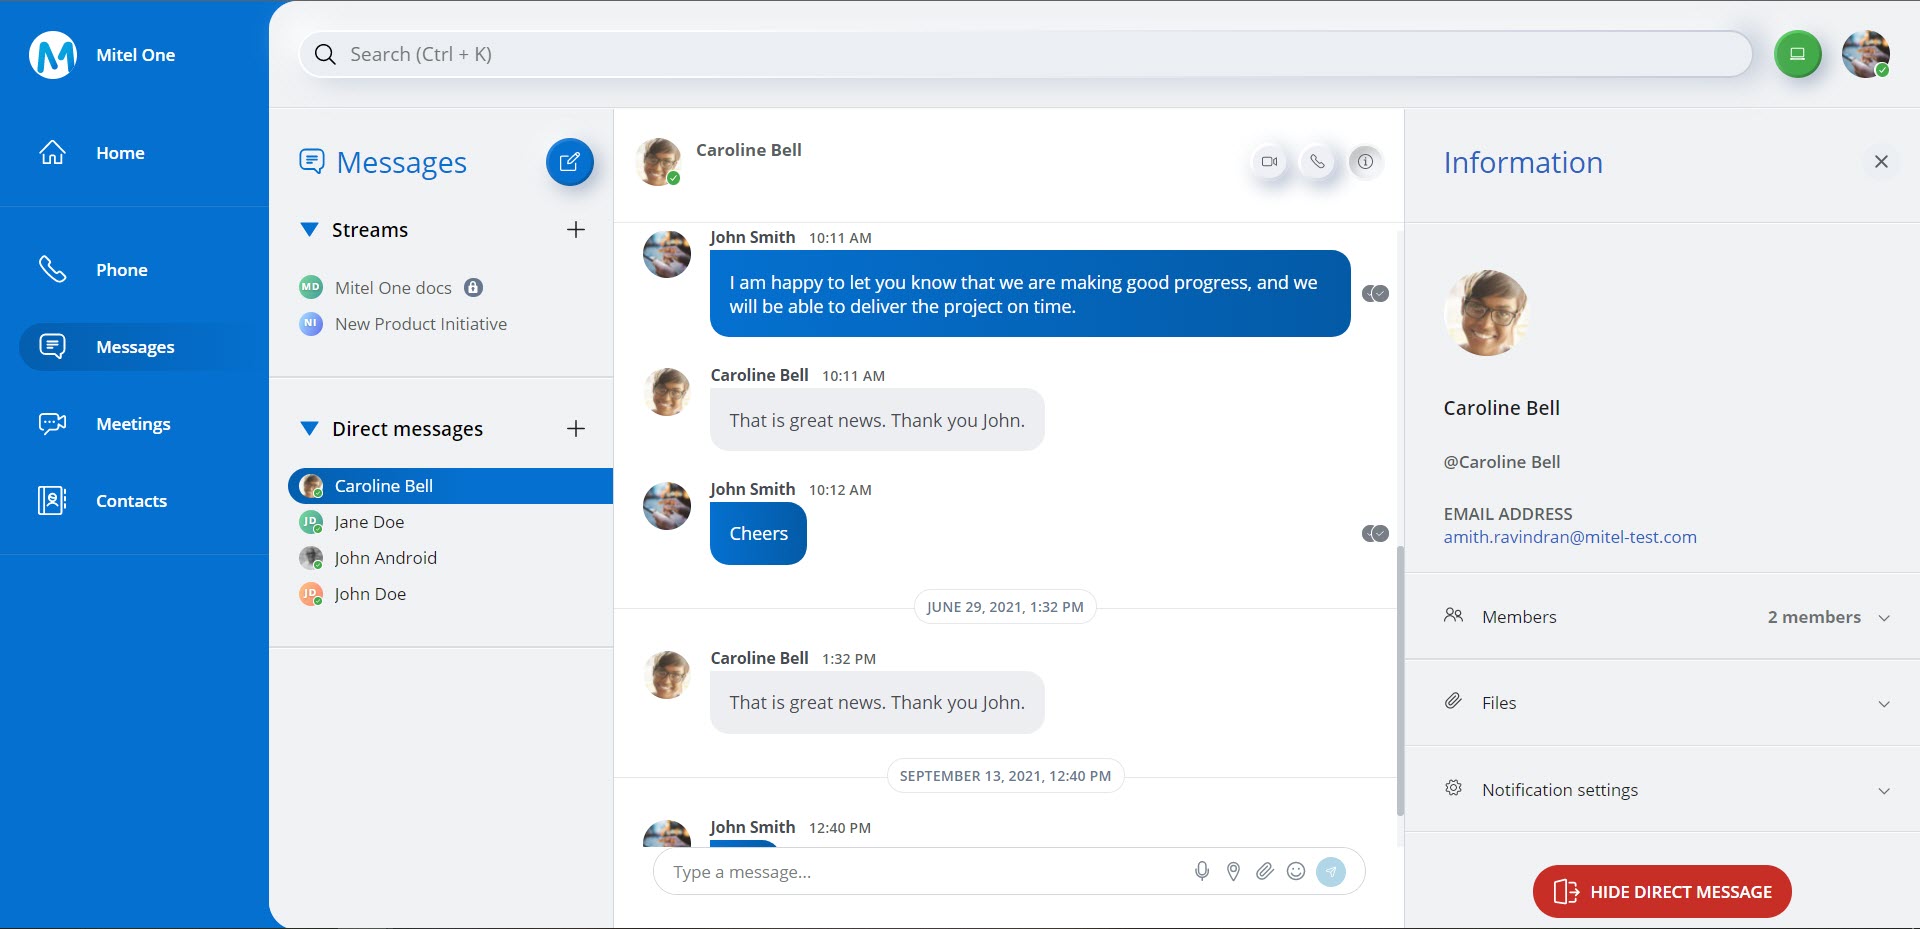
The Messages screen displays all existing conversations on the left-half of the screen and the selected conversation thread on the right-half of the screen. The conversations are listed in alphabetical order of senders' names. The Streams list displays the list of Streams you are added to whereas the Direct Messages list displays a list of the individual and group contacts with whom you have interacted via a message.
Selecting a Stream or a direct message in the list opens the messaging window for that Stream, or the individual or group contact, displaying messages from previous conversations including the time of day and a top banner with the date for each message.
When viewing a Stream, the name of the Stream and the number of members in the Stream are displayed at the top of the messaging window. When viewing a group message, the names of the first few participants are displayed at the top of the messaging window. To view the list of all participants for a Stream or a group message, click the ![]() icon, and from the Information panel that opens, click Members.
icon, and from the Information panel that opens, click Members.
In the Streams list, the messages history shows all Streams of which you are a participant. However, in the Direct Messages list, the messages history shows only the recent 10 messages. Earlier messages are auto hidden every 96 hours after the last message was sent to or received. The message will reappear if you receive another message from the participant of that conversation. A user can also access a hidden message by initiating a direct message with the contact.
Message Typing Indications
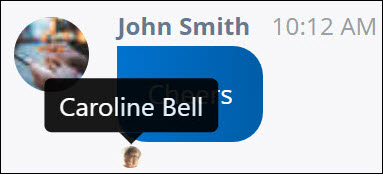
During an individual or group message, when a participant begins typing, the application provides a visual indication (![]() ) to the other participants that this person is typing. This indication appears every 10 seconds while the typing continues. If typing is stopped for more than 10 seconds, the indication no longer appears. Also, if the chat screen is open the application provides a visual indication below the Type a message... field to the other participants that this person is typing. When a participant, while typing one message clicks away to another message without sending the first one, the message avatar of the intended recipient of the unsent changes to
) to the other participants that this person is typing. This indication appears every 10 seconds while the typing continues. If typing is stopped for more than 10 seconds, the indication no longer appears. Also, if the chat screen is open the application provides a visual indication below the Type a message... field to the other participants that this person is typing. When a participant, while typing one message clicks away to another message without sending the first one, the message avatar of the intended recipient of the unsent changes to ![]() icon.
icon.
Read Receipts
The read receipts in the application indicate who has read your message in real-time. A miniature version of the contacts' avatar is displayed right below a message and the icon ![]() associated with the contact name indicates that they have read the message. Hover over the mini avatar to see the contacts' name. If the
associated with the contact name indicates that they have read the message. Hover over the mini avatar to see the contacts' name. If the ![]() icon is displayed, it indicates that the message is delivered but not read by the recipient.
icon is displayed, it indicates that the message is delivered but not read by the recipient.
Browse a Message
To browse and access a message, do the following:
- Click the Messages icon (
 ) in the navigation menu of the application. The Messages screen opens.
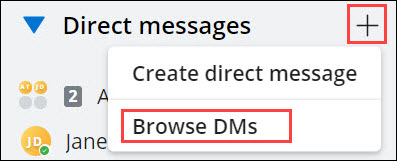
 - Access the Browse DMs option by doing either of the following:
- Click the
 icon in the Direct messages section. A panel opens displaying the Browse DMs option.
- Hover over a message, and click the More icon (
 ). A panel opens displaying the Browse DMs option.
- Click the
- Click Browse DMs.
- The All Direct Messages panel opens displaying a list of all the existing messages in the chronological order.
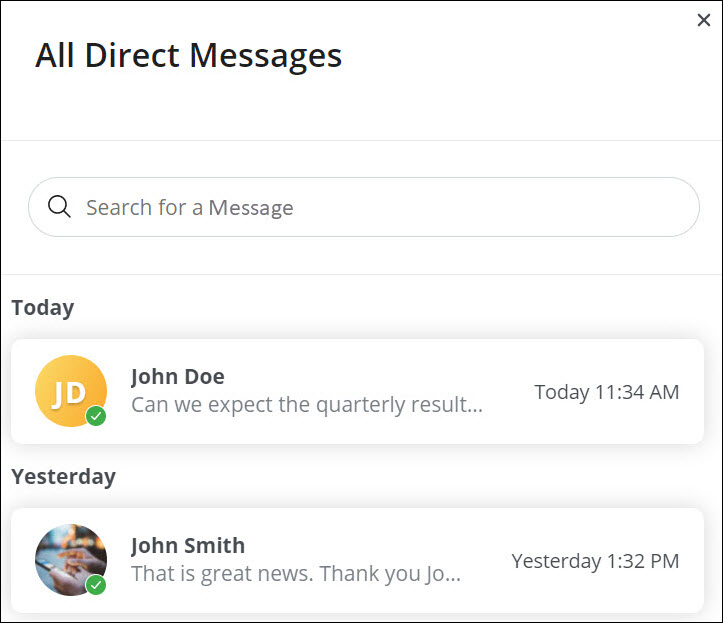
- Click the message you want to access. You can also search for the message you want to access by typing the name of the contact in the Search for a Message field. The search field displays a list of messages (direct and group) for which the contact is a part of, that match the letters you type. Click the message you want to join.
Start a Meeting while Messaging
You can start a meeting with a contact or a group during a message conversation by clicking the meeting icon (![]() ) in the top-right corner of the message screen. The meeting pop-up window opens, and a new meeting session is created with the contacts. A Join now action card is displayed in the message for the contacts to join the meeting.
) in the top-right corner of the message screen. The meeting pop-up window opens, and a new meeting session is created with the contacts. A Join now action card is displayed in the message for the contacts to join the meeting.
Place a Call while Messaging
During an message conversation, click the phone icon (![]() ) at the top-right of the messages screen to call that person.
) at the top-right of the messages screen to call that person.
When you are in a group message, there is no option to call the group. However, you can create a group on the FAVORITES widget to include multiple contacts and then call that group. To learn how to create a group, see Manage User Groups.
Information Panel
The Information panel in the Messages screen displays the following information.
- For Streams
The Information panel in a Stream displays Stream start date, name of the contact who started the Stream, the members in the Stream, the files shared in the Stream, the option to enable or disable notifications for the Stream, the option to invite contacts to the stream, the option to leave the stream, and the option to edit the details of the Stream.
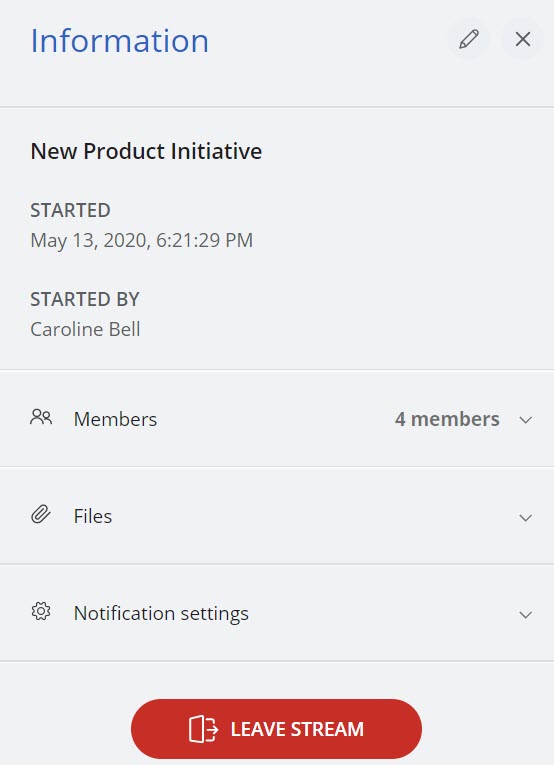
- To view the participants involved in the Stream, click the Members option. To add more contacts to the Stream from the Members panel, click ADD PEOPLE .
- To view the files shared in the Stream, click the Files option. For more information about how to manage the files, see Manage Files.
- To enable or disable notifications for the stream, click the Notification settings option and click ENABLE or DISABLE respectively.
Note: You can enable notifications for 10 Streams only.
- To leave a Stream, click LEAVE STREAM.
- To edit the details of a Stream, click the
 icon.
icon.
For more information, see Manage Streams in Streams.
- For Direct Messages
The Information panel in a Direct Message displays the information of the contacts (name, extension number, email address, and avatar) with whom you are messaging, the members involved in the message, the files shared in the message, the option to mute or unmute the notification for the message, and the option to hide the message.
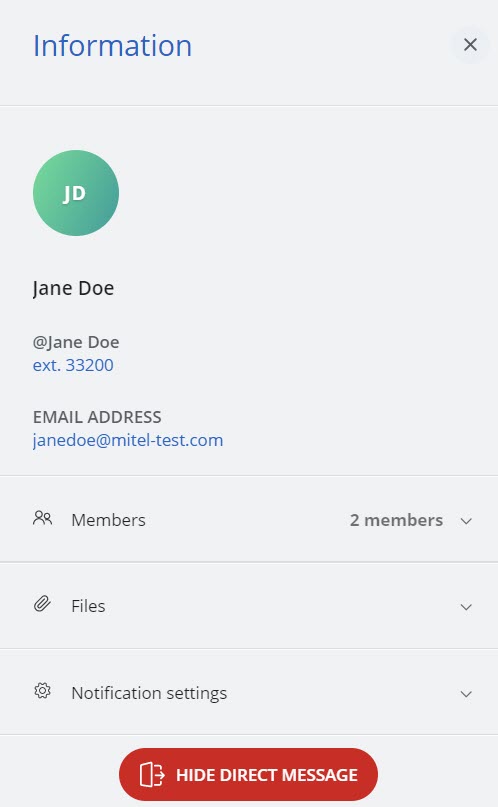
- To view the participants involved in the message, click the Members option.
- To view the files shared with the contact or the group, click the Files option. For more information about how to manage the files, see Manage Files.
- To mute or unmute the notifications for a message, click the Notifications settings option and follow the steps mentioned in Mute or Unmute Message Notifications.
- To hide the message, click HIDE DIRECT MESSAGE.
Mute or Unmute Message Notifications
Mitel One allows users to mute or unmute specific conversations to stop getting notifications for messages they receive in these conversation threads.
- You can mute notifications for a maximum of 10 conversations threads.
- If an individual or group message is muted, the
 icon appears beside the display names of the contact involved in the message.
To mute the notifications for a conversation for a specific period of time:
- Click the conversation, and from the message screen that appears, click the
 icon. The Information panel opens.
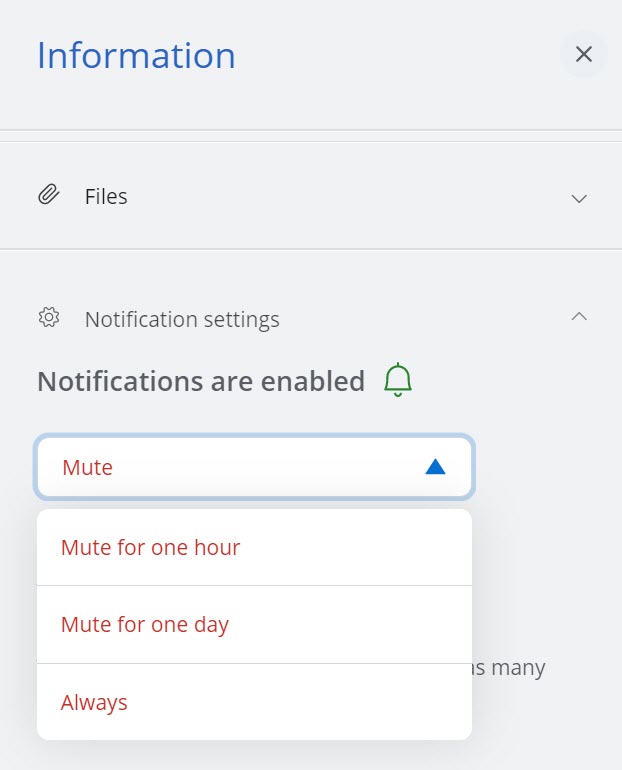
 - Click the Notification settings option.
- Click the Mute drop-down list and select for how long you want to mute the notifications from the options Mute for one hour, Mute for one day, and Always.
A confirmation message is displayed.
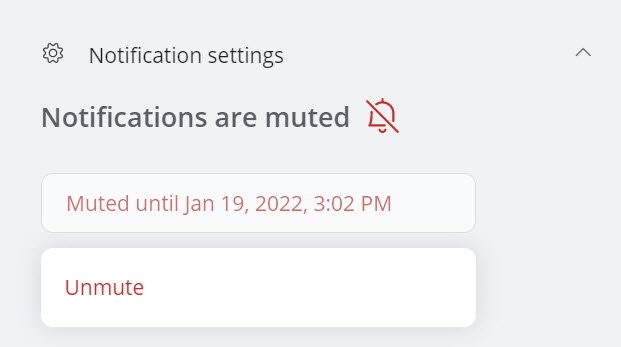
- Click GOT IT to accept the changes and close the panel. Clicking UNMUTE NOW cancels the operation.

The Notifications Settings panel will display the updated changes as shown in the following screenshot.
To mute the notifications for a conversation all the time:
- Hover over the conversation, and click the More icon (). A panel opens.
- Click Mute notifications .
The notifications for the conversation will be muted all the time.
To unmute notifications for a conversation:
- Click the conversation, and from the message screen that appears, click the icon. The Information panel opens.
- Click the Notification settings option.
- Click Unmute.
Alternately, hover over the conversation, and click the More icon (![]() ). From the panel that opens, click Unmute notifications.
). From the panel that opens, click Unmute notifications.
Hide a Message
You can hide a specific conversation displayed in the Direct Messages list in the application. To hide a conversation, do either of the following:
- Hover over that conversation, and click the More icon (). From the panel that opens, click Hide Direct message.
- Click that conversation, and from the message screen that appears, click the icon. The Information panel opens. Click Hide direct message.
The conversation will reappear if you receive another message from the participant of that conversation.
Edit or Delete a Message
- This option will be displayed only if a Mitel Partner or the Account Administrator of your CloudLink account has selected the Allow editing and deleting of messages check box under Chat integration for your account in the Mitel Administration. For more information, contact your Account Administrator or see the section Allow Users to Edit or Delete Chat Messages in CloudLink Applications.
- Only text messages can be edited.
To edit a message, do the following:
- Hover over the message you want to edit and click the More icon (
 ).
).
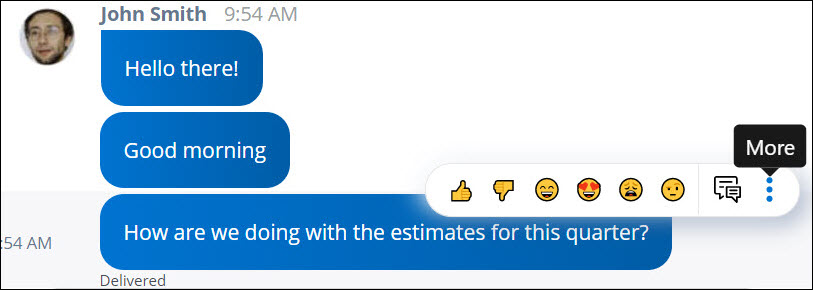
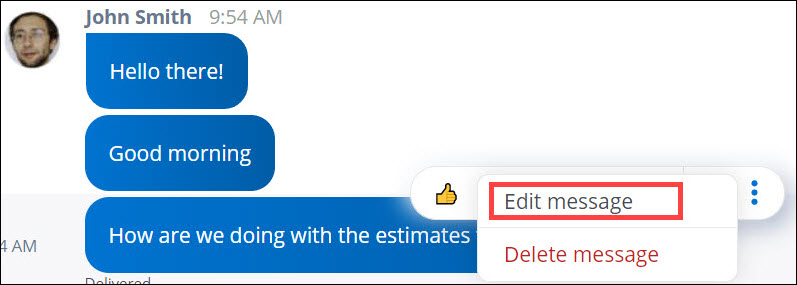
- From the dialog box that opens, click Edit message.
- In the text box that opens, edit the message.
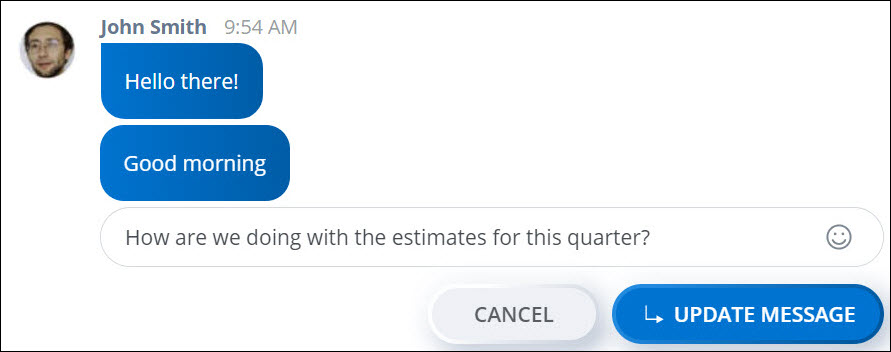
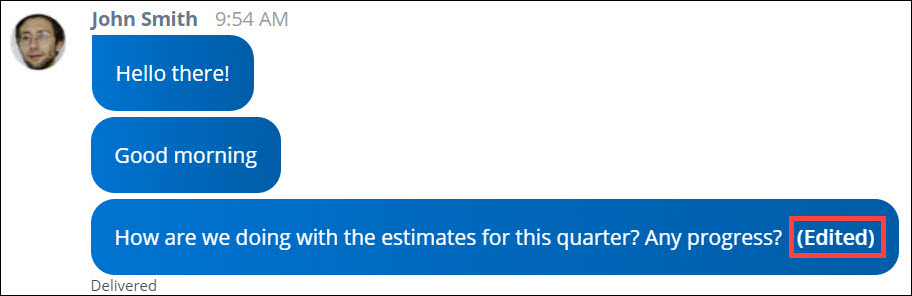
- Click UPDATE MESSAGE. The original message will be replaced with the edited message and will be marked as (Edited). Clicking CANCEL cancels the operation.
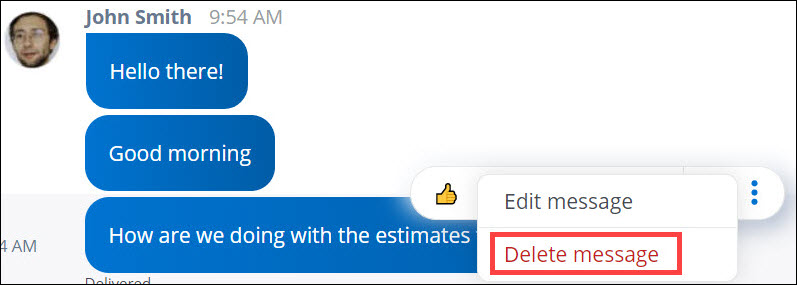
To delete a sent message, do the following:
- Hover over the message you want to delete and click the More icon ().
- From the dialog box that opens, click Delete message.
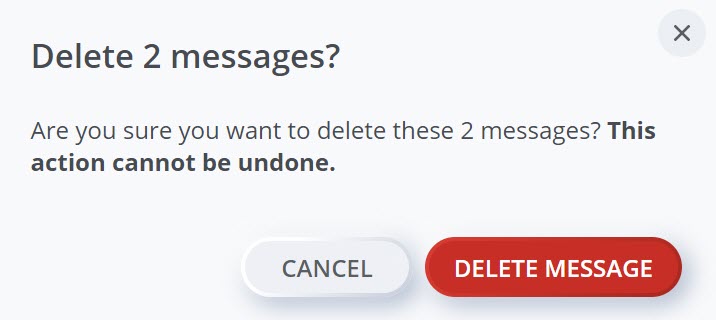
A confirmation message is displayed.
- Click DELETE MESSAGE. Clicking CANCEL cancels the operation.
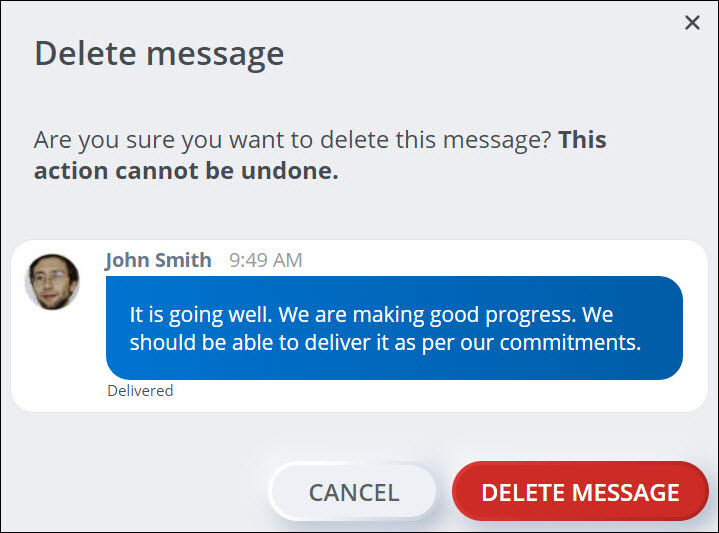
The message is deleted permanently.
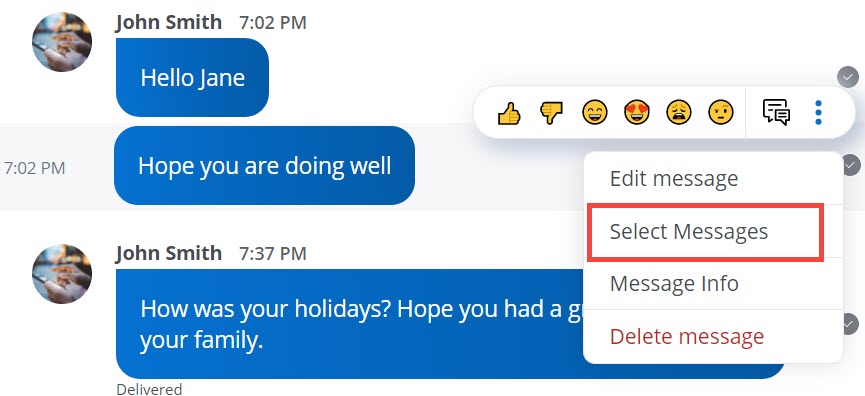
- Hover over any message you want to delete and click the More icon ().
- From the dialog box that opens, click Select Messages.
- Select the messages you want to delete, and click DELETE MESSAGE.
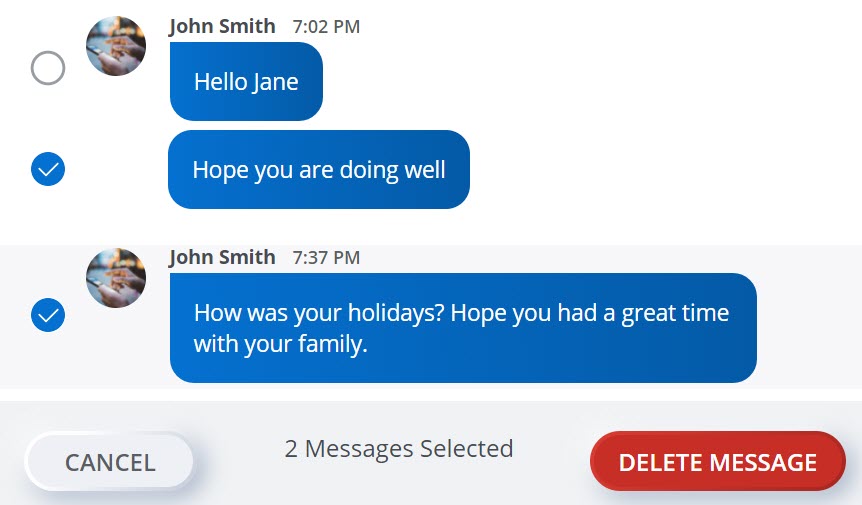
A confirmation message is displayed.
- Click DELETE MESSAGE and close the panel. Clicking CANCEL cancels the operation.
The selected messages are deleted permanently.
Mark a Message as Unread
Mitel One allows a user to mark a specific read message as unread so that you can flag the conversation for follow-up. To mark a message as unread:
- Hover over the message, and click the More icon (). A panel opens.
- Click Mark as unread.
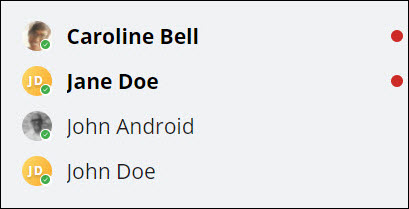
The contact’s name appears in bold letters, and a red dot appears to the right of the contact’s name marking the message as unread.
Manage Files
Mitel One allows users to preview, download, and delete the files shared in a Stream or a chat conversation.
- Click the Stream or the conversation, and from the message screen that appears, click the icon. The Information panel opens.
- Click the Files option.
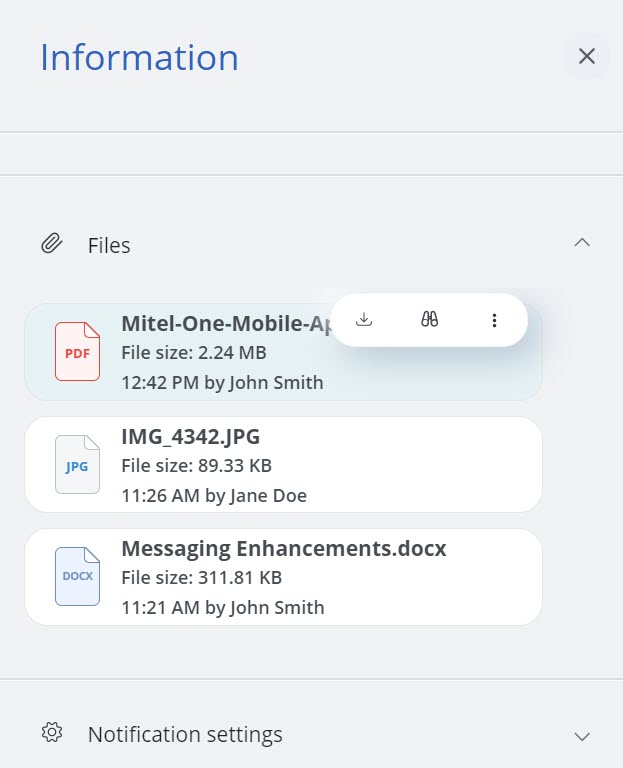
- Hover over the file, and
- click the Download icon (
 ) to download the file
 - click the Preview icon (
 ) to preview the file
 - click the More icon (), and then click Delete message to delete the file.
- click the Download icon (
- click Click to download to download the file
- click the Preview icon () to preview the file
- click the More icon (), and then click Delete message to delete the file.
Sort Messages
You can sort the Streams list or the Direct Messages list alphabetically, or based on the recent activity in a conversation. To do this:
- Hover over the message, and click the More icon (). A panel opens.
- Click Sort, and then click Alphabetically or Recent Activity to specify your preference.
The Streams list or the Direct Messages list will be sorted based on your choice.
Customize the Sidebar
You can customize the sidebar in the Messages menu to choose which option you want to appear at the top, Streams or Direct Messages. To do this:
- Hover over the message, and click the More icon (). A panel opens.
- Click Customize Sidebar. Drag the option you want to appear on top and click SAVE. Clicking CANCEL will discard the changes.