Manage Mitel One Settings
You can personalize the settings of your Mitel One web application from the Settings panel. You can edit your avatar; access the personal contacts on your Office 365 application; choose the call option; choose the type of messages for which you want to receive notifications; submit an issue and share feedback about the application; and access the online help documentation, release information, the privacy policy, the End User License Agreement, and view the application version number.
To access the Settings panel:
- Click your avatar on the top right hand corner.
- From the panel that appears, click Settings and preferences. The Settings panel opens.
To personalize the settings in your application, do the following.
- Click the General tab to personalize the following settings.

- To change your avatar, click the Edit icon (
 ). For more information, see Set Up Your Profile.
 - To synchronize the calendar and personal contacts on your Office 365 application, click SIGN IN.
- To change your avatar, click the Edit icon (
- Click the Meetings tab to enable or disable features for your meetings.
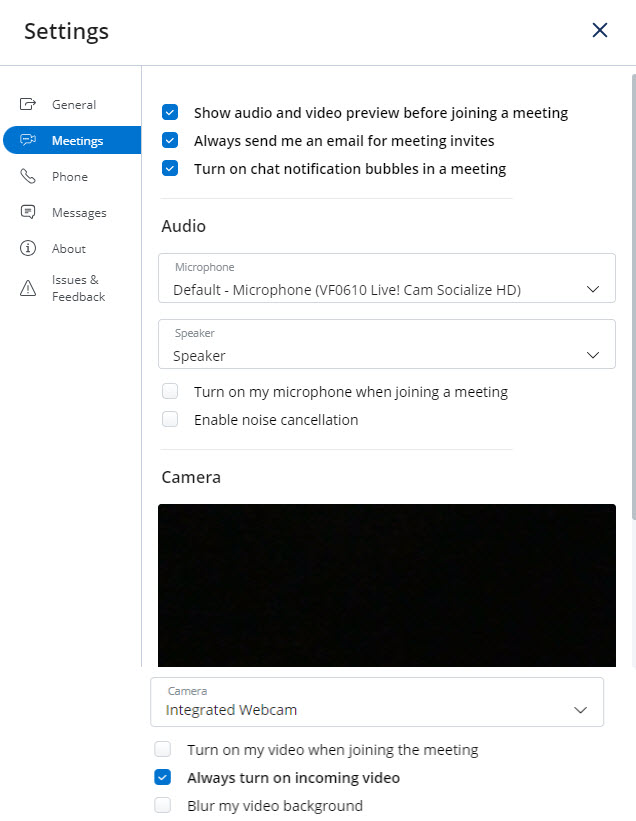
- Show audio and video preview before joining a meeting – Select this check box to display the Audio and video preview panel before you connect to a meeting.
- Always send me an email for meeting invites – Select this check box to receive an email invite to a meeting you are invited to.
- Turn on chat notification bubbles in a meeting – Select this check box to receive chat notifications during a meeting.
In the Audio section:
- Choose the preferred Microphone and Speaker from the respective drop-down lists.
- Turn on my microphone when joining a meeting – Select this check box to always join a meeting with your microphone turned on.
Enable noise cancellation – Select this check box to cancel background noise.
In the Camera section:
- Choose your preferred Camera from the drop-down list.
- Turn on video when joining a meeting – Select this check box to always join a meeting with your video turned on.
- Always turn on incoming video – Select this check box to display the video of other participants in the meeting who have turned on their video.
Blur my video background – Select this check box to blur your video background.
- Click the Phone tab to choose how to place or receive calls in the application, and to choose the device for which you want to have a ringtone for incoming calls.
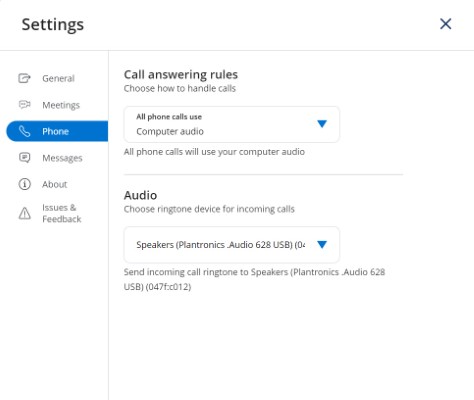
In the Call answering rules section:
- To place or receive calls through the softphone in the web application, click the All phone calls use option, and from the drop-down panel that opens, click Computer audio.Note: When you choose the default audio option from the All phone calls use drop-down list, the application uses the audio device determined by the operating system.
- To place or receive calls through the deskphone associated with your account click the All phone calls use option, and from the drop-down panel that opens, click Deskphone.
In the Audio section:- Click the drop-down menu below Choose ringtone device for incoming calls and select the device for which you want to have a ringtone for incoming calls. Note: This feature is supported only in the following browsers:
- Google Chrome
- Microsoft Edge
For more information, see Manage Calls using Deskphone.
- To place or receive calls through the softphone in the web application, click the All phone calls use option, and from the drop-down panel that opens, click Computer audio.
- Click the Messages tab to personalize the following settings.
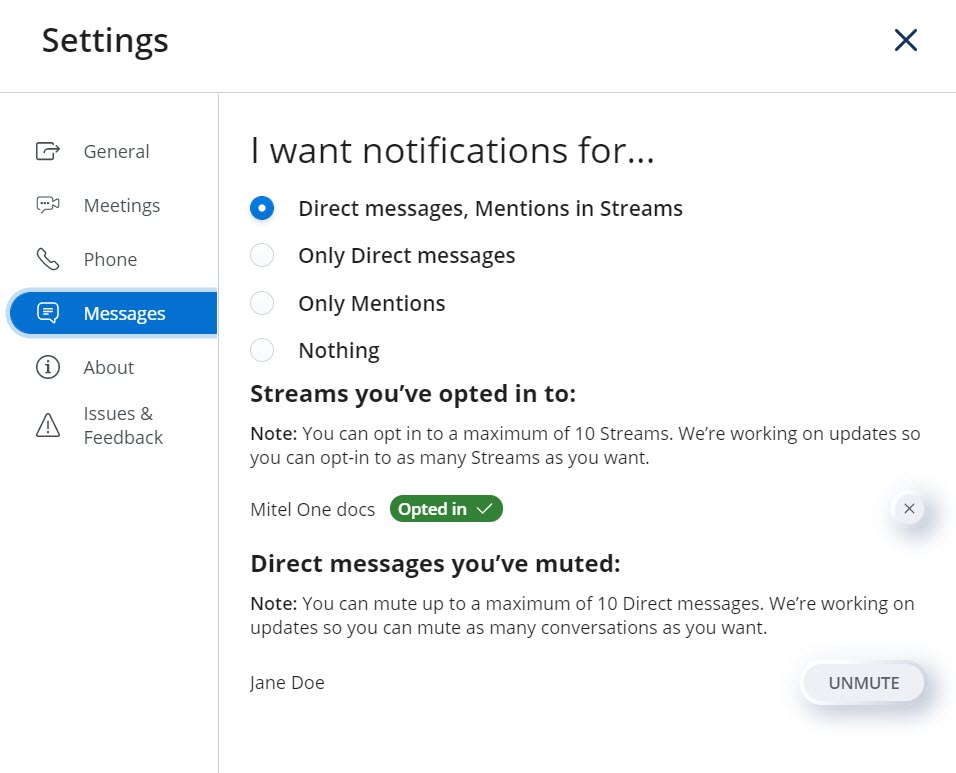
- To choose the type of messages for which you want to receive notifications, click the icon associated with the message type.
- To opt out from receiving notifications for a Stream, click the icon associated with the Stream.
- To unmute the notifications for a Direct message received from a contact, click the Unmute option associated with the contact.
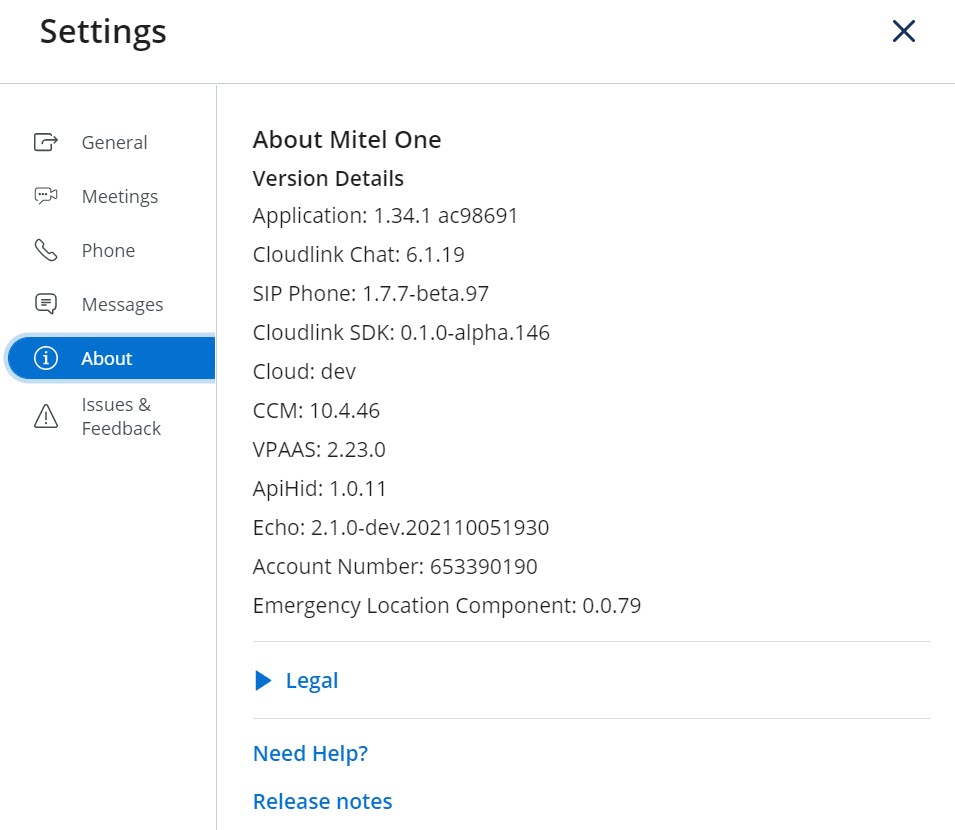
- Click the About tab to view the version details of the application, URLs to the online help, release information, privacy policy, and End User License Agreement.
- Click the Issues and Feedback tab to report a problem you encountered while using the application and to share your ideas and feature suggestions about the application. For instructions on how to report issues and provide feedback, see Report an Issue and Share Feedback.