Scheduling a Meeting
A registered user can schedule a meeting by following these steps:
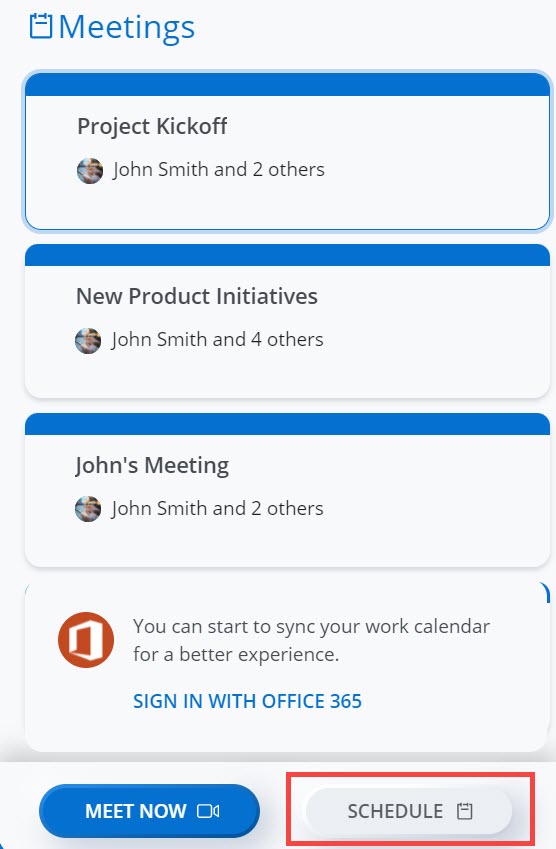
- From the Meetings section, click SCHEDULE.
The Schedule a meeting panel opens.
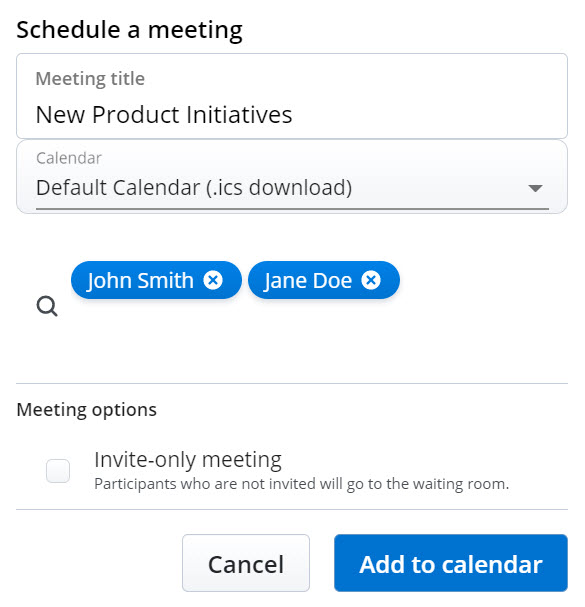
- In the Meeting title bar, specify a title for the meeting.
Note: It is highly recommended that a meeting be given a unique humanly identifiable name that is easy to remember for the participants. This will enable registered users to easily identify which meeting space to use for their collaboration and facilitate meeting searches.
- Click Calendar and from the drop-down list, choose the calendar to which you want to add the meeting invite.
- Invite participants to the meeting. You can invite both registered users and guest users as participants to a meeting.
Note: A meeting can have a maximum of 100 participants.
- To invite a registered user to a meeting
- In the Search bar, type the name of the user you are searching for. The search field displays a list of registered users whose names or e-mail addresses match the letters that you type.
- Click the name to invite the user as a participant to the meeting.
A meeting invite containing the URL of the meeting, and the dial-in numbers will be sent to the user’s email address from [email protected]. Also, a messaging session will be created with the user in the Mitel One application, and a Join now action card is displayed in the message. The user can join the meeting by clicking either the meeting URL or the Join now action card.
Note: To receive an email for meeting invites, a registered user must select the Always send me an email for meeting invites check box in the Meetings tab of the Settings panel. For details on how to select this check box, see Manage Mitel One Settings. - To invite a guest user to a meeting
- In the Search bar, type the email address of the participant you want to invite to the meeting. Note that you must type the exact e-mail address of the participant you want to invite. The email address you type appears in the search field.
- Click the email address to invite the user as a participant to the meeting.
A meeting invite will be sent to the user’s email address from [email protected]. The user can join the meeting by clicking the meeting URL.
- To invite a registered user to a meeting
- In the Meeting options section, choose either of the following depending upon the type of meeting you wish to create.
- Invite-only meetings – To create a meeting in which only the meeting creator can admit uninvited participants into the meeting, select the Invite-only meeting checkbox. For more information, see Invite-only Meeting.
- Meeting with no waiting room – To create a meeting in which the waiting room is disabled, thereby allowing all participants to automatically enter into the meeting directly, select the Remove waiting room checkbox.
Note:
- This option will be displayed only if a Mitel Partner or the Account Administrator of your CloudLink Account have enabled the Optional Waiting Room toggle button for your account in the Mitel Administration. For more information, contact your Account Administrator or see Allow Users to Manage Waiting Room in Meetings.
- For more information regarding which users will go to the waiting room, see the FAQ Who goes to the waiting room before joining a meeting?
- For guest users to be automatically accepted into a meeting that has the waiting room disabled, at least one registered user must join the meeting.
- Click Add to Calendar. The Scheduling proceeds based on the calendar type you selected from the Calendar drop-down list.
- Default Calendar (.ics download) – downloads an ICS file with meeting join details, title, and participants, which you can view in your default calendar app (such as Outlook desktop) and send to users as part of a meeting invite.
Note: If you choose this calendar type while the Mitel One web application runs on the Google Chrome browser, the warning message XXXX (meeting name).ics may be dangerous, so Chrome has blocked it. might be displayed. To continue downloading the invite, click the Keep option beside the warning message. Clicking Discard cancels the download.
- Google Calendar – opens a new tab in Gmail with a prepopulated calendar invite with meeting join details, title, and participants.
- Exchange / Office 365 – opens a new tab in Office 365 with a prepopulated calendar invite with meeting join details and title; but does not carry over the participants. You must add the participants directly in the open calendar in Office 365.
- Default Calendar (.ics download) – downloads an ICS file with meeting join details, title, and participants, which you can view in your default calendar app (such as Outlook desktop) and send to users as part of a meeting invite.
CAUTION:
Customers should exercise caution to prevent accidental disclosure of Meeting Access Codes. For more information, see the latest version of Mitel One Security Guidelines.
↑